Leaderboard
Popular Content
Showing content with the highest reputation since 09/15/2026 in all areas
-
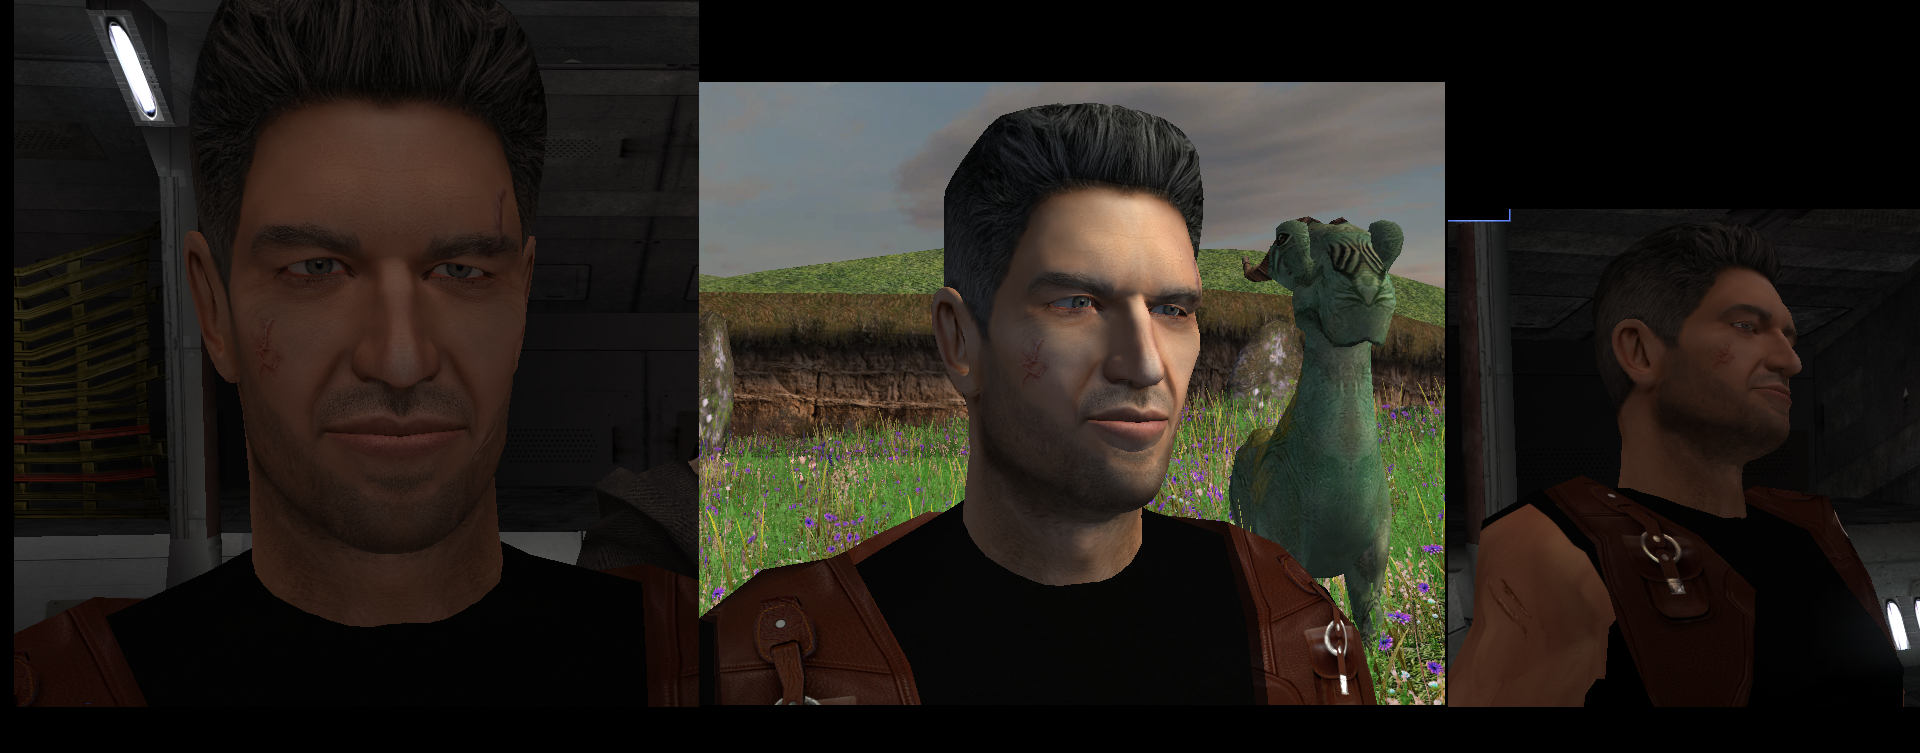
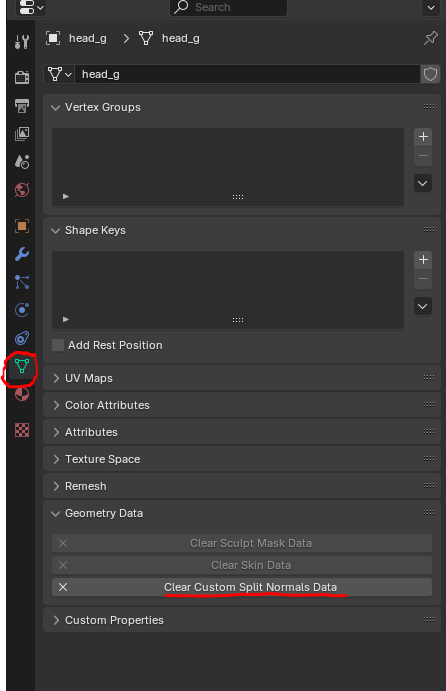
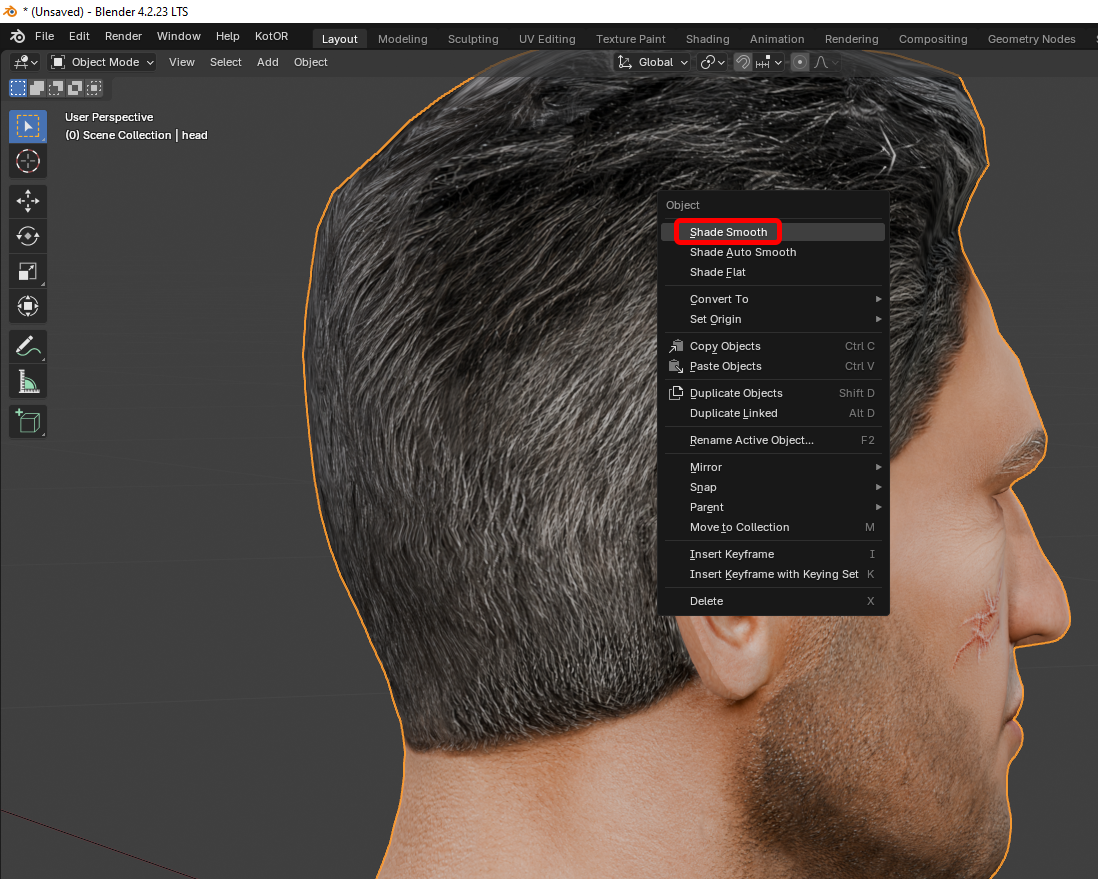
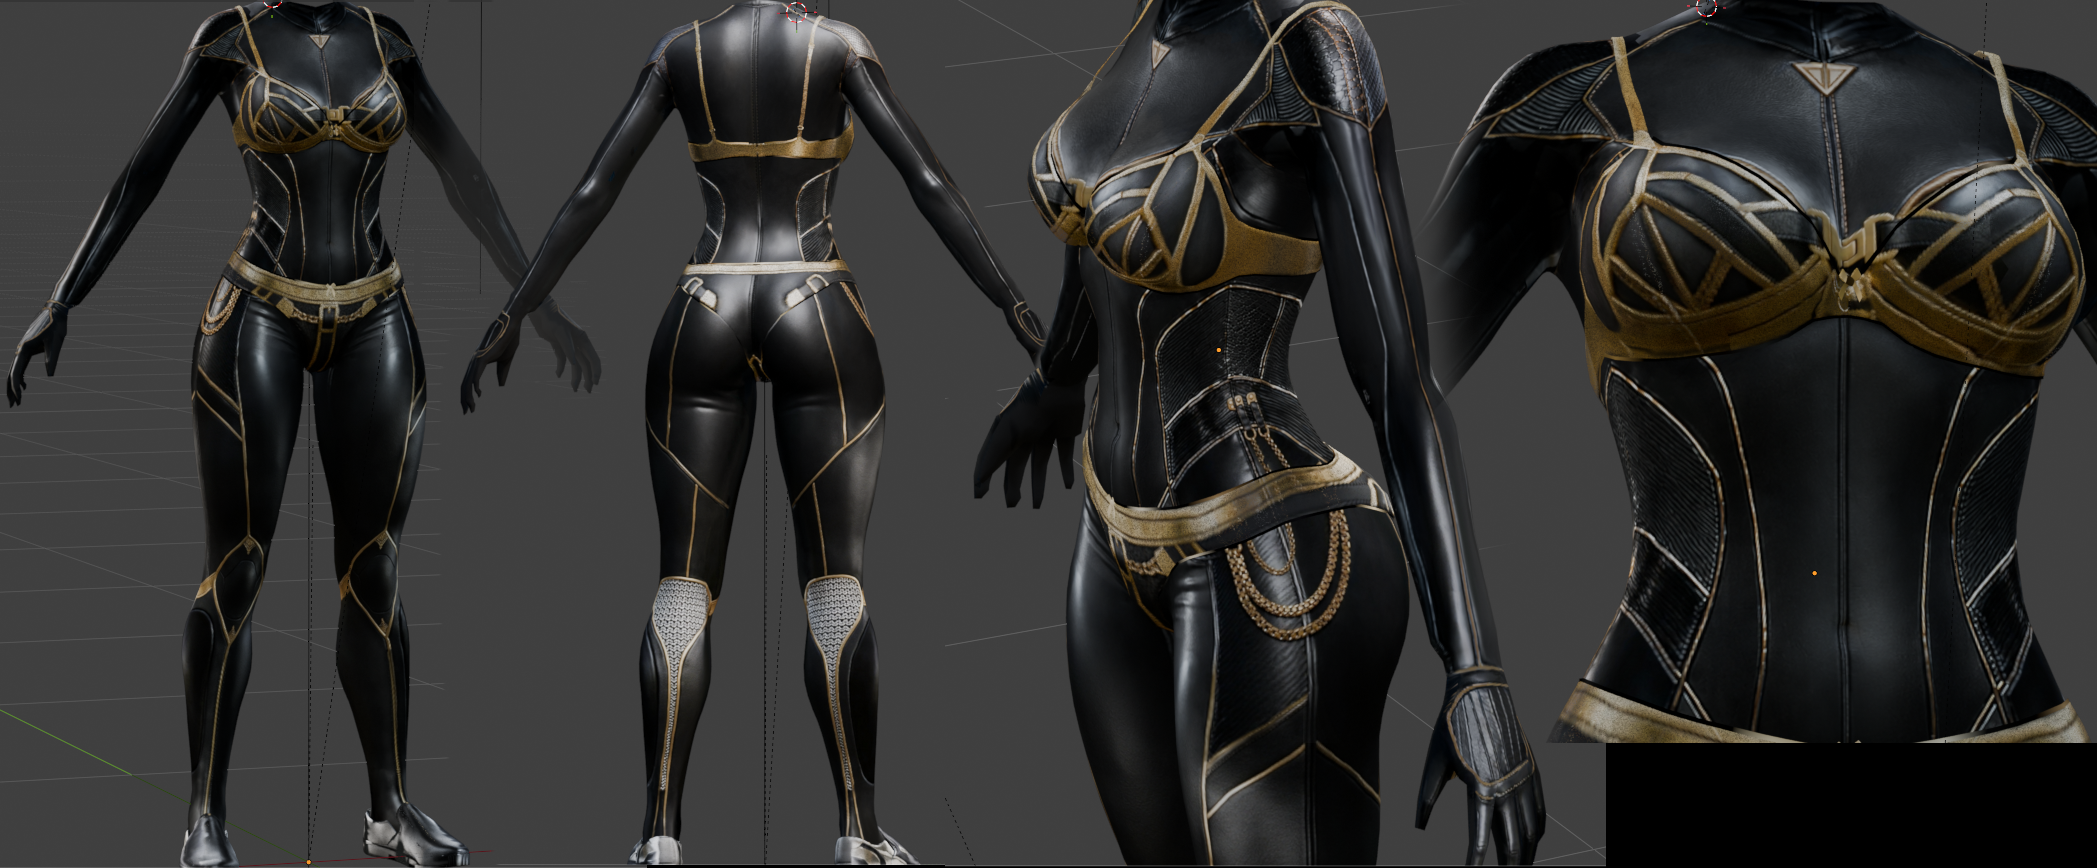
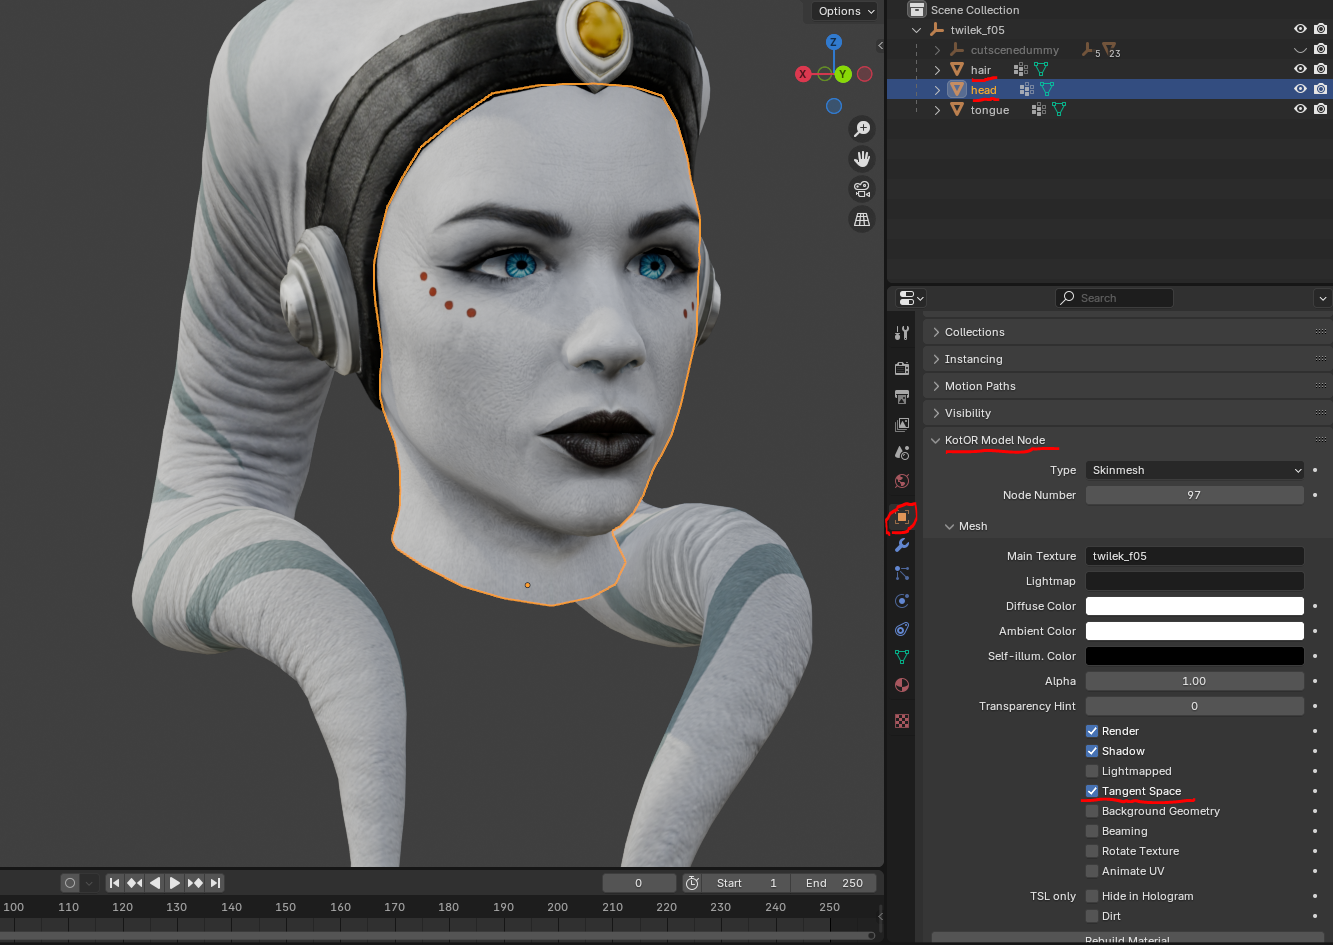
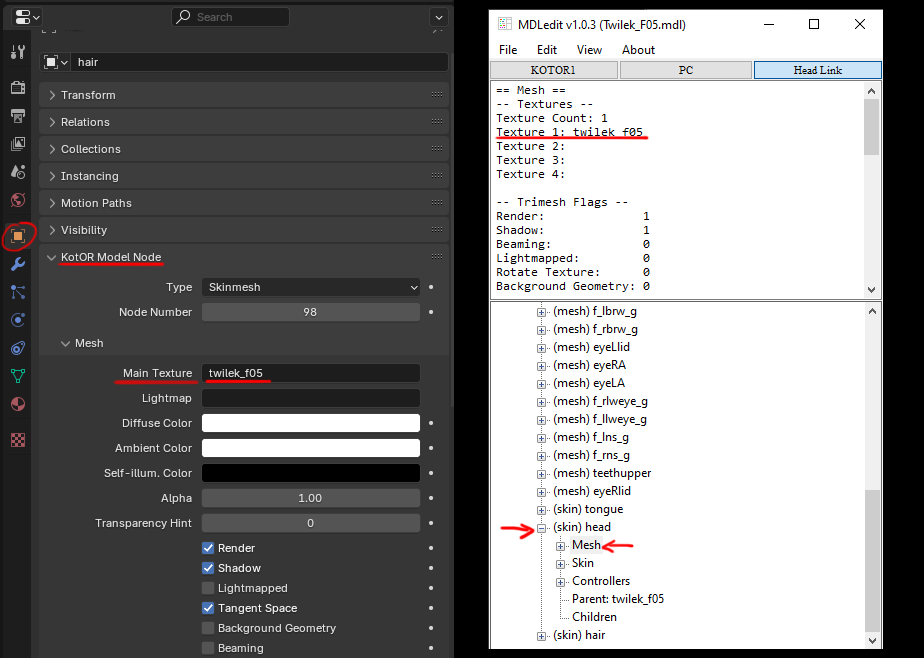
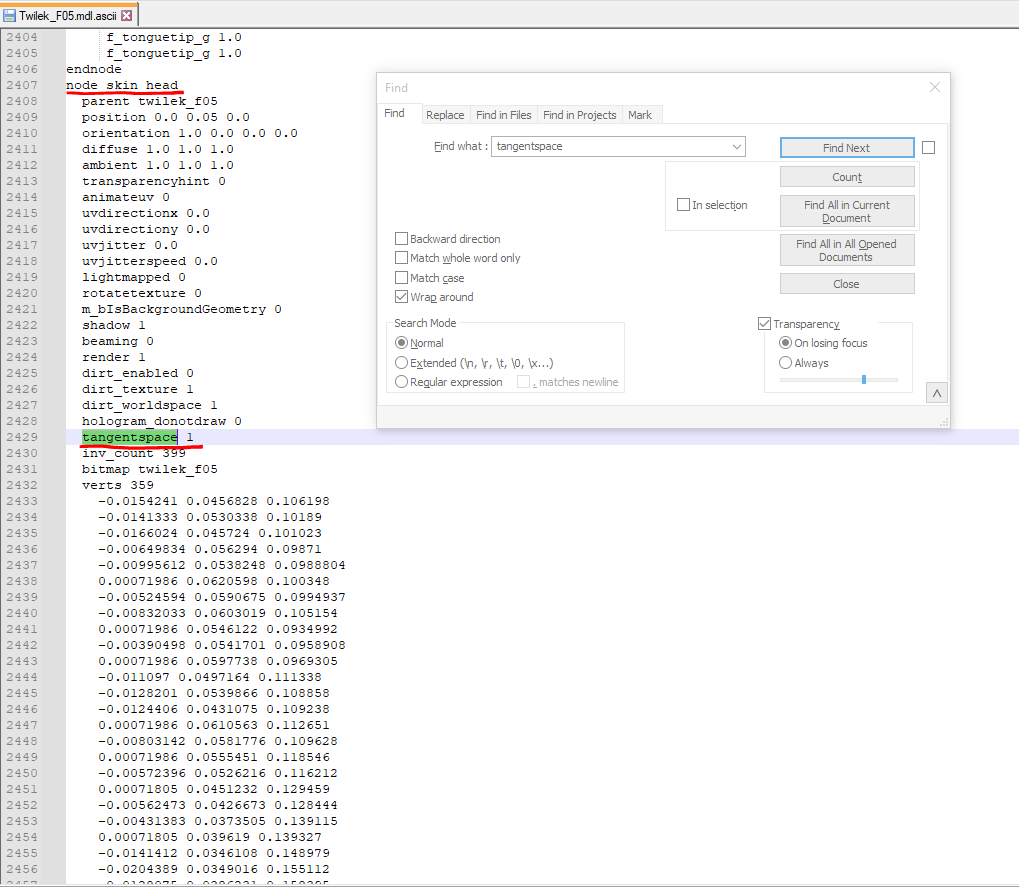
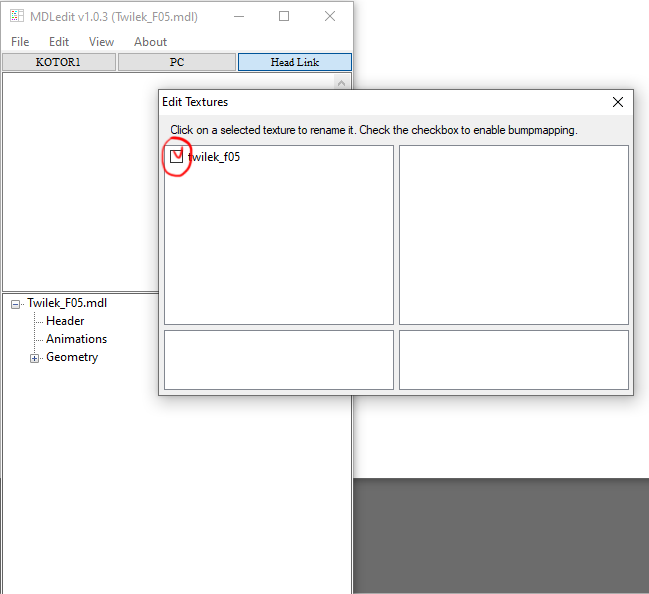
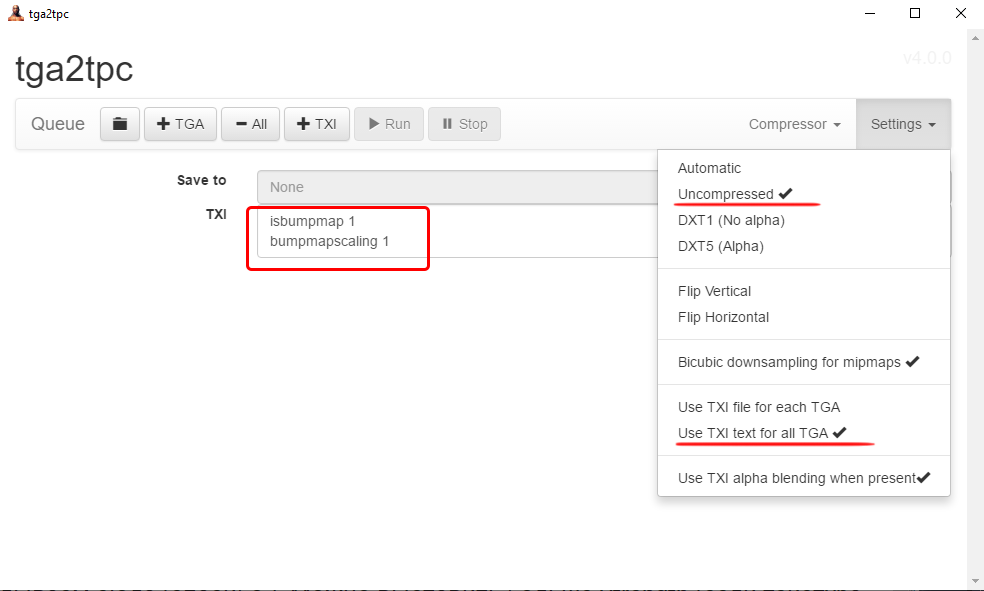
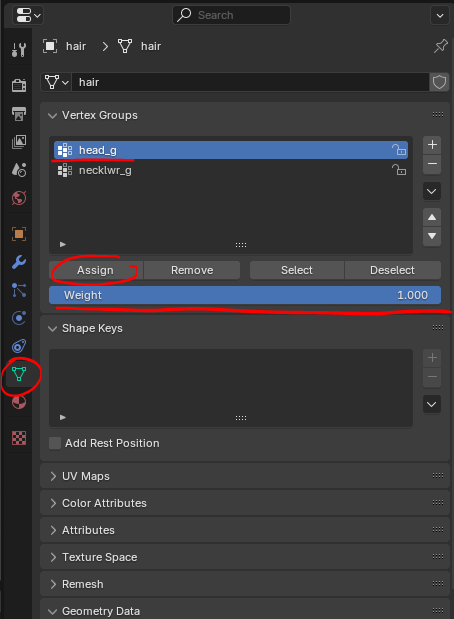
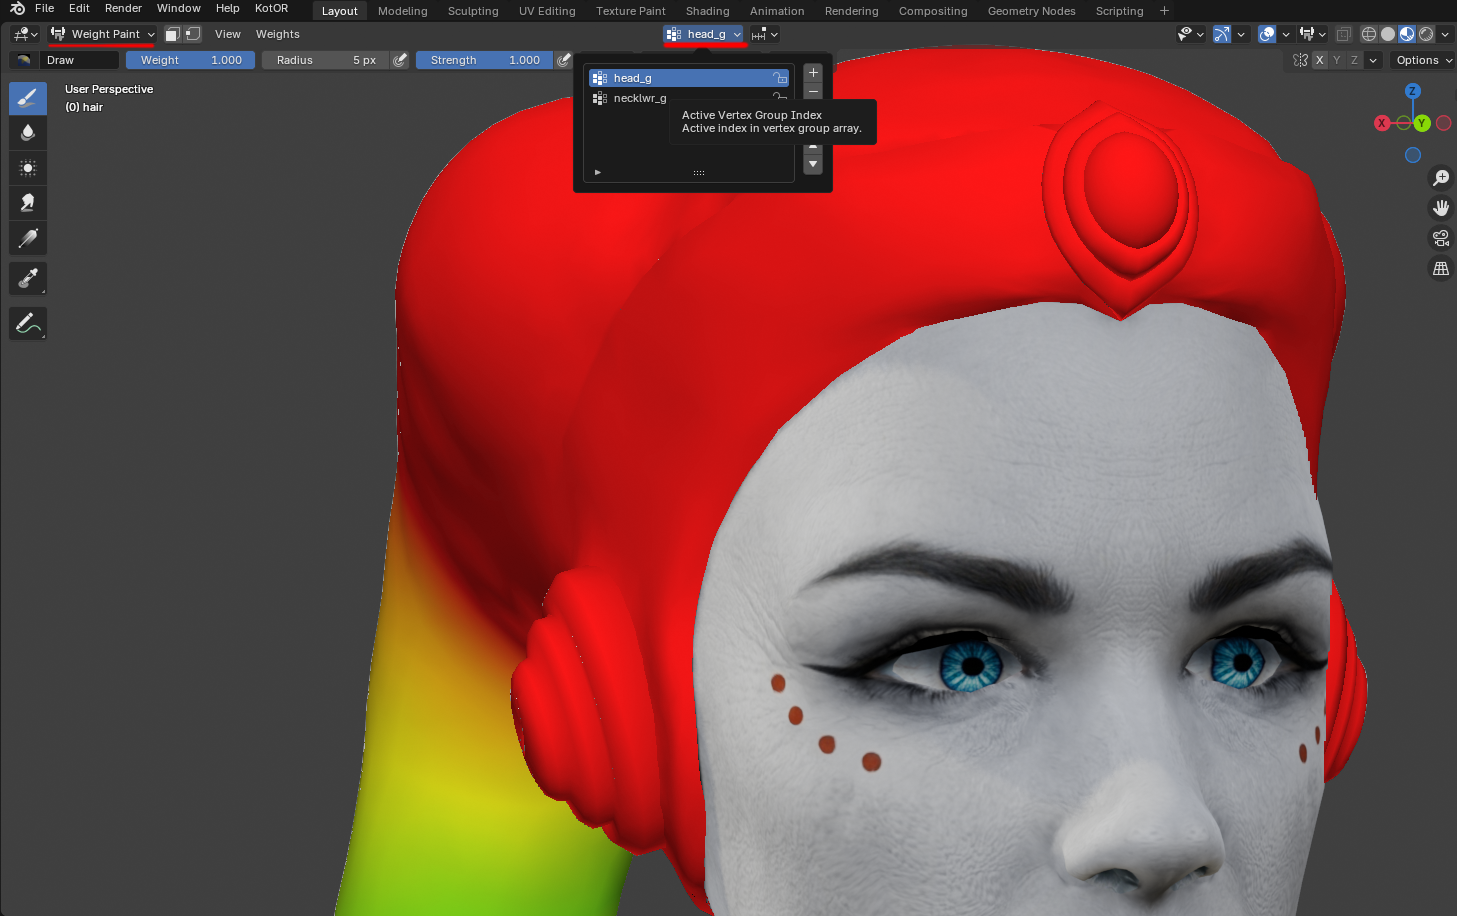
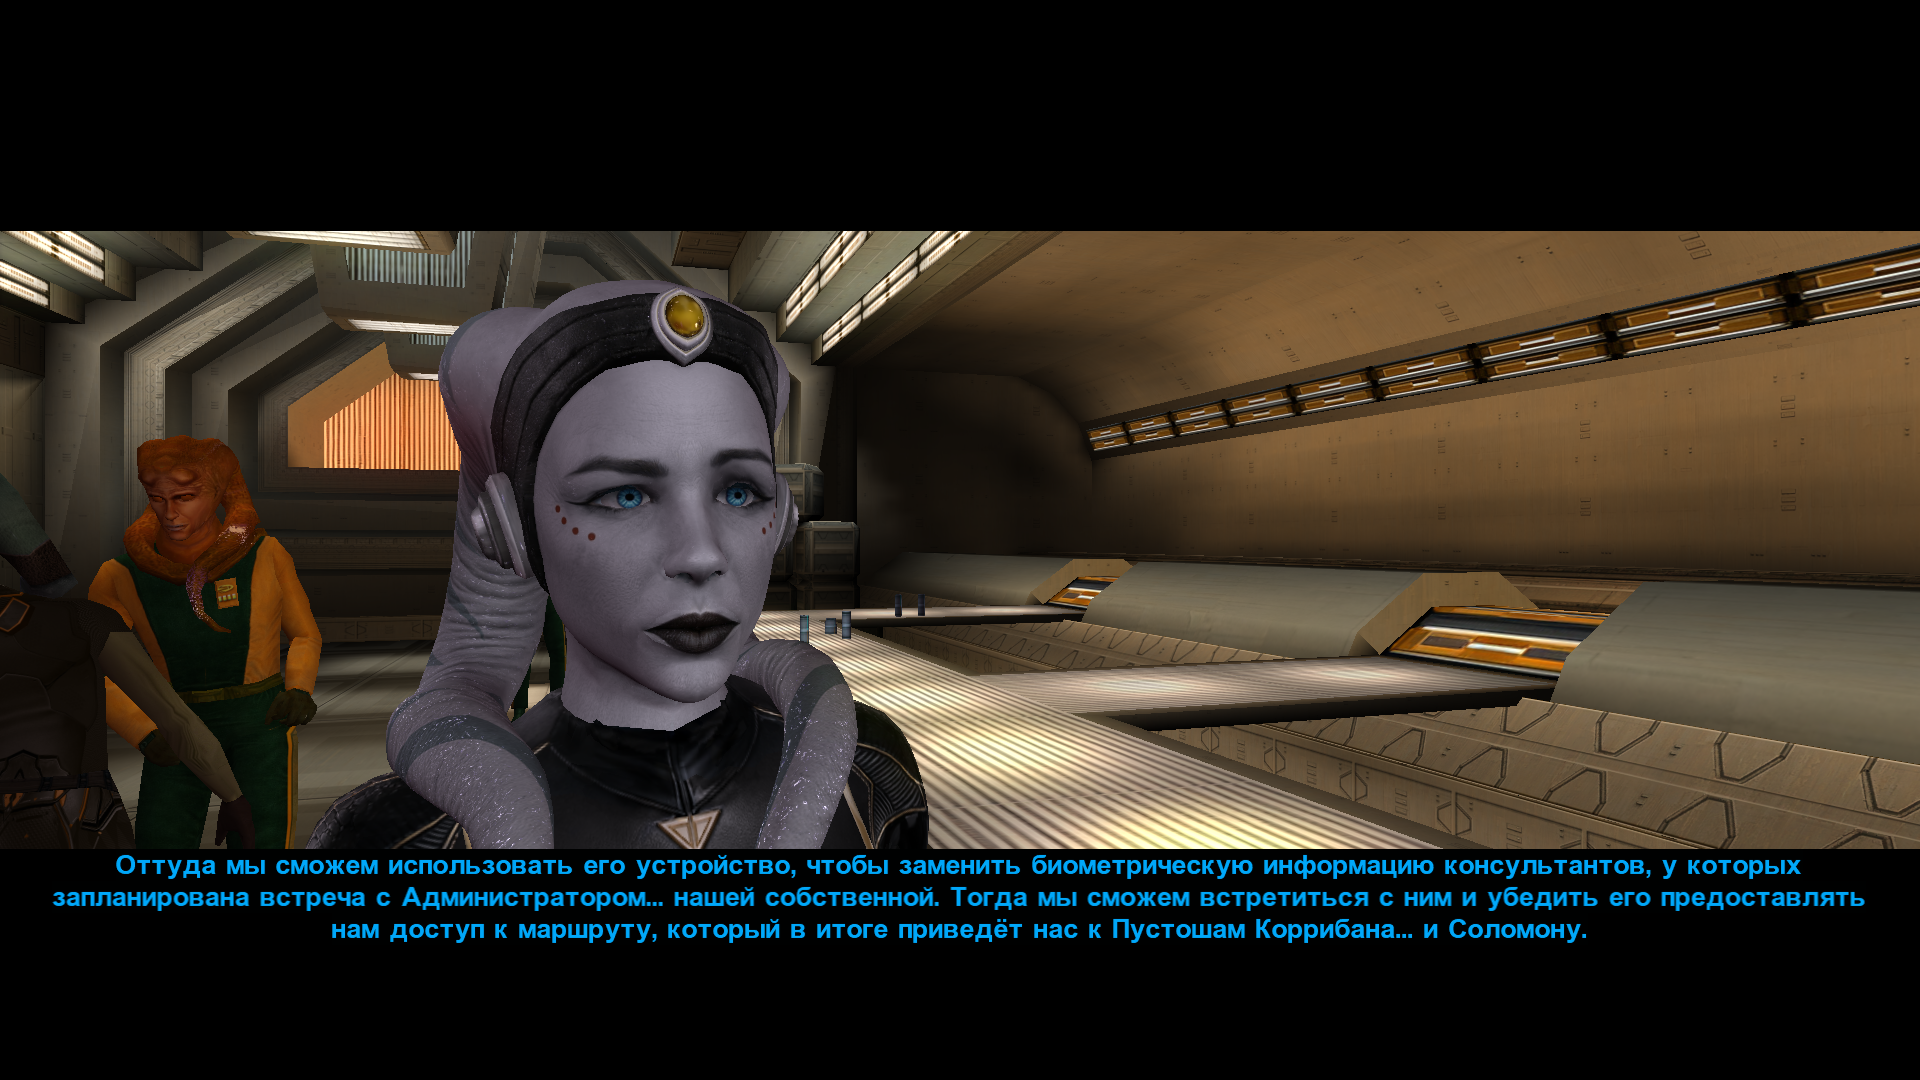
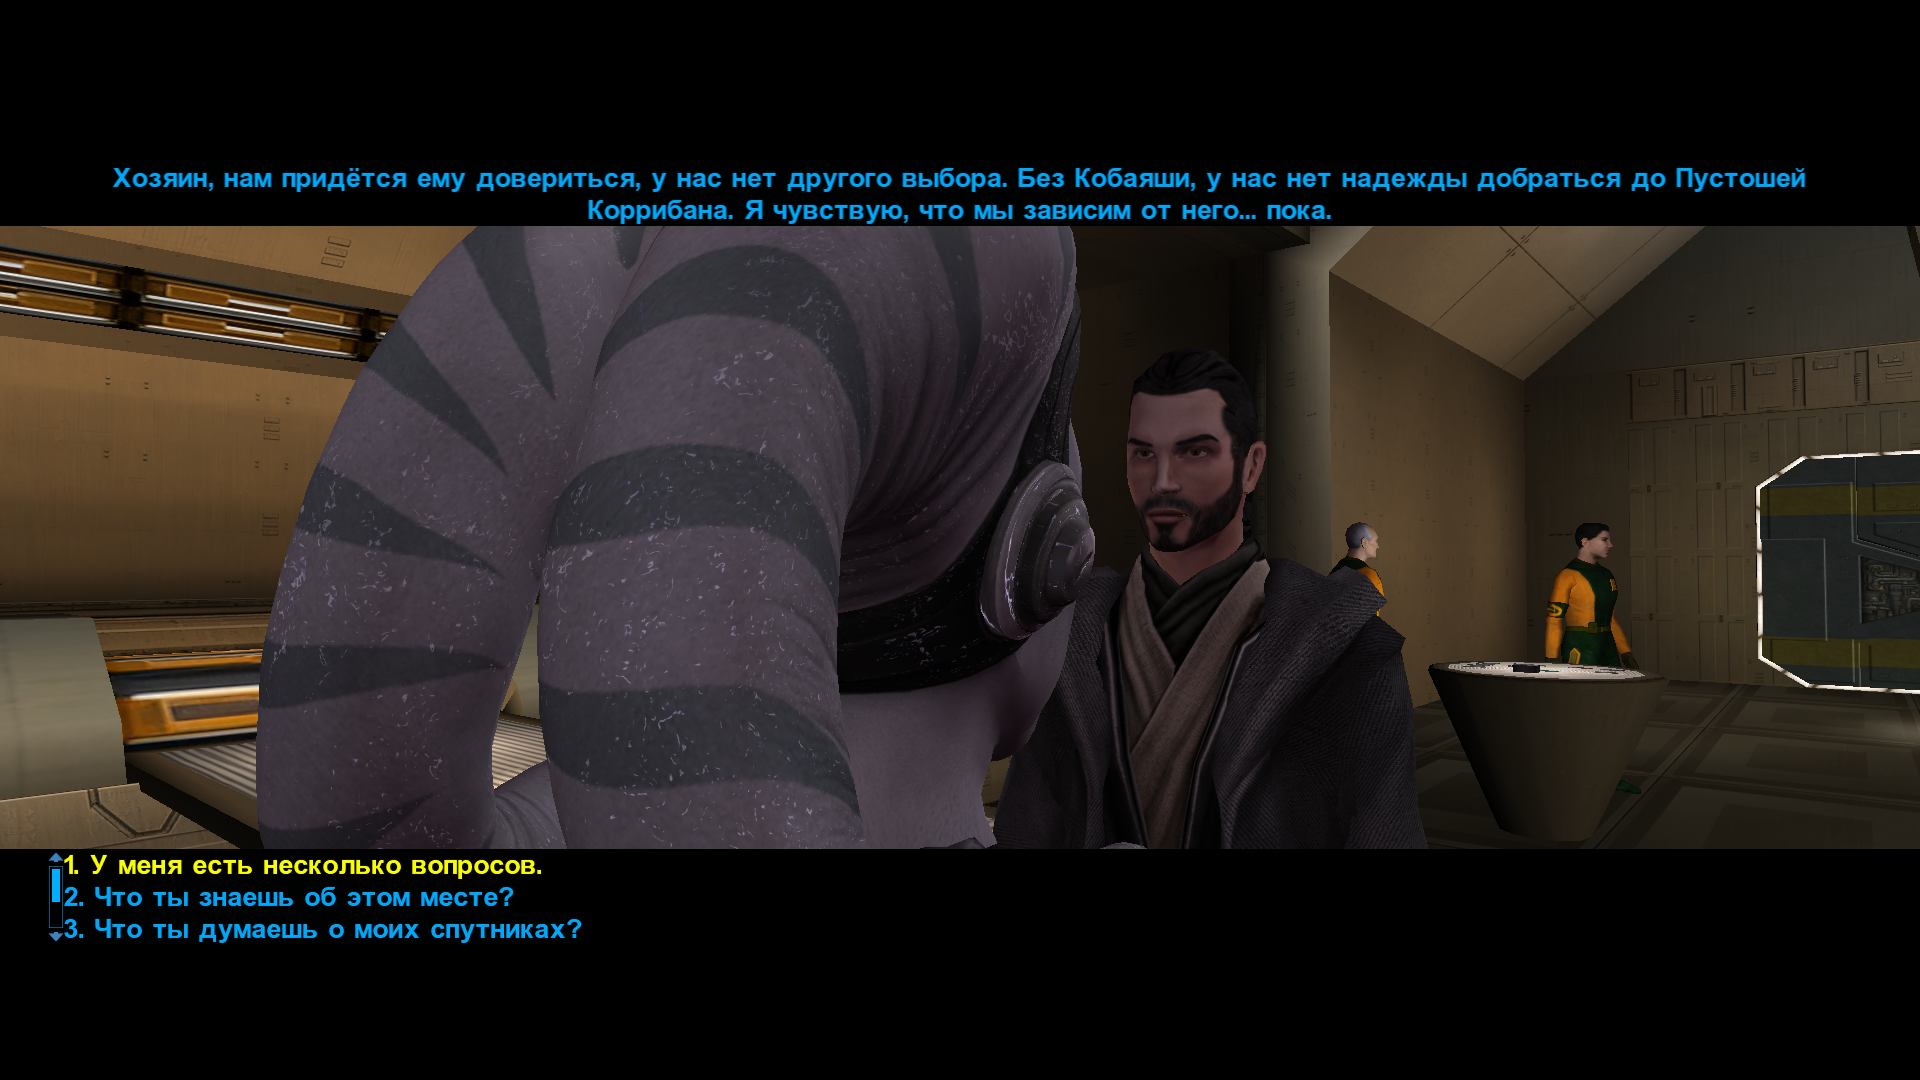
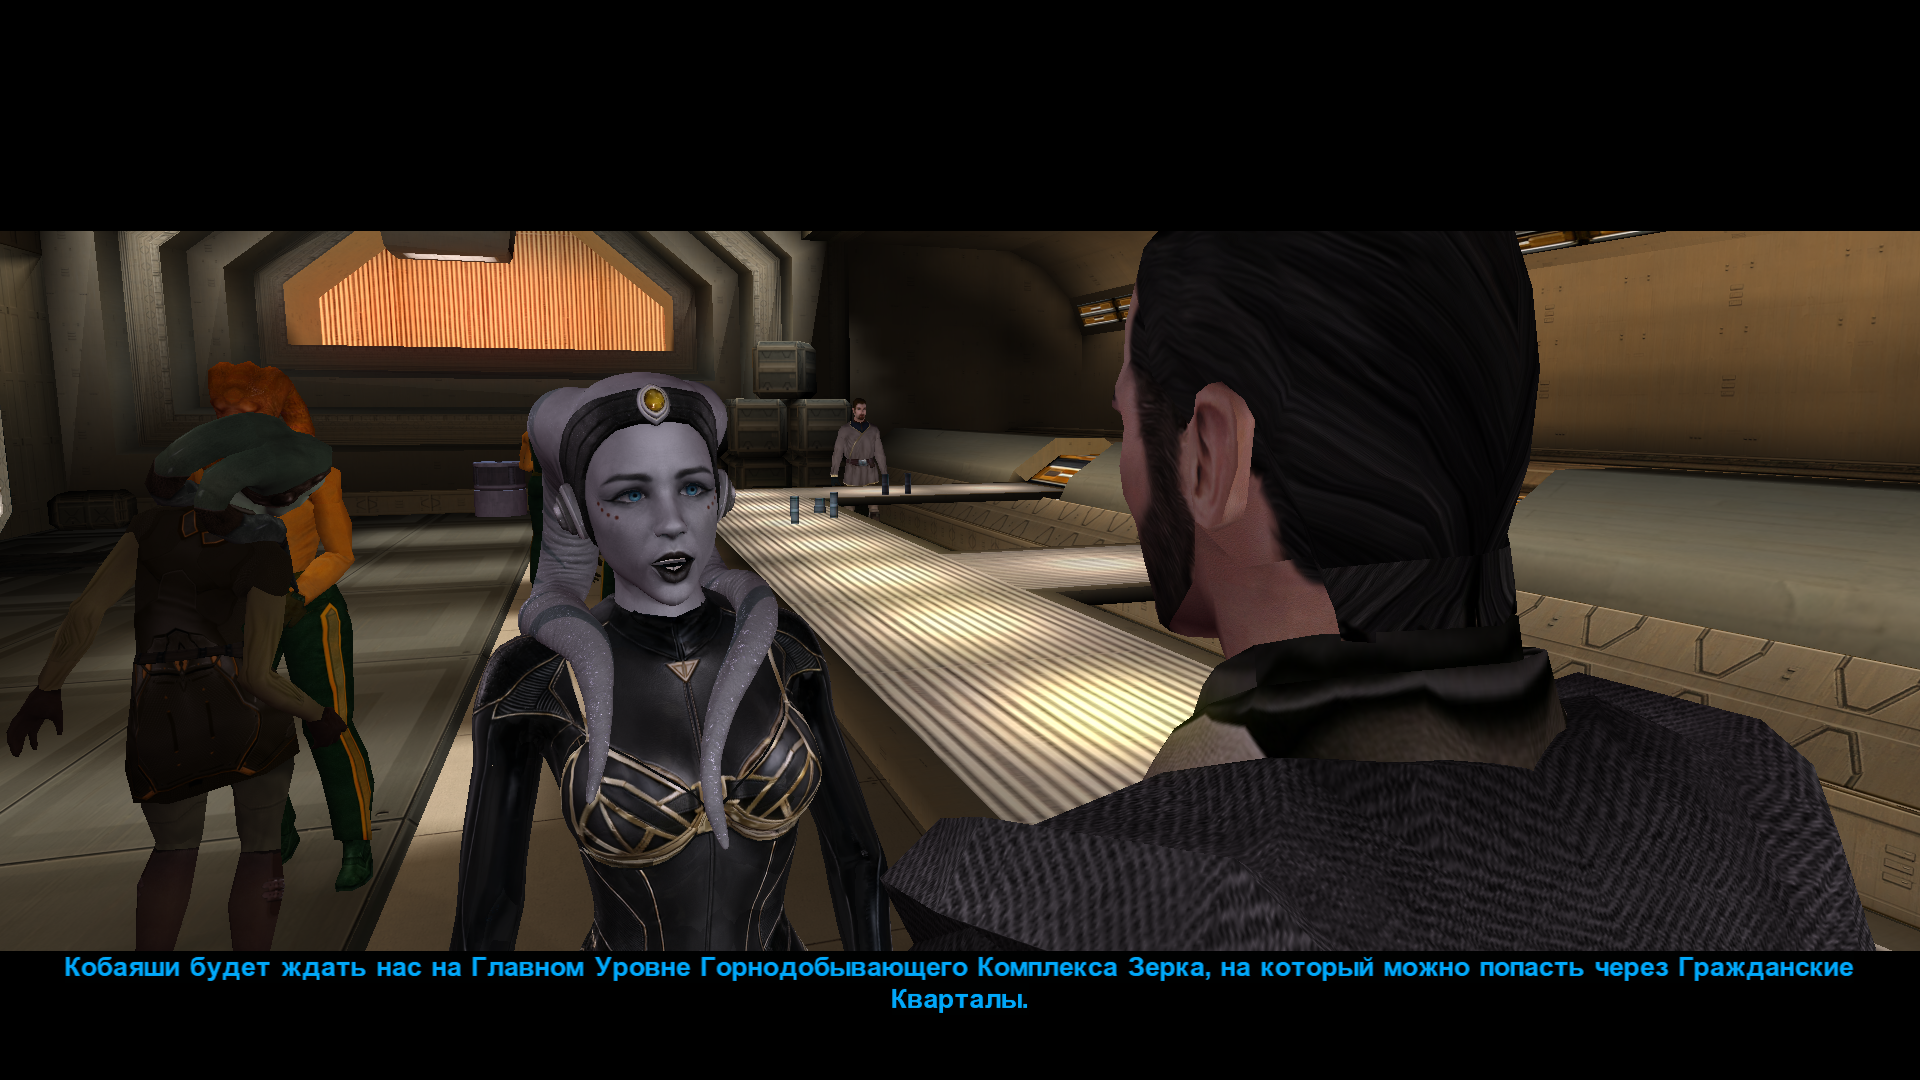
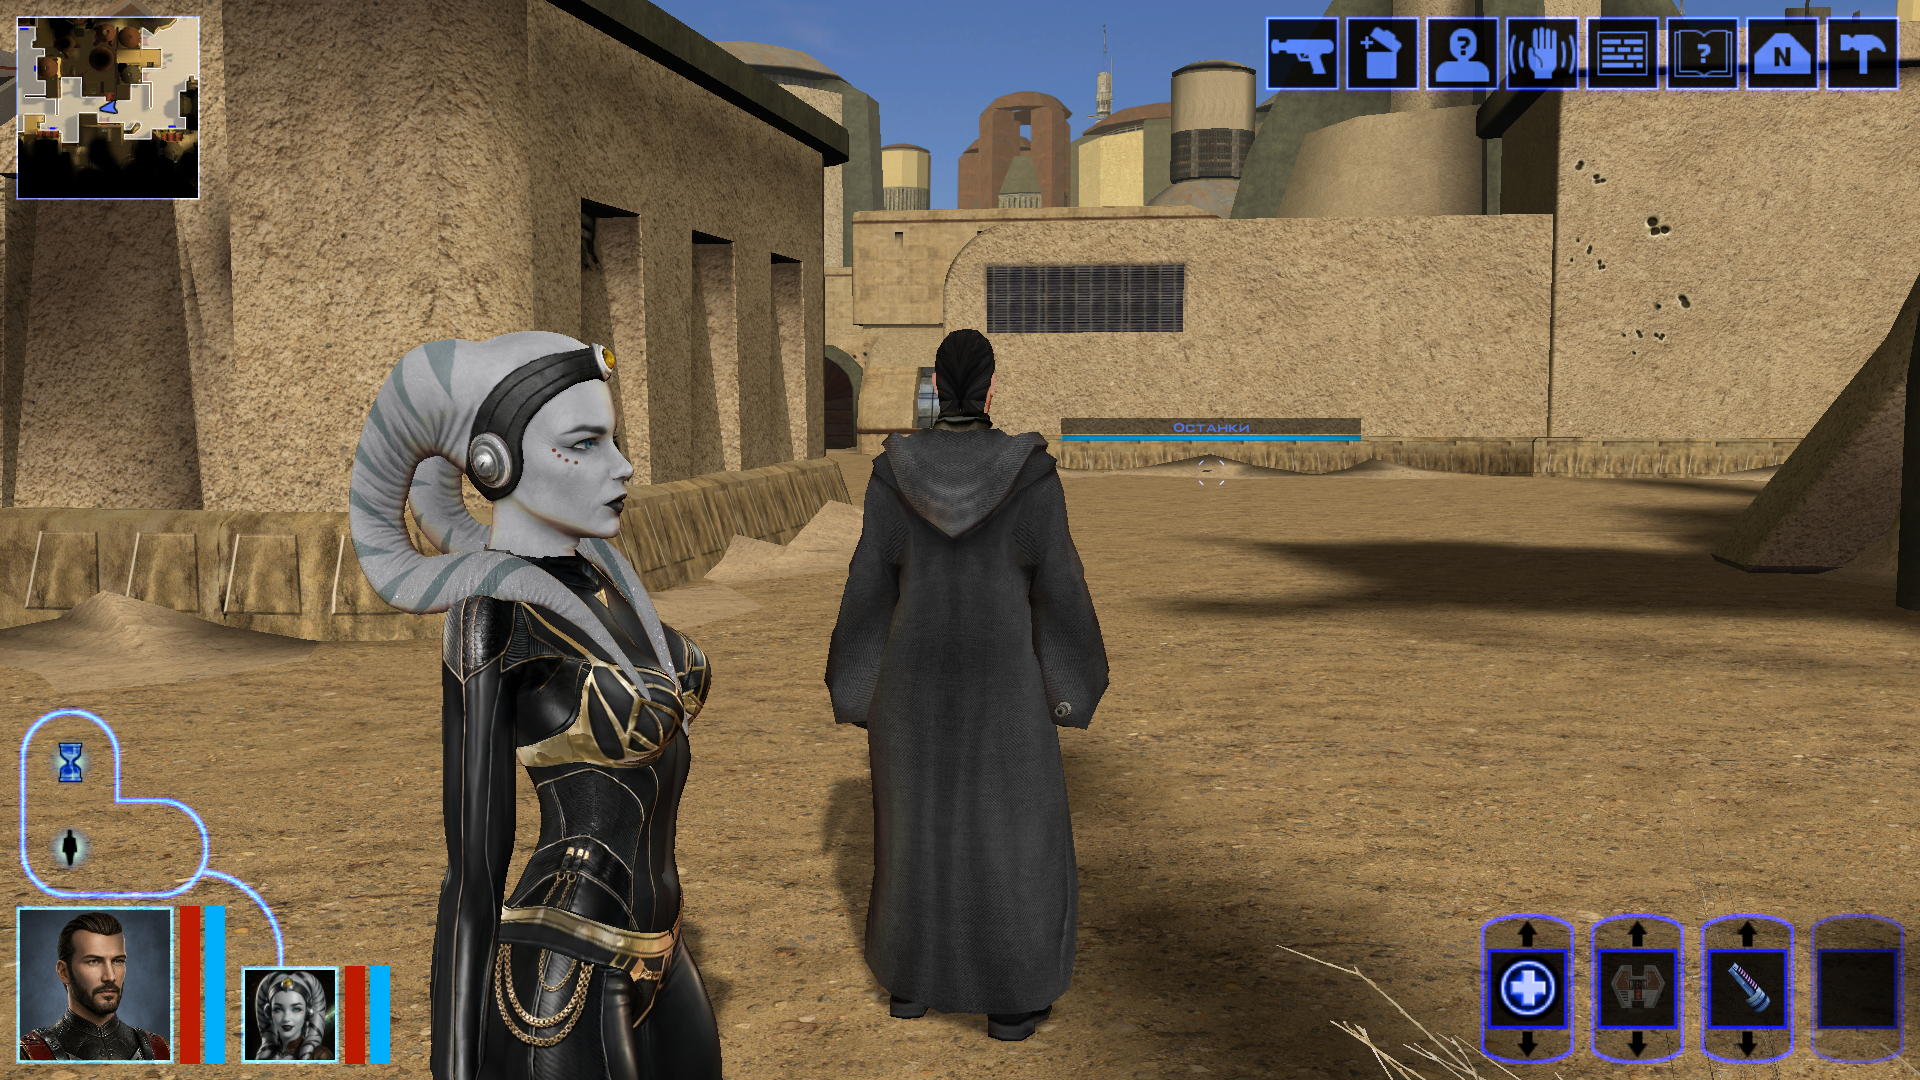
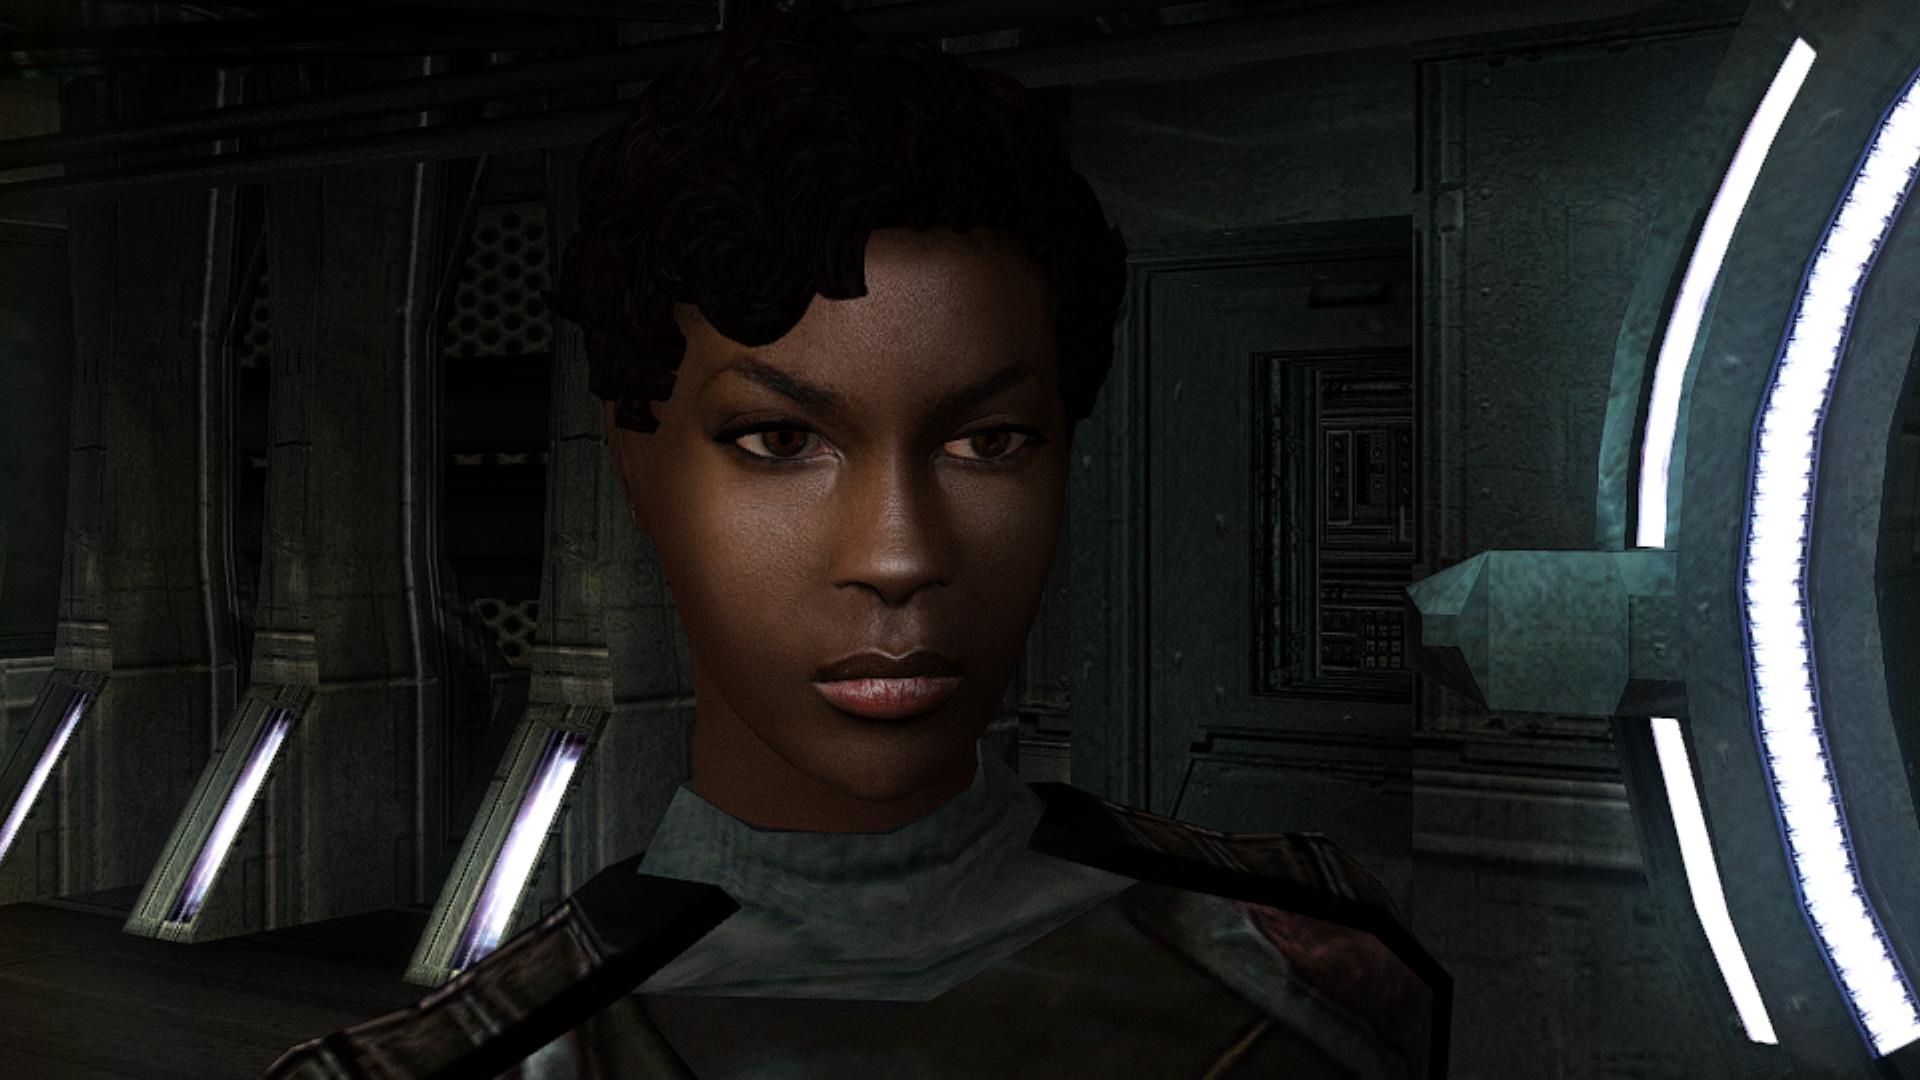
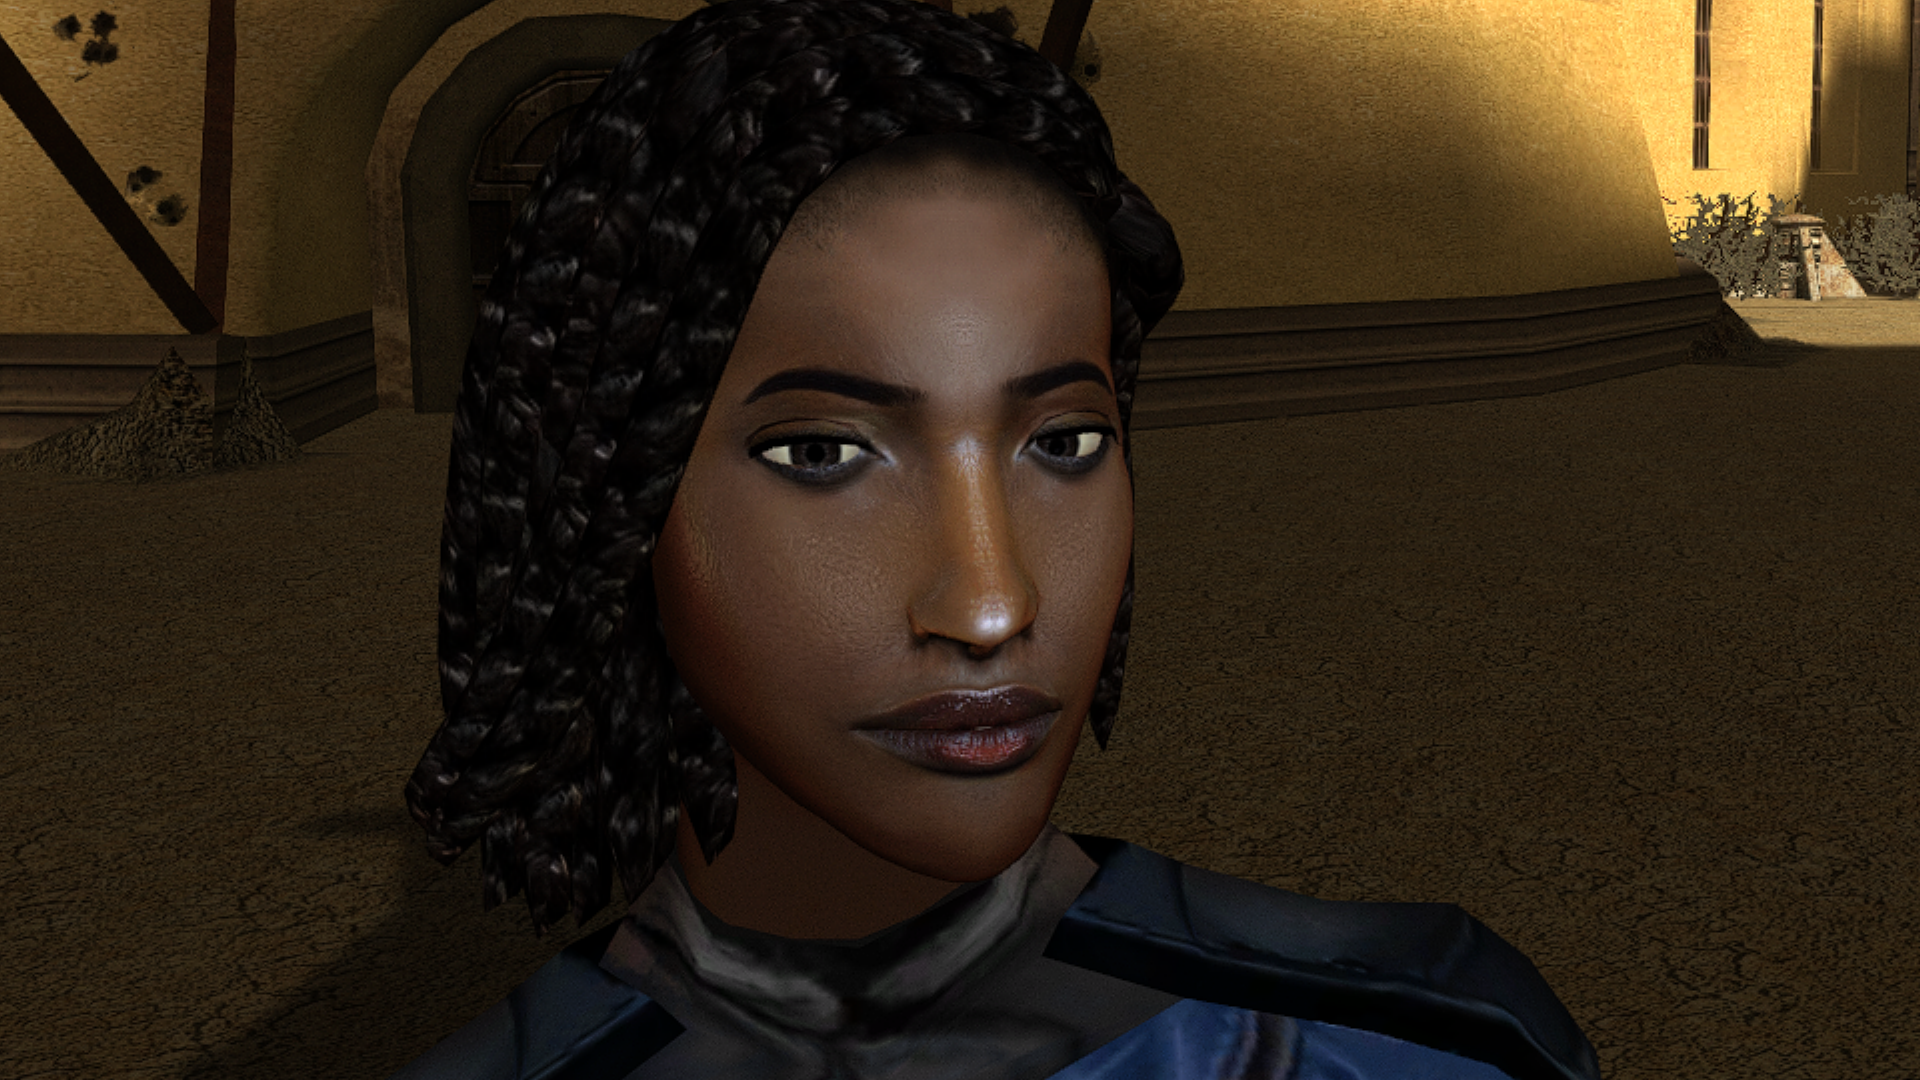
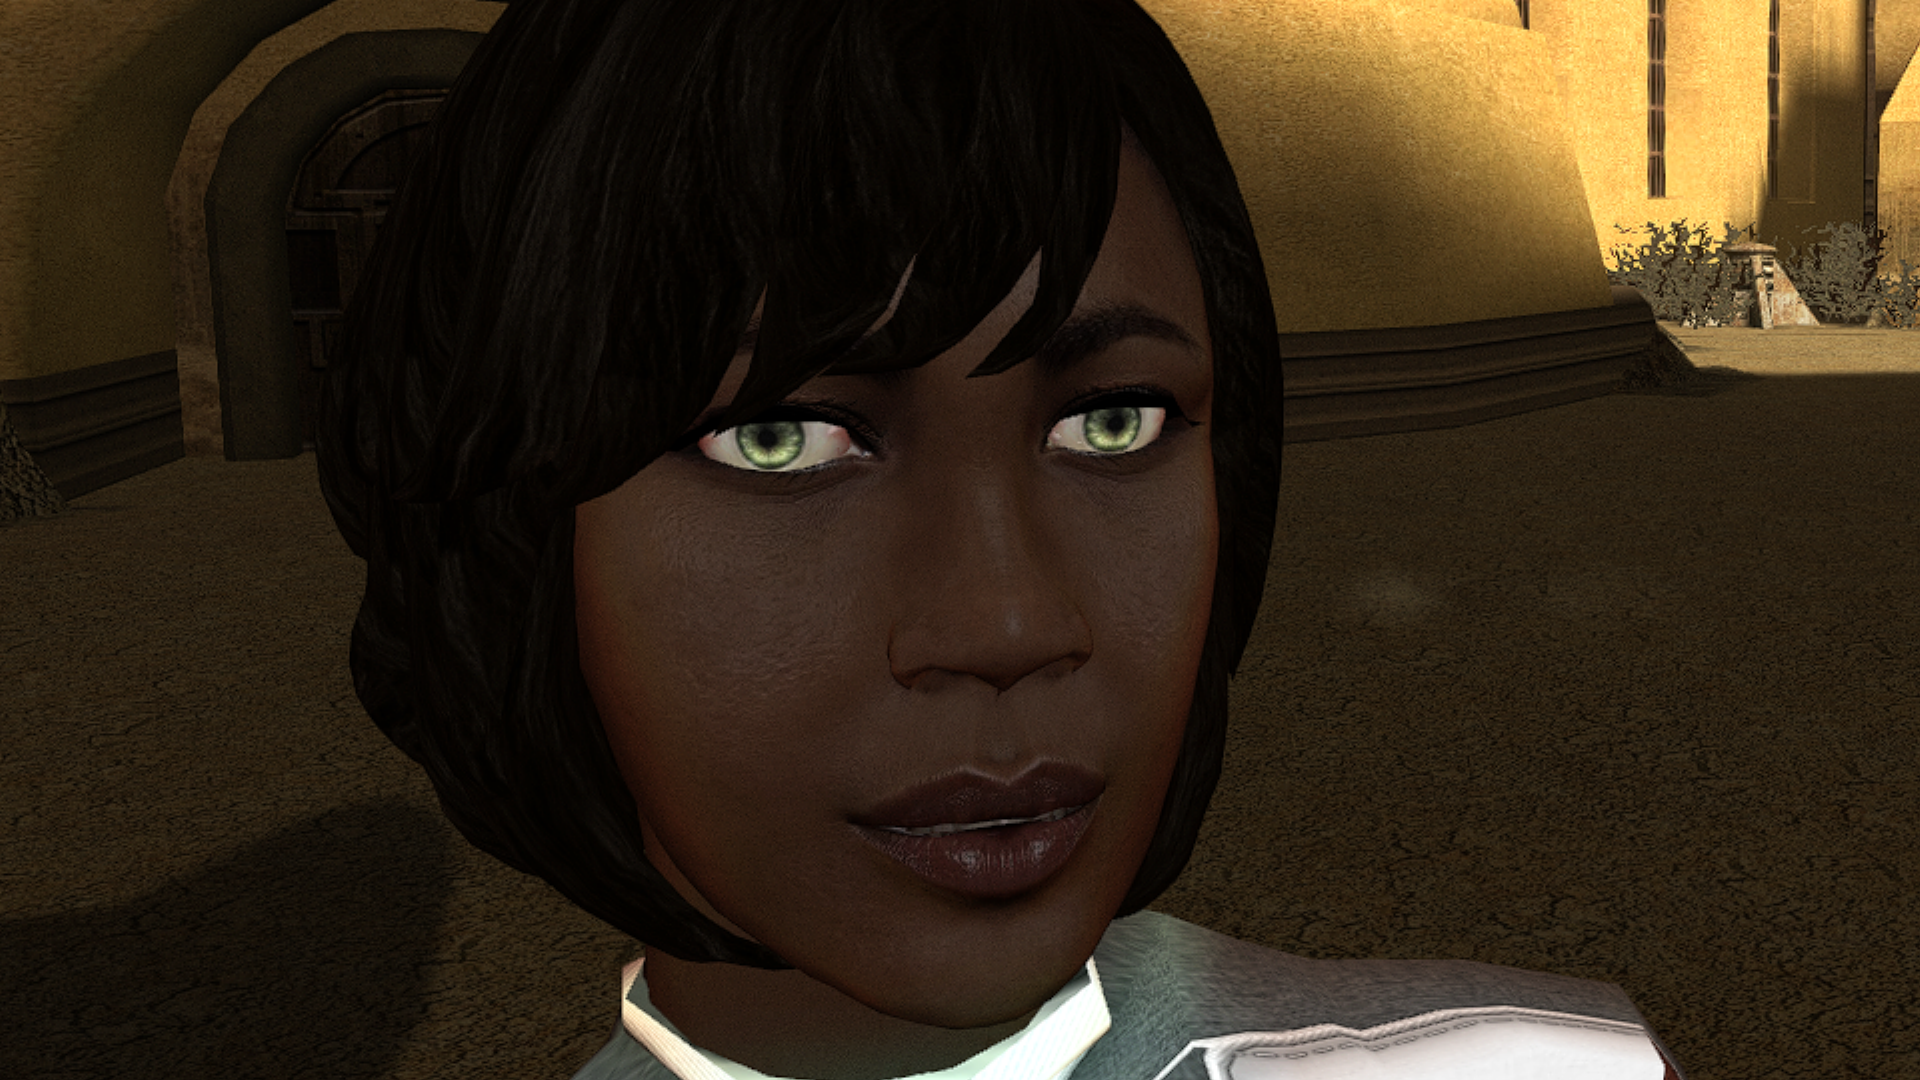
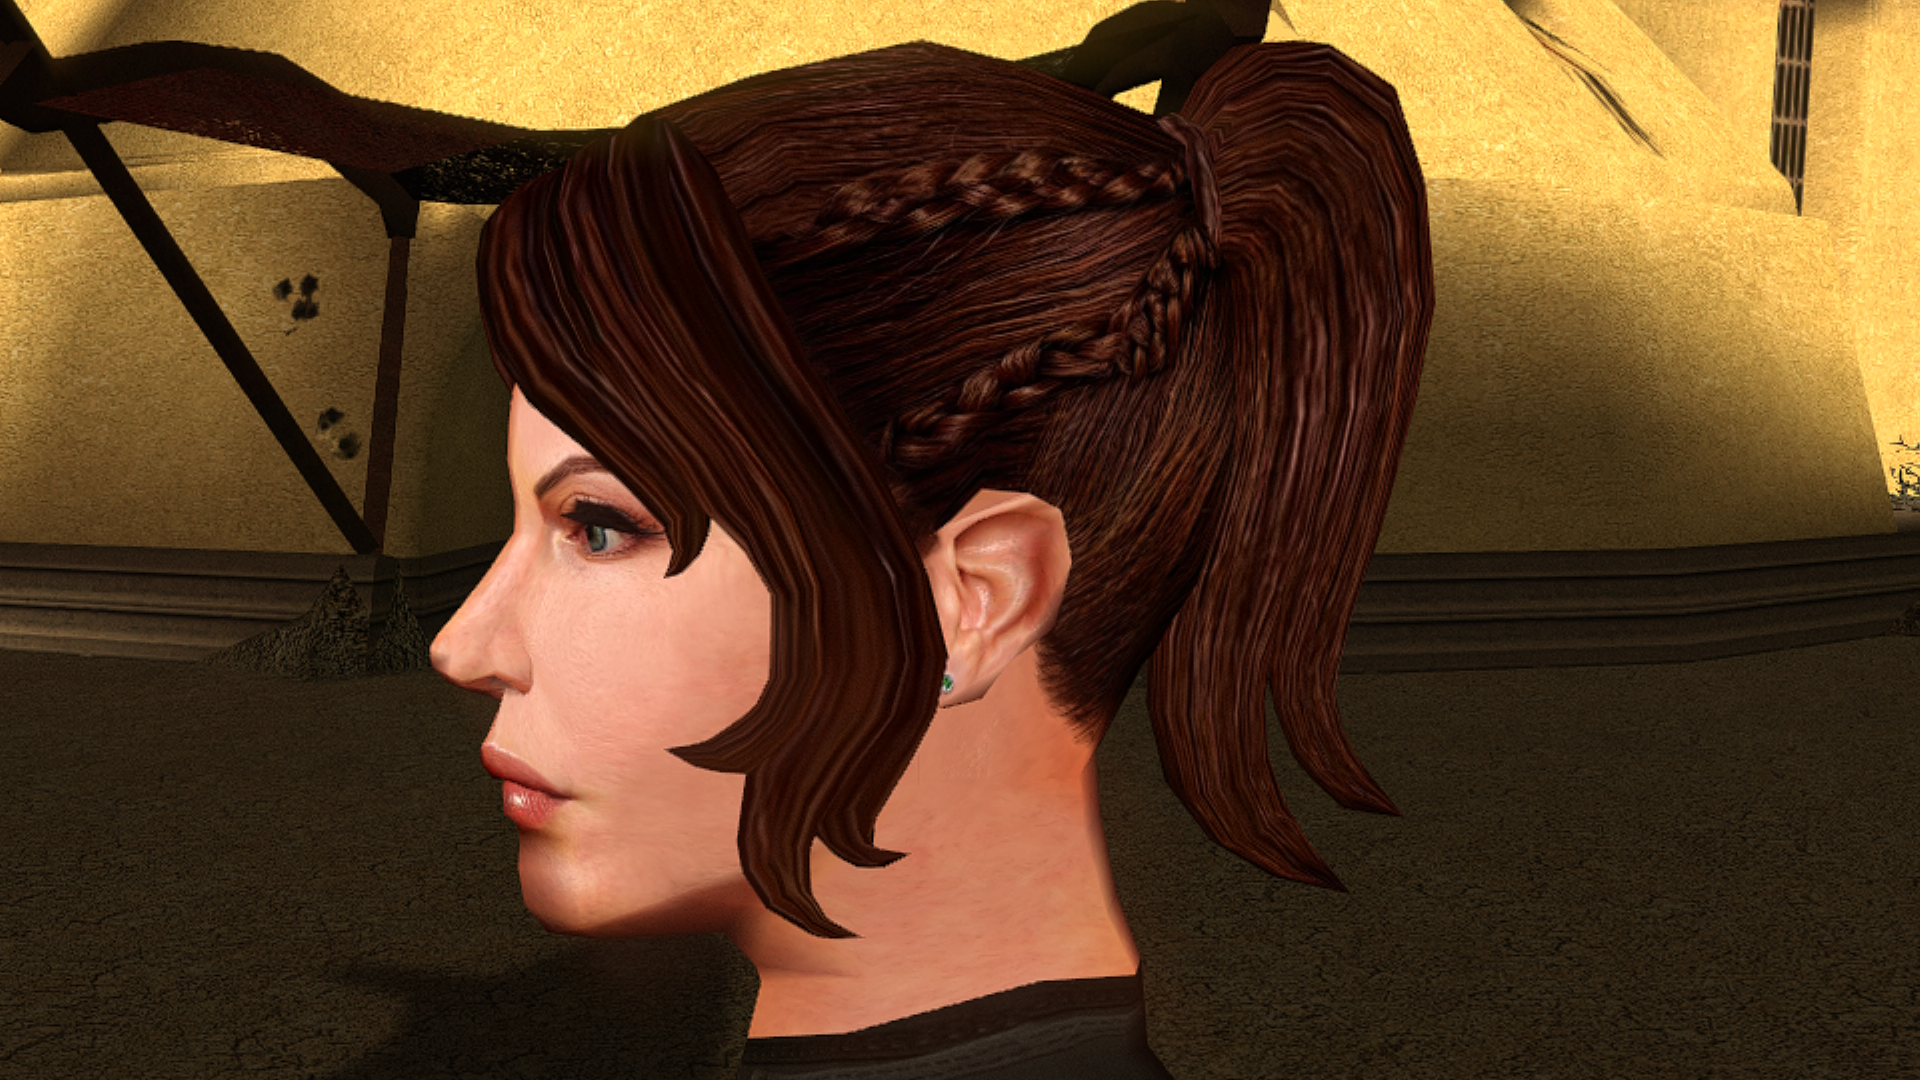
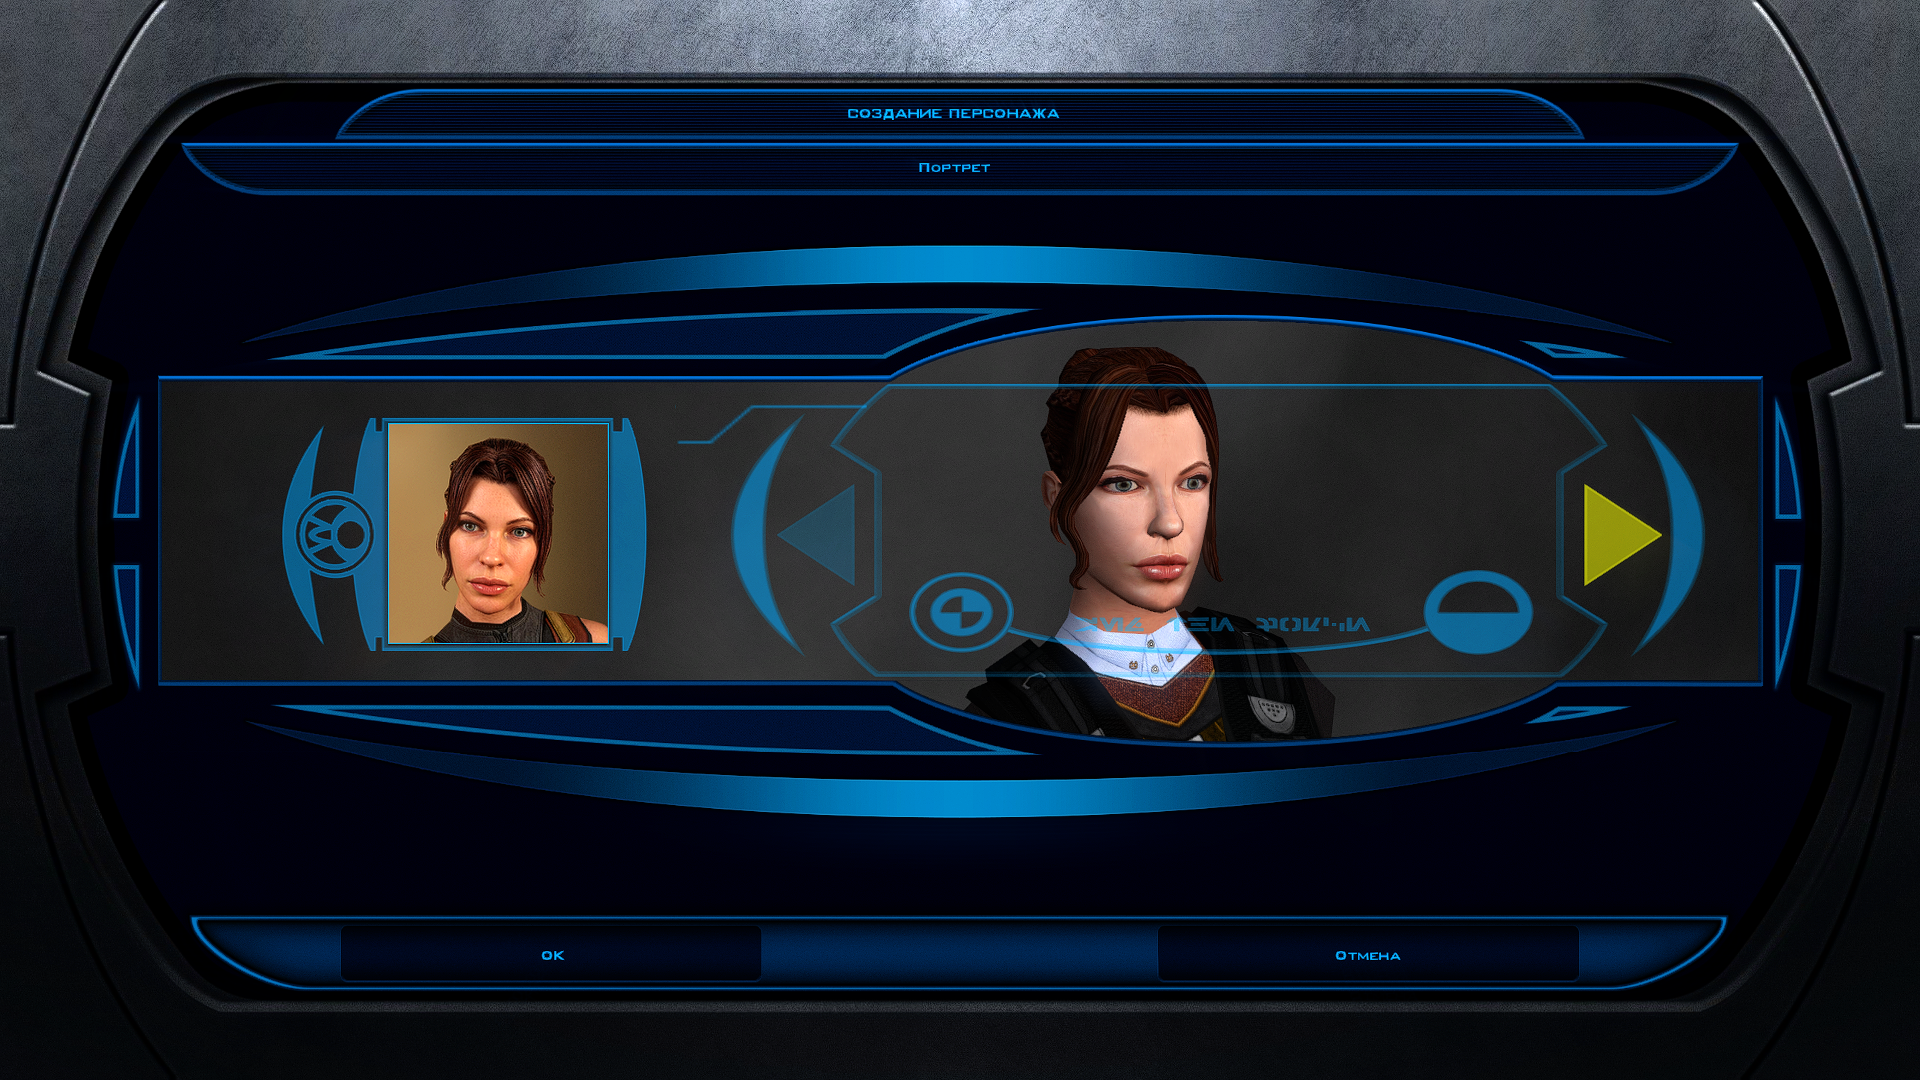
Hi everyone on this great forum! 😊 I decided to start my own little thread, even though I’m still relatively new here. I’ll be posting my work-in-progress, notes on how things are done - mainly for myself, so I can come back and refresh my memory later. If it ends up being useful to someone else as well, I’ll be happy of course. I’m sure everything I’m writing about has already been discussed countless times on this forum and is familiar to everyone. But I’m still a newcomer! My already released mods: https://deadlystream.com/files/file/3054-new-portraits-for-partymembers/ https://deadlystream.com/files/file/3055-hd-animated-computer-interface/ https://deadlystream.com/files/file/3079-saul-karath-retexture/ https://deadlystream.com/files/file/3092-narves-new-high-poly-canderous-head/ While working on the Canderous head I made a bit of progress learning Blender. I only knew it at a very basic level before, because I’m a 2D artist, not a 3D one. I still don’t really know what proper topology should look like, how to paint weights correctly, how to build textures with nodes, and so on. I’ll be learning all of that gradually. For this particular head I took a high poly mesh from this mod - big thanks to the author! Of course I heavily edited it: the geometry, the UV unwrap, and the texture. I also learned a few useful texture painting tricks. Geometry-wise the hardest parts are always the eyes and the lips, because the animation has to deform them properly, and what looks fine in Blender often ends up looking completely different in the game. Something I’d like to note here for myself - how to get rid of grey spots on the model after exporting from Blender to mdl/mdx: 1. The most important step - clear Custom Split Normals Data: Select the head mesh in Object Mode. Go to the Object Data Properties tab. Expand the Geometry Data panel. If the “Clear Custom Split Normals Data” button is active, click it. This removes the old broken data and forces Blender to recalculate the normals. Also helpful: 2. Apply smoothing — Right-click the model → Shade Smooth. 3. Apply transforms — Use with caution and only when needed! Things can shift in unexpected ways. In Object Mode select the head and press Ctrl + A → Apply All Transforms. ____________________________________________ P.S. English is not my native language, so I apologise in advance if anything is phrased awkwardly. ____________________________________________ Then I decided to retexture the high-poly Bastila body from the TCS mod. The thing is, we started playing through BOSSR on stream, and there Shadow uses Bastila’s body. And we have this Bastila mod installed. So I made her this outfit. I didn’t touch the model or the UV unwrap, only the texture. I painted the alpha channel in the places that should be more shiny. Since I don’t know how the original model author would feel about this little “side project” of mine, of course I won’t be releasing this texture anywhere — it’s purely for personal use. After that I moved on to her head. I wanted both the lekku and the face itself to have more polygons. So I simply applied a Subdivide, then worked on the mesh — editing vertices, sculpting, and so on. Then I started texturing, and at that point I really wanted to add a bump map so the lekku would look bumpy the way vanilla Twi’leks do (even if the vanilla ones are very low quality). I dove deep into the problem — I remember spending entire weekends glued to this forum reading everything people wrote about adding bump. Nothing was working for me. I tried every piece of advice, converted the poor bump map to TPC every which way, opened the model files in ASCII and searched for tangent vectors… I even started recalling university calculus about quaternions and how I used to redefine matrix multiplication in C++ practicals…🤣 It turned out the problem was completely different. The BOSSR mod authors used the "Twilek05" head model, but in heads.2da they assigned it the texture name "matilda_headd". Meanwhile the model itself is linked to the texture "Twilek05". And even though the engine can pull the main (diffuse) texture information from a texture that isn’t the one specified in the model, it cannot pull bump map information (and apparently txi info as well) from a texture with a different name! I don’t know why it works this way — maybe some internal script. Anyway, once I renamed the main texture to "Twilek05.tga", the bump map to "Twilek05b.tpc", wrote this in the "Twilek05.txi": bumpyshinytexture CM_SpecMap bumpmaptexture Twilek_F05b and also put "Twilek05" as the texture in heads.2da — miracle of miracles, the game finally saw the bump map! Yes, it didn’t turn out perfect — the bumps are too fine and therefore look a bit like shimmering. I probably won’t fix it, because we had to abandon that mod playthrough — it conflicted with other mods. But I’ll write down the key points needed to add bump (even though all of this is already on the forum — huge thanks to DarthParametric and everyone else who shared advice and tutorials): Before exporting, you must enable the “Tangent Space” checkbox in the KotOR Model Node plugin options for all the meshes that need it (in my case “hair” and “head”). To verify — open the model in MDLEdit, save it as ASCII, open it in Notepad++ and search for the word “tangentspace”. On the relevant nodes it should say tangentspace 1, not 0. If it somehow still shows 0 even though the checkbox was enabled on export from Blender, change it to 1, save, open that ASCII file again in MDLEdit (it might complain that it can’t recalculate the vectors — hopefully that’s not a problem), and then save it back to binary mdl/mdx. You can also just tick the corresponding checkbox in MDLEdit itself and re-save — but keep in mind that the bump will then be applied to every mesh in the model that uses that texture, not only the ones you might have wanted. Preparing the .txi. It must have the exact same name as the main texture, and the main texture must be the one that is actually linked to the model. Inside the .txi you need: bumpyshinytexture (your Cubemap) bumpmaptexture (your bump map name) In theory bump should work without the shiny part (only the line "bumpmaptexture " in txi), but for me it never did — because in that case the engine treated the alpha channel of the main texture as transparency. Meaning: if you darken the alpha to make the bump stronger → the object becomes transparent if you leave it white → no bump is visible. Maybe I’m doing something wrong? Preparing the main texture. It must be named exactly as specified in the model (you can check that here). It needs an alpha channel that controls both the shininess (via the Cubemap) and the strength of the bump. The darker the alpha, the stronger both effects. Yes, both at once — there’s no other way. Preparing the bump map. Save the main texture as an image and throw it into this website (again, thanks for the link — found it on the forum). You can increase Strength if the texture isn’t very contrasty, and add a bit of blur (slider to the negative side). Download the result and save the texture as TGA with a pure white alpha channel. Then use tga2tpc with these settings. You can also add extra lines or strengthen the bump with the bumpmapscaling value, as DarthParametric wrote here: https://deadlystream.com/topic/9353-bump-mapping-tutorial-request-for-novices/#findComment-87017 Final contents for the override folder: the model (mdl + mdx), the main texture (tga), the .txi with the parameters, and the bump map (tpc). Phew. The last thing I learned on this head was adding new geometry — I wanted to model headphones and a stone on her forehead. Important points here: convert everything to triangles and weight-paint it to the head. To check — switch to Weight Paint mode and make sure it’s painted red. If you need a piece not to move with the head, weight-paint it to the neck instead (a different vertex group). If you don’t weight anything at all, those pieces of the model simply won’t appear in the game. 🙃🙃 I’ll say it again: I’m by no means an expert on KOTOR modding, so I apologize if I write or do anything incorrectly! And, of course, I’d be grateful for any advice, comments, or corrections.
 3 points
 -
Version 1.0.0
24 downloads
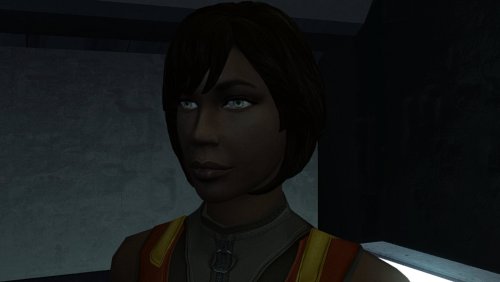
The mod replaces the PFHB02 model and textures. To Install 1. Download: PFHB02 2. Copy all files to the Knights of the Old republic's Override folder. (Example location - C:\Program Files (x86)\Steam\steamapps\common\swkotor\Override) 3. When/if prompted to overwrite files, press okay. 4. If you like the mod; leave a comment or endorse! (It would be much appreciated) Made with love.3 points -
3 points
-
Version 1.0.0
8 downloads
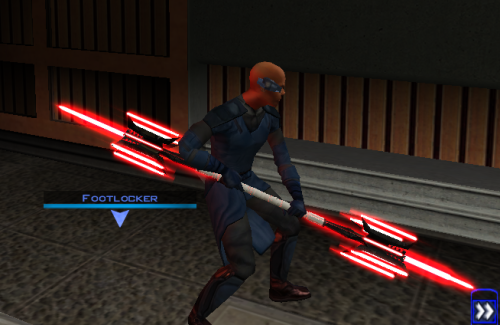
Thought I already uploaded this here but I forgot so if anyone is interested here you go! The readme's in the zipped files are outdate. Please refer to the standalone ReadMe file or the below instructions regarding instalaltions. To install: *Steps 3 and 4 may not be necessary, try running without doing them first, but if the game crashes do steps 3+ 4 and try again.* 1: Drop all files except readme.txt swkotor.ini files and upcrystals.2da into override folder. 2: A) If you don't an upcrystals.2da file in your override folder, just copy the one provided into your override folder. If you do already have an upcrystals.2da file in your override folder, - Insert a new row at the end of the table. - Copy the last row from the table provided, paste it into the new row you just created. - Save the file. *3: In your folder that contains your swkotor.exe (usually named Star Wars - KotOR) locate the file named swkotor.ini and rename it BACKUPswkotor.ini so that you can revert to it later if you desire. *4: Paste the swkotor.ini file included with this download into that same folder ( Star Wars - KotOR) --note you can use either included .ini but if using WINDOWEDswkotor.ini rename it to swkotor.ini They are basically the same but one is set for fullscreen and the other windowed mode. ---- Uninstall: 1) Delete files from override folder. 2) Delete the .ini file you added, and rename the one you re-named as BACKUPswkotor.ini to it's original name. To get items in game: 1) Enter the cheat menu (~) 2) Type giveitem g_w_lghtsbr45 or giveitem_g_w_dblsbr045 and press enter. ---------- A giant shoutout and thanks to JCarter426 over on the DeadlyStream forums for helping me solve the rendering issue! Credits: This Mod contains source assets from other creators, all credit due to them for their original works. Permissions have been attained and followed per the licenses of their works. I own the $10 unlimited commercial license for 'Goblin Iron Mace - fantasy PBR game ready weapon' by Dominik Maral. https://cubebrush.co/orders/159g6hh95g?token=Eqyy2xDzWuarI9uPcWMzEVscuvTHnBazuWAxvQSkWTc This mod also uses FinBass' 'Battle Mace 3D Model' available at https://sketchfab.com/3d-models/battle-mace-07bfd5d2ff694f94b2f2f77c465fa0f5 a big thanks to them for making this available for free with a CC Attribution license. Also as always a big thanks to Crazy34 for making their lightsaber blades with ambient lighting available as a modders resource for the rest of the community to incorporate into their mods. Check out their mod here: https://deadlystream.com/files/file/1855-new_lightsaber_blades_modders_res/ Credit and thanks also to Kaidon Jorn as from my understanding the hilts used by Crazy's mod come from him "Lightsaber Hilts models and textures and icons are created by Kaidon Jorn " Also a giant thanks, along with credit go to J for making their Glitched Lightsaber Hilt Fix - TSL ASPYR 2.0 mod available as a modders resource! Without this I couldn't have solved the rendering issues. Make sure to go support their work at https://deadlystream.com/files/file/2735-glitched-lightsaber-hilt-fix-tsl-aspyr/ Full credit goes to the original developers, artists, and respective intellectual property rights holders (Lucasfilm, Pandemic Studios, and BioWare). This is a strictly non-profit, fan-made educational project intended exclusively as a technical proof-of-concept demonstrating asset handling for the KOTOR modding community. Furthermore, I do not own or claim rights to any of the third-party tools used or described in this project; all rights belong entirely to their respective developers. Permissions regarding use of this model: Feel free to use as you see fit, but please give due credit. ---------- Purpose: This mod is a prototype WORK IN PROGRESS. It adds a new weapon type, the lightmace (and a 2h version), to the game. I plan to fine tune the hilt textures later. IF you have any color requests please comment as I can easily make different colors with my script (also available for download).2 points -
Version 1.0.0
30 downloads
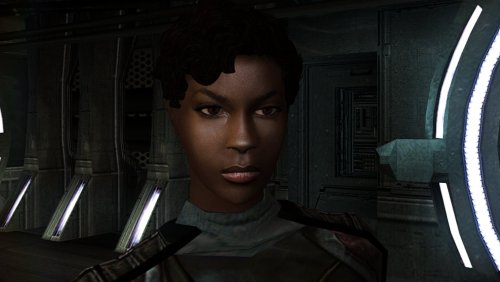
The mod replaces the PFHB01 model and textures. To Install 1. Download: PFHB01 2. Copy all files to the Knights of the Old republic's Override folder. (Example location - C:\Program Files (x86)\Steam\steamapps\common\swkotor\Override) 3. When/if prompted to overwrite files, press okay. 4. If you like the mod; leave a comment or endorse! (It would be much appreciated) Made with love.2 points -
Version 1.1.0
8 downloads
Easily manage, install, and revert loose-file mods. Features: Opens a mod as the zip, 7z or rar it downloaded as, or as a folder you already unpacked. No unpacking first. Works out which files are actually game content. Readmes, screenshots and packaging are left behind, and a mod shipping alternate versions of the same file asks you to pick one. Every install is recorded and can be taken back later. Uninstall leaves a file alone if something has changed it since, so it will not step on a patcher mod's work or on a later mod's. Finds duplicates already sitting in your Override. A name capitalised two ways, or one texture shipped as both a TPC and a TGA. Only one of each is ever loaded, and the game picks it arbitrarily. Shows what every layer of the game holds for a given file, so you can see a loose file quietly shadowing a copy inside a module archive. Finds your installation on its own. Steam, GOG and retail, on Windows, Linux and macOS, for both KotOR 1 and KotOR 2. If you play on Linux or a Steam Deck, this fixes something quiet Mod builds are ordered lists, and later mods are meant to overwrite parts of earlier ones. On Windows that happens by itself, because the filesystem does not care whether a file is called `Appearance.2da` or `appearance.2da`. On Linux it does care. Both files end up in Override, the game loads whichever one it reaches first, and the overwrite prompt the build guide told you to expect never appears. Your install order silently did not happen. This installs by name with a common lowercase filename, so the overwrite you meant is the one you get. What it does not do (yet) TSLPatcher mods. Those do not copy files into place. They merge rows into 2DA files that are already there, add entries to the talk table and write inside module archives. This recognises them and says so instead of half-installing them. Keep using HoloPatcher for those. (for now) Tested against The loose-file mods from the community build lists, and a full modded install. Additionally tested on Linux by @Leilukin and on macOS by @FTD Thanks for your help testing! Requirements The window fits a 1280x800 screen, so it works on a Steam Deck without too much squeezing. On Windows: Windows 10+ 64-bit On macOS: macOS 10.12+ for Intel Macs and 11.0+ for Apple Silicon Macs On Linux: Any recent Linux distro with glibc 2.35+ About Rakata Rakata is a clean-room Rust workspace for reading, writing and validating KotOR game data, written from scratch against notes taken from the engine rather than from anybody else's code. This installer is one tool built on top of it. It is free and open-source under GPL-3.0, and the source along with the format documentation is at https://codeberg.org/Synchro/rakata LLM Disclosure This project made use of an LLM during development, in the following capacities: Brainstorming: exploring possible approaches and design directions Decompilation assistance: help interpreting reverse-engineered code Code comments: refining and clarifying existing comments Skeletons and fixes: generating initial code scaffolding and minor fixes. All LLM-assisted output was modified and reviewed by a human before being committed.2 points -
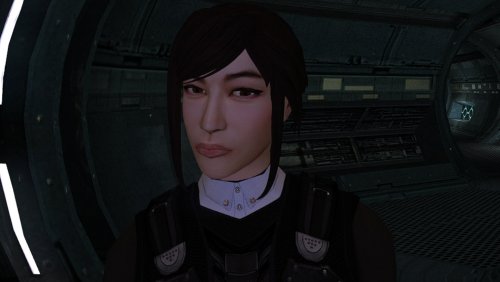
Version 1.0.0
49 downloads
The mod replaces the PFHA05 model and textures. To Install 1. Download: PFHA05 2. Copy all files to the Knights of the Old republic's Override folder. (Example location - C:\Program Files (x86)\Steam\steamapps\common\swkotor\Override) 3. When/if prompted to overwrite files, press okay. 4. If you like the mod; leave a comment or endorse! (It would be much appreciated) Made with love.2 points -
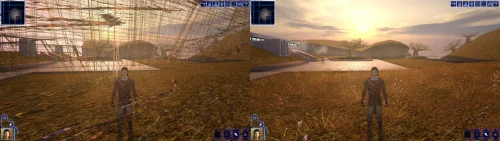 Incredible that it's taken this long to use grass and shadows again. Incredible.1 point
 -
Pretty sure something like the Lightmace already showed up in Star Wars: Visions.1 point
-
Don't let Lucasfilm see this, someones gonna try to shoehorn it into their next project1 point
-
1 point
-
View File High poly PFHB02 The mod replaces the PFHB02 model and textures. To Install 1. Download: PFHB02 2. Copy all files to the Knights of the Old republic's Override folder. (Example location - C:\Program Files (x86)\Steam\steamapps\common\swkotor\Override) 3. When/if prompted to overwrite files, press okay. 4. If you like the mod; leave a comment or endorse! (It would be much appreciated) Made with love. Submitter Dark Hope Submitted 09/16/2026 Category Mods K1R Compatible Yes1 point
-
pfhb02.mdlpfhb02.mdx1 point
-
![More information about "[K1] HD Female Twi'leks + NPC Diversity + Playable Female Twi'leks"](https://deadlystream.com/downloads/screens/monthly_2026_09/Untitled-5.thumb.png.825cd65aa1f41bb1266ad35609de16ba.png)
Version 1.3.0
90 downloads
===================================================== [K1] HD Female Twi'leks + NPC Diversity + Playable Female Twi'leks ===================================================== Mod for Knights of the Old Republic 1 Author: Lily File Name: K1_HD_Female_Twilek_Diversity_and_PCs_v3.zip Latest Version: 1.3.0 --- 1. DESCRIPTION: This mod overhauls the female Twi'lek NPCs in KotOR 1 and adds 26 new playable female Twi'lek heads. NPC Overhaul: - Upscaled and updated dancer outfits. - Body skin tones all match head skin tones. - Added specular highlights to body textures. - Added specular highlights with a bump map to the heads, giving female lekku the same light-reactive shine male Twi'leks have. Eyes and lips also get a subtle shine. - NPCs now use different lekku positioning per head, so they no longer all look like pure reskins. - Gives a unique appearance to: - Yuthura Ban when encountered on Dantooine - Zaerdra - Hidden Beks bodyguard, Taris - Lyn Sekla - dancer, Taris - Janice Nall - droid shop owner, Taris - Kandon's Bodyguard - Black Vulkar Base - Malare - Bastila's quest - Lena - Mission's quest - Zoriis Bafka - swoop racer, Tatooine - Casandra Mateil - swoop racer, Manaan - Zeena - swoop racer, Manaan Playable Heads: - 26 playable female Twi'lek models, including every female Twi'lek NPC. - A number of completely new heads. - Dark side transitions. - Every playable head comes with a Handmaiden-style underwear model with matching skin tones. Find the KotOR II version here! --- 2. INSTALLATION: Run Install.exe and select your KotOR 1 game directory. There are 3 installation options. - Default Installation: Includes playable Twi'lek models and replacements for NPC Twi'leks. You probably want this one. - Playable Twi'leks ONLY: Includes only models for the player character, NPC Twi'leks will remain unchanged - NPC replacement ONLY: Replaces models for NPC Twi'leks, does not add any playable characters If you use the default installation, you DO NOT need to install NPC replacement ONLY or Playable Twi'leks ONLY. You should be safe to reinstall this mod on top of itself without any problems. You will probably want to use a widescreen mod such as this Without a high resolution, the bump mapping looks pretty bad. A "backup" folder is created by the installer in the same directory. Don't delete it if you plan to uninstall later. --- 3. UNINSTALLATION: Run Install.exe, select your KotOR 1 directory, and use the "Tools > uninstall/restore backup" option to revert all changes made by this mod. --- 4. KNOWN ISSUES: If you have met any of the NPCs, they will not have their unique appearance. You should use a save from beforehand. If you find any bugs or problems, please report them. --- 5. MOD COMPATIBILITY: Installing this should not break any other mods or have any conflicts, including K1R. This mod only touches female Twi'lek head/body models, textures, and appearance-related files - no dialogue, scripting, or module changes. Should be compatible with all other mods other than any other mods that have changed the female Twi'lek appearances, this mod will obviously stop the old appearances from showing. All files should have unique names, so this should not overwrite other mods, and it would just take Appearance.2da changes (or an uninstallation) to revert. Notably, this mod conflicts with KotOR 1 Twi'lek Female NPC Diversity That mod directly installs to the override folder instead of into modules, so you will need to uninstall that mod if you want to see the NPC appearances from this mod. However, if you wish to keep any appearances from that mod or any other female Twi'lek NPC mods, you can install those after this one to overwrite specific NPCs without an issue. Do not use the Steam Workshop for KotOR. It will almost certainly end with compatibility issues. --- 6. SUPPORT: My mods are free to use. You do not need to pay for them, but if you would like to say thanks, you can buy me a coffee! --- 7. PERMISSIONS: Please let me know if you plan on using any of the files in my mod for your own mod. The answer is "yes you may", but I would like to know what you are doing with it! Do not directly reupload this mod anywhere else. --- 8. THANKS: - Dark Hope - HD Twilek base textures - Leilukin & SpaceAlex - Dahnis Unique Look - Effixian - Red Twi'lek head - DarthParametric - Twi'lek high boots model - redrob41 - Original Twi'lek head/body model fixes, original underwear, dancer, assassin models - bead-v - MDLEdit - Fred Tetra - KotOR Tool - Cortisol - Holocron Toolset & HoloPatcher - Fair Strides - TSLPatcher - seedhartha - KotOR Blender - ndix UR - tga2tpc - ??? - A couple playable heads are originally from a decade-old modpack with no credits. If you are or know the author, let me know and I can credit the author/remove them. THIS MODIFICATION IS NOT SUPPORTED BY BIOWARE/OBSIDIAN ENTERTAINMENT OR LUCASARTS OR ANY LICENSORS/SPONSORS OF THE MENTIONED COMPANIES. USE THIS FILE AT YOUR OWN RISK.1 point -
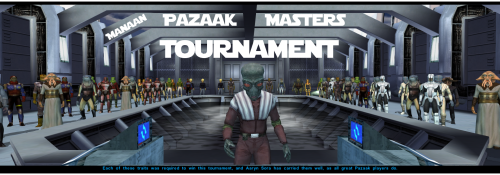 Really fun addition to the game, and no bugs encountered! Worked great combined with Easy Pazaak, as directed here I installed this first then added the file from EP to override. Definitely will include in future playthroughs!1 point
 -
1 point
-
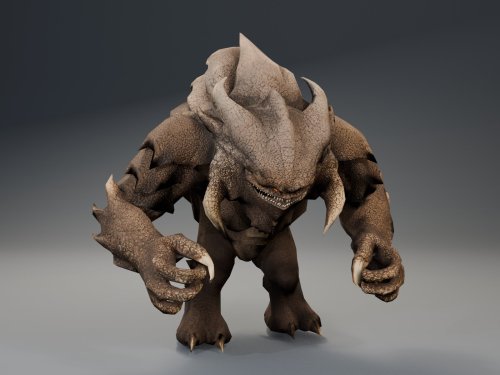 same thing is happening to me1 point
 -
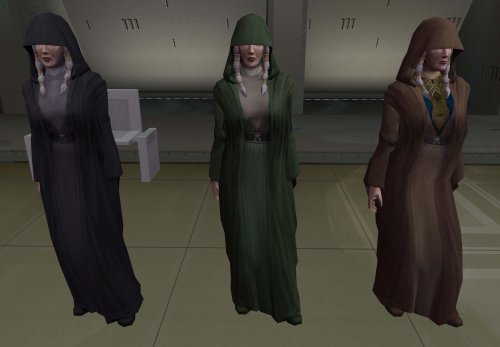 Yes, that's compatible too!1 point
 -
It's compatible with Party Swap and Azgath's Tomb, yes. That's not the tomb mod that needs the patch either. I'm not sure what SLM 2024 is.1 point
-
View File High poly PFHA05 The mod replaces the PFHA05 model and textures. To Install 1. Download: PFHA05 2. Copy all files to the Knights of the Old republic's Override folder. (Example location - C:\Program Files (x86)\Steam\steamapps\common\swkotor\Override) 3. When/if prompted to overwrite files, press okay. 4. If you like the mod; leave a comment or endorse! (It would be much appreciated) Made with love. Submitter Dark Hope Submitted 09/13/2026 Category Mods K1R Compatible Yes1 point
-
 Setting windows scaling to 100% is what fixed this for me This mod is a Godsent. I am finally able to play KOTOR 1 for the 1st time because I never got it working properly on a 4K TV. Now the game looks amazing together with a texture mod. Thank you. I found 1 bug though so far, in my 15 hours: the Scripts menu is empty for all characters, it looks like this: https://imgur.com/70Ekx9O1 point
 -
![More information about "[TSL] Exchange Gamorrean Fix"](https://deadlystream.com/downloads/screens/monthly_2026_09/20260912154612_1.thumb.jpg.a7baab39ff2842f8499ca644a681ac76.jpg)
Version 1.0.0
35 downloads
===================================================== [TSL] Exchange Gamorrean Fix ===================================================== Mod for Knights of the Old Republic II - The Sith Lords Author: Lily File Name: Exchange_Gamorrean_Fix.zip Latest Version: 1.0 --- 1. DESCRIPTION: With TSLRCM, the Gamorrean Exchange thugs in the refugee sector on Nar Shaddaa have two bugs: 1. They no longer have dialogue if you try to talk to them. I believe the base game had a bug where they had more dialogue lines than they would actually say when you talk to them, and TSLRCM tried to fix this but it ended up even more broken and they just remain silent. With this mod, all of their dialogue lines are restored. 2. When you security one of the metal boxes near them, they tell you "Get out of there or I bash you!" which is an empty threat as they don't care if you take what's inside the box. With this mod, they will become hostile and attack you if you open the box to take what's inside (unless you are in stealth) as intended. --- 2. INSTALLATION: Run Install.exe and select your KotOR 2 game directory. A "backup" folder is created by the installer in the same directory. Don't delete it if you plan to uninstall later. --- 3. UNINSTALLATION: Run Install.exe, select your KotOR 2 directory, and use the "Tools > uninstall/restore backup" option to revert all changes made by this mod. --- 4. KNOWN ISSUES: None. If you find any bugs or problems, please report them. --- 5. MOD COMPATIBILITY: This should be compatible with all other mods. Requires TSLRCM. Do not use the Steam Workshop for KotOR. It will almost certainly end with compatibility issues. --- 6. SUPPORT: My mods are free to use. You do not need to pay for them, but if you would like to say thanks, you can buy me a coffee! --- 7. PERMISSIONS: Please let me know if you plan on using any of the files in my mod for your own mod. The answer is "yes you may", but I would like to know what you are doing with it! Do not directly reupload this mod anywhere else. --- 8. THANKS: - Fred Tetra - KotOR Tool - Cortisol - Holocron Toolset & HoloPatcher - Fair Strides - TSLPatcher THIS MODIFICATION IS NOT SUPPORTED BY BIOWARE/OBSIDIAN ENTERTAINMENT OR LUCASARTS OR ANY LICENSORS/SPONSORS OF THE MENTIONED COMPANIES. USE THIS FILE AT YOUR OWN RISK.1 point -
.thumb.png.f28748a2e0f97c4bd2e46a90e24ee84e.png)
Version 1.1.0
892 downloads
A Mod for Star Wars Knights of The Old Republic Author: N-DReW25 1.0.1 Release Date: 25.05.2024 Installation: Please install the K1 Community Patch FIRST before this mod! No exceptions! Once you click on the HoloPatcher.exe, you'll be given a few install options. 1) Main mod: Installs the actual mod. 2) NPC Diversity Patch: If you're using the NPC Diversity Pack mod, you WILL have to install this option AFTER the main mod. 3) RC-K1CP Addon: RC-K1CP restored an Ithorian Miner to Anchorhead, this mod is OPTIONAL but if you want to use it you HAVE to have RC-K1CP installed BEFORE installing Czerka Redux. 4) Business Attire Addon: This option expands the Rodians modified by JC's Czerka: Business Attire for K1, this mod is OPTIONAL but if you want to use it you HAVE to have JC's Czerka: Business Attire for K1 installed BEFORE installing Czerka Redux. 5) Women of Czerka: Adds female Czerka Employees where possible. Completely optional but must be installed AFTER the main mod. Description: Czerka Redux is a union of various Czerka related textures into a single mod which aims to enhance the Czerka Corporation in Kotor 1. The Czerka Muscle Suit, Czerka Technician and Mining Suits from BOSSR have been added with the latter two being given to the Miner and Technician NPCs of Kotor. For any of my other mods which edits the Czerka Miners, those mods are compatible with Czerka Redux... meaning players who use Duros: Armed & Ready are able to use Czerka Redux and have the Duros Miners visibly wear BOSSR Czerka Mining Suits. The Czerka Combat Suit in RedRob41's Modder's Resource has also been added to the majority of Czerka's Security personnel. All the new Czerka items can be found and obtained in normal gameplay. The NPC textures from the K1 Enhancement Project have also been added, giving new meaning to the Czerka NPCs and their in-game profession. The green Czerka Officer texture from the Czerka Commander has been repurposed as a standard Czerka Officer profession skin whilst former Czerka Commanders now use armor. The male Czerka texture from JC's Fashion Line B: Commoner Clothing has been added for male Czerka NPCs and was used to convert new female Czerka clothing from K1EP into a new male variant exclusive to Czerka Redux. You'll also see new NPC variants from Czerka themed battle droids to Czerka Protocol Droids using B4-D4's texture. This mod also provides addons for other Czerka related mod, if you have JC's Czerka: Business Attire for K1 installed you can install the optional Business Attire Addon and get unique textures for JC's Rodians. If you use RC-K1CP, you can also install the RC-K1CP Addon to give the restored Ithorian Miner a new Business Attire inspired appearance. And of course, female Czerka NPCs can be added via the Women of Czerka option which uses DarthParametric's Female Czerka Officer's Uniform and has custom AI generated VO. Known Bugs: This mod shouldn't have any bugs but if there are please report them to me on Deadlystream. Incompatibilities: To be added! Permissions: Do NOT claim credit for this mod and do not use my assets from this mod without my permission. BOSSR assets are free to use as confirmed by SilverEdge9. RedRob41's Czerka Combat Suit textures are free to use as they are a modder's resource. K1 Enhancement Pack assets are free to use as they are a modder's resource. JC's Czerka: Business Attire for K1 is free to use as long as you credit JCarter426. DarthParametric's Female Czerka Officer's Uniform is free to use as it is a modder's resource. JC's Fashion Line B: Commoner Clothing cannot be used without permission from JCarter426. Thanks to: SilverEdge9: For BOSSR Czerka Assets! RedRob41: For the Combat Suit Modder's Resource! SpaceAlex: For the K1EP Czerka Assets! JCarter426: For granting me permission to use the male Czerka commoner texture from JC's Fashion Line B and for making Czerka Business Attire! DarthParametric: For making the Female Czerka Officer's Uniform modder's resource! ElevenLabs Website: For the custom AI VO service! Bioware: For such an amazing game! Fred Tetra: For Kotor Tool! th3w1zard1: For HoloPatcher! Everyone who downloads the mod! Legal: THIS MODIFICATION IS NOT SUPPORTED BY BIOWARE/OBSIDIAN ENTERTAINMENT, LUCASARTS, DISNEY OR ANY LICENSERS/SPONSORS OF THE MENTIONED COMPANIES. USE OF THIS FILE IS AT YOUR OWN RISK AND THE ABOVE-MENTIONED COMPANIES OR THE AUTHOR IS NOT RESPONSIBLE FOR ANY DAMAGE CAUSED TO YOUR COMPUTER FOR THE USAGE OF THIS FILE.1 point -
![More information about "[K1] Swoop platform model repairs"](https://deadlystream.com/downloads/screens/monthly_2025_04/370802232_Sanstitre1.thumb.jpg.da452fd1dbb89c2b1cd7762f60385ead.jpg)
Version 1.6
5,132 downloads
Swoop platform models repairs =============== By ZobiZob ------------------ Description There are notoriously some problems with most of the levels geometry, models and textures. They are not ultra noticeable, but once you see it, you can't unsee it. As i am working on a custom module using the swoop platform geometry, i decided to fix some of these problems, and also add numerous details like venting effects, animated light and distant swoop riders with upscaled textures for their bikes + different colors for riders. The full pack also displays your swoop in the module. Fixed music changes from 1.5 with version 1.6. Installation 3 options, either the full pack with the swoop you use during the race displayed, no swoop bike displayed and also an option without the doors. 1) Use the holopatcher.exe included and you're ready to go. If you're not satisfied with an option or the other, you can always come back and reinstall the desired option. Known Bugs and Incompatibilities Everything should be fine. If you replace the m03af.git file after installing the doors that i added in the distance will disappear. The upscaled textures only affect the swoop bikers and won't change the textures for Niktos/swoopgang creatures. Permissions You are free to incorporate this into any of your work without asking, just credit me and shiningredHD for the upscaled textures (swoop riders, swoop bikes). Acknowledgements All materials and copyrights belong to LucasArts, and Bioware. Upscaled textures from ShiningRedHD. I own none of the materials, and I'm not making any money out of this mod. This mod is not to be distributed for profit, either.1 point -
Really helped to improve the atmosphere in this section! It really felt like a lived-in area.1 point
-
![More information about "[K1] K2 swoops to K1"](https://deadlystream.com/downloads/screens/monthly_2025_04/swoop1.thumb.jpg.4f3de38f4f76729d2dab6fbab9857034.jpg)
Version 1.0.0
5,411 downloads
Swoops from K2 to K1 =============== By ZobiZob ------------------ Description A small mod that changes your swoop model while racing. Either you keep the vanilla model, and it only adds a shield effect when you take damage (extracted from K2), or you can completely replace the vanilla K1 model with the one from K2 and all its animations. You have the choice between the 3 skins that there are in TSL (Classic, black, beige). There is a folder with the screenshots to see the K2 model and the different skins. Installation 1) Use Holopatcher.exe and choose one of the installation option. If you are not satisfied, you can restart the launcher and chose another option. Known Bugs and Incompatibilities Everything should be fine as long as you do not replace the model file from the swoop with something else of course. The model on the ebon hawk will still be the vanilla one. Permissions You are free to incorporate this into any of your work without asking, just credit me. Acknowledgements All materials and copyrights belong to LucasArts, Obsidian and Bioware. This mod is not to be distributed for profit, either.1 point -
Adding the K2 animation gives the races a little more "oomph!". Love this!1 point
-
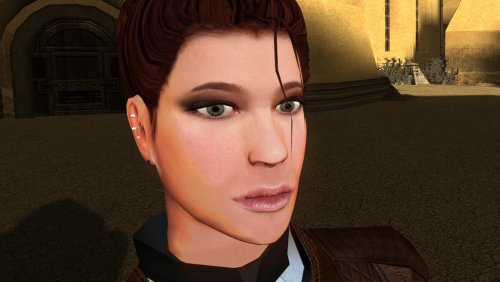
Version 1.0.0
70 downloads
The mod replaces the PFHC02 model and textures. To Install 1. Download: PFHC02 2. Copy all files to the Knights of the Old republic's Override folder. (Example location - C:\Program Files (x86)\Steam\steamapps\common\swkotor\Override) 3. When/if prompted to overwrite files, press okay. 4. If you like the mod; leave a comment or endorse! (It would be much appreciated) Made with love.1 point -
Really amazing job on making the hair-meshes and bone structure so much more detailed. Is that your take on TCS's Bastila in the preview where Revan is ogling?1 point
-
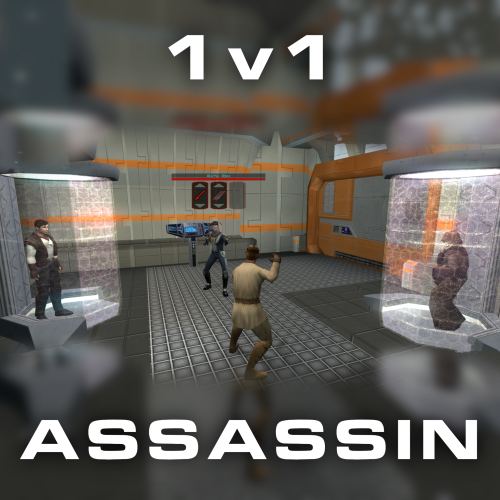
Version 1.0.0
43 downloads
Citadel Station assassin no longer frees your companions, for a 3v1 fight. Also includes a fix from TSLRCM and a fix for TSF agents disappearing before the screen fades to black. Copy 'a_grenn_cut.ncs' to your games 'override' directory.1 point -
1 point
-
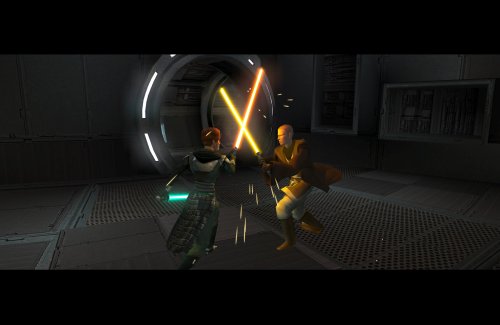
Version 1.0.1
213 downloads
Expands the mechanics of training your Jedi companions in TSLRCM. SUMMARY TSLRCM adds the ability to teach your Jedi party members a select few powers, feats, and forms. It’s a cool concept that adds to the feeling of training your companions, but it was never very fleshed out. As is, there’s a very limited pool of abilities to teach, no real player choice in what to teach, and no depiction of the training aside from a fade to black. This isn’t a fault of the TSLRCM team, there just wasn’t much to restore. The mod aims to expand the whole training mechanic to make it more interesting and immersive. Summary of the main changes of this mod: - You can now choose which abilities to teach your companions. - The pool of teachable powers, feats and forms has been significantly expanded. - Every teachable ability now includes a brief cutscene depicting the training. - Party members can learn 1 power or feat and 1 form at a time and must level up before learning more. - Different prestige classes can teach different abilities. JM/SL can teach a wider selection of powers, JWM/SM can teach more combat feats, and JW/SA can teach a mix of both. - Handmaiden and Disciple can now be trained like other Jedi companions. DETAILS INSTALLATION TSLRCM required. Ensure TSLRCM is installed first before installing this mod. To install, run HoloPatcher.exe. Select the main install option and run. Unaltered copies of any modified files will be placed inside the "backup" folder in the location of HoloPatcher.exe. If you have PartySwap installed, run the included compatibility patch. Ensure both PartySwap and the main mod have been installed first before installing this patch. UNINSTALLATION Remove the following files from override: If any files were created inside the backup folder, move them to override. COMPATIBILITY Incompatible with any mods that hard overwrite the dlg files for Atton, Bao-Dur, Disciple, Handmaiden, Mira, or Visas. Compatible with PartySwap by Darth Tyren & Leilukin using the included compatibility patch. Compatible with Visas Marr and Female Exile Romance by Leilukin. The following mods appear compatible but have not been extensively tested: Handmaiden and Female Exile - Disciple and Male Exile Romance by Leilukin Atton Rand and Male Exile Romance by Leilukin Not compatible with Mira Romance Mod by JediArchivist. Soft conflict with Train the Handmaiden by jc2 as this mod also allows training Handmaiden. BUGS Minor bug where Handmaiden doesn’t restart her idle animation after learning Burst of Speed, for some reason. Talking to her fixes it. No other bugs that I’m aware of. Please report any. PERMISSIONS You are free to use and edit this mod’s dlg files if needed to make a compatibility patch for another mod. However, please ask permission before reuploading or modifying the files for any other reason. Do not reupload any files from the PartySwap patch without permission from the author. CREDITS offthegridmorty zbyl2, DarthStoney, Hassat Hunter, VarsityPuppet & contributors - TSLRCM dlg files DarthTyren, Leilukin - PartySwap dlg files HoloPatcher - Cortisol, th3w1zard1 TSLPatcher - stoffe, Fair Strides KOTOR Tool - Fred Tetra K-GFF - tk102 AniCam - JdNoa Reone Toolkit Lip Composer - seedhartha Holocron Toolset - Cortisol, th3w1zard11 point -
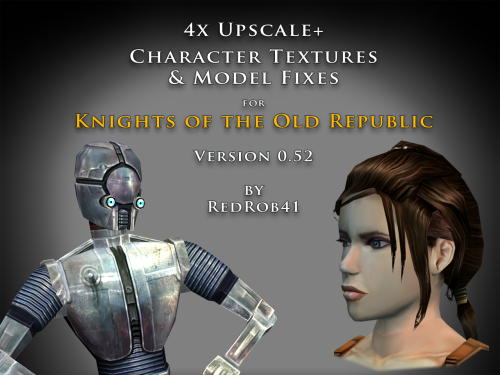
Version 0.52.0
6,489 downloads
================================================================ IF YOU ARE EVER IN ANY DOUBT ABOUT INSTALLING ANY MODS, PLEASE REMEMBER TO ALWAYS BACKUP YOUR FILES BEFORE INSTALLATION, JUST IN CASE. ================================================================ Description: This mod is more than just a simple process of running all the character textures through an A.I. upscaling program. The purpose is to increase the size and fidelity of the character textures while maintaining the painterly style of the original game artists. This mod does not attempt to create photo realistic textures or add extra detail (like zippers, clothing stitches, fabric patterns, skin pores, etc) that are not already part of the existing style. This mod also fixes many of the UVW mapping errors, lighting errors, and some XYZ errors that the original model .mdl & .mdx files may have had. The process followed is generally: run texture files through A.I. upscaling program multiple times using different settings. Some settings result in "crunchy" textures (high contrast, sharp edges). Some result in "soft" textures (smooth gradients, lower contrast, blurry edges). Some result in better straight/parallel lines. Early tests used Vance AI; Deep Image; ImageUpscaler; or Let's Enhance. Eventually Topaz Labs' Gigapixel AI was chosen and used on the majority of textures. combine textures in multi layered Photoshop file, using layer masks to isolate the best parts of each upscaled image. This allows for some portions to be smooth (like skin, glass, metal or tubing), others to be sharp (like burlap, skin folds, hair, scratches, etc). touch up by manually painting away errors (such as jaggies due to original low resolution jpeg compression). manually recolor areas that the original artists missed (like commoner clothes where the pants seat do not match the pant leg; or player armors where pouches are inconsistent between male & female; etc). strategically add painted detail (such as highlights and shadows along the shoulders and neck of Player Character soldier's underwear; adding glove details to armors F, G, H, I, J; etc). painting personal choices (like changing P_BastilaBA02 to have different pants and remove wrist & neck restraints than P_BastilaBAS01 slave outfit). recreating entire textures (such as Player Character male scoundrel dark side underwear PMBASD01). fix the models' UVW maps to reduce some texture stretching (like collar of TSL robes I); adjust areas that are poorly mapped to the wrong locations or too large/small (such as PFBD collar); fix edge seams from one area to another; close gaps (like Mission's arms). manually fix texture seams by copying small areas of the image from one area to another; stretching and scaling them. This should result in model seams that are hidden or difficult to notice. sometimes the Alpha 1 channel is upscaled, but usually it is recreated directly from the final HD color texture. personal choice to add punchthrough transparency to the Alpha 1 channels of some female head models' eyelashes (like P_BastilaH04). recreate the Normal map (for bumpyshiny effects) from the final HD color texture. These work best when saved as .tpc format For most models, they only needed to be manipulated in 3DS Max, exported, and then run through Taina's replacer. This is usually sufficient to fix any XYZ and/or UVW coordinates. I prefer Taina's replacer method so that the model retains its smoothing groups data. For some models (like C_RancorS or C_Terantanak), Taina's won't work, so for those files, I had to resort to manually hex editing the binary .mdl & .mdx files. This is a much more labourious process, but in the end I got them to work. A few models required fixing the model weights of individual verticies. This was done to reduce portions of the model clipping through other parts in different animations. Again, this was done by manually hex editing. For many head models, the UVW coordinates for the tongue and inside of mouth may be moved significantly, especially for the KotOR heads. This is because the originals often map the tongue to a single pixel located in the lips area, which results in almost no detail. By moving the UVW to a free area of the texture, there may be room for painting a detailed tongue. For the party members that have specific underwear textures and basic clothing textures, there has been an effort to make any skin areas (like hands & arms) match between them. Usually the hand area from the underwear texture is copied to the hand area of the clothes texture. This creates more consistency of the party characters' appearance. For low resolution versions of models (like C_Gammorean_Low, C_Protocol_Low, N_Swoopgang_low) or placeables (such as PLC_EndPlA, PLC_RakatCrp, Stunt_WarDrd01) the original textures were not simply upscaled. Instead, the new versions were actually taken from similar high resolution versions and scaled down. Sometimes the textures were rebuilt from parts of other higher resolution images, with some touch up painting. Included is a spreadsheet labelled "KotOR upscale completed list v0_52.xlsx" which has more detailed information as to what files were changed, and in what ways. As of this update, 52.71% of the texture files that I intend to upscale have been completed. As such, this mod should be considered a beta test. The percentage is calculated for both games together, however the mod is released with files separated for K1 & TSL. The spreadsheet was created with Google Sheets and exported as .xlsx, so hopefully the formatting remains correct. I have also attached a copy of the spreadsheet to this mod thread. There will be three versions of this mod to choose to download: 4x .tga version. Highest resolution, the typical texture is now 2048x2048 pixels which = 16MB. This version is a total 5.2GB, hopefully it isn't too large or cause problems for some PCs. This version is also the best choice to use as a modder's resource. 4x .tpc version. Created by running full size .tgas through tga2tpc program which compresses a 2048x2048 pixel file to 5.5MB. This version is a total of 1.8GB, so it should be easier on PC systems, with no noticeable loss of visual fidelity. 2x .tpc version. Created by reducing full size .tgas by half in Photoshop, then running them through tga2tpc which further compresses them to 1.4MB. This version is a total of 530MB, which should be much easier on PC systems. All versions include the same .mdl & .mdx files. I have tested the .tga version exclusively, but have not tested the .tpc versions in-game. Please let me know if there are any issues. Most of the screenshots have been taken in TSL, because I find that it renders the characters better and has higher resolution screen grabs. My computer doesn't seem to render some of the CM shader effects properly (especially the bumpyshinytexture CM_SpecMap always seems too strong on my computer). I would appreciate any in-game screen shots that you take of characters like Hutts, Rakghouls, Rakata, or Selkath so that I can compare how other computers render their shader. ================================================================ Compatiblity: For best results, the model and texture files included with this mod should be used together. In most cases, the models can be mixed and matched with textures from other mods, but results will vary. For instance, the other textures won't be as perfect along the seams. Some other photo realistic HD texture mods may have been created using the original model's UVW layout, which will not perfectly line up with this mod's corrected UVW maps. Conflicts may also occur if there is another mod uses a .tpc file with the same name as one of this mod's .tga files (or vice versa if you install one of the .tpc versions). I would suggest installing other large mods (such as "KotOR 1 Restoration" or "KOTOR 1 Community Patch") first, then this one. ================================================================ Installation: Copy and paste the desired model and texture files into KotOR's Override folder. You may need to over write any existing files, so always have a backup. An effort was made that these textures and models require no 2da editing. The folder marked "Reference Normal Map" is not required to be copied to the Override forlder. These .tga files are simply a modders' resource. The normal maps seem to work best if they are saved in .tpc format. The "Copy contents to Override" folder should already have .tpc files in it for the normal maps. ================================================================ Uninstall: Delete unwanted files from the game's Override folder. ================================================================ Thanks for modding tools: KOTOR Tool – Fred Tetra mdlops (used version 7a2) - cchargin, JdNoa NWMax – Joco Replacer - Taina tga2tpc - ndix UR KotOR/KotOR2 Savegame Editor v3.3.2 - tk102, Fair Strides Hex-editor XVI32 2.55 - Christian Maas ================================================================ Permission: Consider this as a modder's resource. I give permission to any modder to use these files as a base for their own creations; as long as their creation remains free to use (not for profit); and credit is given to me as the source of any modded files. Please include a statement that specifies this mod's title and version. The original credit of course goes to the talented artists who worked on the original games for BioWare and Obsidian. Without their work, none of this would have been possible. I have tried my best to maintain the artistic style that they created long ago. This mod may NOT be uploaded or redistributed, in whole or in part, to any mod hosting site without my explicit permission. As always, this mod is free for your non-commercial/personal use. There should never be a requirement to pay for it. If you like the work I do, and would like to encourage me to create more, you can always donate to my tip jar at https://buymeacoffee.com/redrob416 where the funds collected will be used towards additional graphics tools and software. ================================================================ THIS MODIFICATION IS PROVIDED AS-IS AND IS NOT SUPPORTED BY BIOWARE CORP/OBSIDIAN ENTERTAINMENT OR LUCASARTS OR ANY LICENSERS/SPONSORS OF THE AFOREMENTIONED COMPANIES. USE OF THIS FILE IS AT YOUR OWN RISK AND THE AFOREMENTIONED COMPANIES OR THE AUTHORS ARE NOT RESPONSIBLE FOR ANY DAMAGE CAUSED TO YOUR COMPUTER FOR THE USAGE OF THIS FILE. KotOR upscale completed list v0_52.xlsx1 point -
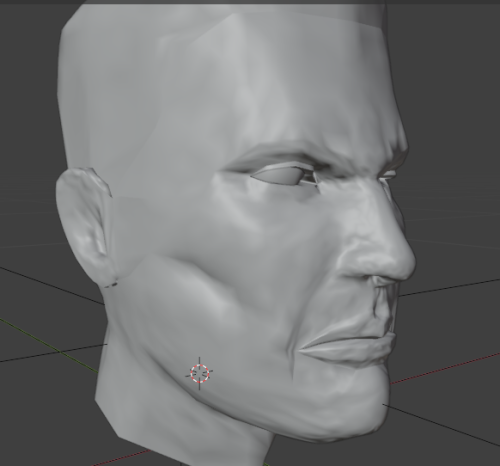
Version 1.0.0
146 downloads
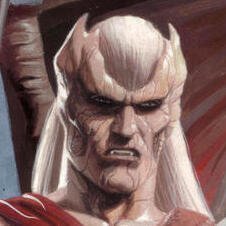
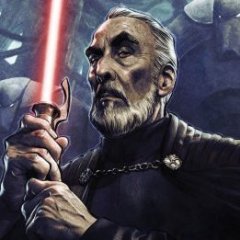
I remeshed Canderous and retextured him i inspired myself with this artwork. I uploaded 2 versions of my textures. one more like the original textures and the other more like the image. I did not remade him AS the image but i was inspired.1 point -

Version 2.0.0
232 downloads
This mod allows you to buy KotOR2 items from Greeta Holda and Yuka Laka on Tatooine. The mod won't work if you already visited the Czerka Office or the Droid Shop, you need to load an earlier savegame.1 point -
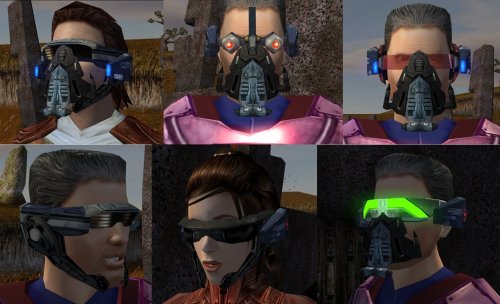 PARFAIT ! Moi qui me disais que le masque de Tulak Hord était ridicule dans le jeu vanilla, je vais enfin pouvoir obtenir quelque chose qui ressemble vraiment au véritable artéfact du plus grand duelliste Sith de tous les temps !!!1 point
 -

Version 1.61
47,095 downloads
This mod attempts to address some of the issues with holograms in TSL. In the vanilla game, the majority of holograms have things like eyeballs and teeth being visible through the head. This is caused by the way the game handles transparency, in conjunction with the order in which it renders the individual meshes that a model is comprised of. By changing the hierarchy of the meshes within these models, certain elements can be occluded, resulting in less cases of “bug-eyed” holograms. This is not a perfect solution however. Because meshes do not self-occlude, visual glitches still remain during certain animations and camera angles, but this is likely the best that can be done without being able to make alterations the game engine itself. Additionally, because their interactions are primarily via hologram, this mod includes a revised version of Jinger/Kreia’s Admiralty Mod, which changes the appearance of Admirals Cede and Onasi to give them outfits more fitting of their rank. And while I was at it, I also revised certain appearances with head swaps and custom model merges (hair, etc.) to try and reduce overuse of the same heads and make NPCs a little more distinct. N.B.: TSLRCM is a requirement for this mod. It is not compatible with the vanilla version of the game. Specific Changes: Ebon Hawk: Bastila hologram (Light Side male Revan) Ebon Hawk: Bastila hologram (Dark Side male Revan) Ebon Hawk: Carth hologram (Dark Side female Revan) Ebon Hawk: Carth (Admiral Onasi) hologram (Light Side female Revan) Ebon Hawk: Canderous hologram Ebon Hawk: Jedi Master Atris hologram Ebon Hawk: Jedi Master Kavar hologram Ebon Hawk: Jedi Master Vash hologram Ebon Hawk: Jedi Master Vrook hologram Ebon Hawk: Jedi Master Zez-Kai Ell hologram Peragus: Administration Officer hologram Peragus: Dock Officer hologram Peragus: Maintenance Officer hologram Peragus: Medical Officer hologram Peragus: Security Officer hologram Peragus: Coorta hologram Peragus: Coorta thug #1 hologram Peragus: Coorta thug #2 hologram Harbinger: Republic Captain hologram Harbinger: Republic Navigation Officer hologram Harbinger: Republic Doctor/Med Officer hologram Harbinger: Republic Soldier hologram (partial) Harbinger: Admiral Cede hologram Harbinger: Admiral Onasi hologram Telos: Admiral Cede hologram Telos: Admiral Onasi hologram Telos: Admiral Onasi physical appearance Dantooine: Jedi Master Vandar hologram Dantooine: Jedi Master Vrook hologram Dantooine: Admiral Cede hologram Dantooine: Admiral Onasi hologram Nar Shaddaa (Goto's Yacht): Goto hologram/projector VFX Korriban: Bastila hologram (Dark Side male Revan) Korriban: Jedi Master Vash hologram (M4-78) Korriban: Jedi Kaah hologram (M4-78) Malachor V: Bao-Dur hologram Known Issues: There are still visual artefacts from overlapping sections of individual meshes, particularly noticeable in the case of the neck being visible through the jaw which occurs with certain animations and/or camera angles. This is not addressable by model edits. The problem is the way in which the engine renders overlapping transparency within a single mesh. The Republic soldier on the Harbinger has been replaced as of v1.3, however the helmet is still somewhat problematic. I'm not sure that is addressable without completely remodelling it, and perhaps not even then given its shape. Hair planes with alpha transparency don't function as intended as holograms, so typically look pretty terrible (e.g. Peragus Maintenance Officer). There's not much that can be done about those, other than completely remodelling the hair to rely on geometry rather than texture transparency. Dangly meshes used for hair bangs tend to look conspicuous due the requirement of placing them under the head mesh in the hierarchy. Particularly egregious examples may warrant having these elements being turned into skinned meshes in a future update. No doubt there are still a few holograms that need attention that I have missed. If anyone can provide a list of such cases, I may address it in a future update. Note that some holograms look fine in their vanilla state. I am only interested in hearing about ones with issues like those already addressed in this mod ("bug eyes", etc.). Compatibility: I've edited UTCs to point to custom appearance.2da entries, so the mod should be compatible with any other mod that only edits the vanilla 2DA entries. However, it will not be compatible with any mod that forcibly overwrites the module files this mod edits, that outright replaces the UTCs in question, or that also edits the UTC appearance values. Install any such mods first, then this mod afterwards. To make it clear, do not use this in conjunction with Jinger/Kreia’s Admiralty Mod or Darth Hayze's TSLRCM Compatibility Patch for said mod. They are superseded by this mod. A separate patch is provided for M4-78 to handle its version of the Korriban academy module. After installing the main content of the mod, run the installer a second time and select the "Additional Patch" option from the drop down menu. An optional patch has been added to give the robe-wearing holograms unique named textures for use with robe mods that use the same filenames as vanilla robe textures. This will prevent texture issues (but note that they will still be wearing the vanilla-style robes). Acknowledgements: Thanks to Fair Strides for creating a customised version of TSLPatcher to handle filename clashes, which made this mod practical. Thanks to Jinger/Kreia for permission to release a revised version of the Admiralty mod's content, the textures from which (with modification) are used in this mod. Thanks to zbyl2 for permission to redistribute TSLRCM's module files to ensure compatibility for Steam Workshop users Thanks to JCarter426 for permission to use the female Republic soldier body model from "JC's Republic Soldier Fix for K2" and his adjusted N_CommM04 texture from "JC's Minor Fixes for K2". Thanks to bead-v for KOTORMax and MDLEdit, and ndix UR for MDLOps 2K18 Edition, all of which were required at various points to get this to work. Thanks to ndix UR for TGA2TPC Thanks to Malkior for providing the impetus for the mod via this thread. Thanks to L0ki194 for offering input on the case of the Harbinger's "Doctor" vs "Medical Officer".1 point -

Version 1.0.0
16,127 downloads
Compatability Note: If you're using TSLRCM, Extended Enclave, or M4-78 EP mods, please install the optional Patch file matching your resolution after installing those other mods. The cutscenes were upscaled using Topaz Gigapixel AI, and interpolated to 60fps using SVP Pro 4. Black bars are used to maintain the aspect ratio of the content while bringing the videos to 16:9 overall. TO INSTALL: Make a backup of your "Movies" folder, which is in your main game directory. Download the main pack(s) that matches the resolution you play at. 1440p and 2160p are each broken into three packs. If using TSLRCM, download the matching Patch file as well. Extract/unzip the pack(s) you downloaded. Replace everything in your Movies folder with the extracted files. Do not place them in your Override folder. If you're using Aspyr's (Steam) version of the game, these should work "out of the box" without any tinkering. If you're using a different version, you can use UniWS to patch your game to the correct resolution. If this doesn't work on your version for whatever reason, you may need to use a hex editor to change some values in your game executable to get them to play correctly. Please refer to the following guide on how to do this, skipping the parts about upscaling the cutscenes: https://deadlystream.com/topic/4631-how-to-force-kotor-i-iis-bik-movies-to-play-in-any-resolution/ NOTE: Many cutscenes in KotOR 2 are in-engine recordings. These have be re-recorded at 4k60 rather than upscaled.1 point -
Version 1.0.0
186 downloads
Changes the Mask of Tulak Hord to look like the Sith Mask, which in my opinion was the intended look for this item, since the 'Model Variation' number of the item only differs by 1 from that of the Sith Mask. (If you already visited the Tomb of Tulak Hord the mod won't work.)1 point -
 Not a problem.1 point
 -
1 point
-
Sith Holocron asked me to repost my old 2013 tutorial on this subject from LucasForums here, which you may have seen before, either in its original form or in the helpful video forms made by Xuul (if you have difficulty understanding any of the steps here, I recommend seeking those videos out). This method was originally discovered and posted for KotOR II, but works for KotOR I as well. Here is the guide, with some minor changes: --- The ability to run the KotOR games in custom resolutions has existed for many years now. Personally, I have patched KotOR I and II to run in a 1920x1080 widescreen resolution (and KotOR II now supports higher resolutions by default after the Aspyr patch), and many other people have done the same, with various resolutions. However, despite these patches, no matter what resolution the game is patched to run in, the games' .bik movies do not run in the patched resolution. They merely upscale to fit the width of the screen. For KotOR II, which was the original subject of this guide, the vanilla non-HQ movies play in an awful 640x272 and upscale from there, maintaining the 640x272 aspect ratio of ~2.353:1 until they are the width of the screen, with ugly black bars on the top and bottom of the movies. In late 2012, in this LucasForums thread, I pieced together the method to getting KotOR II to run the .bik movies in different resolutions -- in my case, 1920x1080. This thread will explain that method, applied to both games, and should allow anyone to force the games to run the movies in the same resolution that their game is patched to. WARNING: This modification requires the hex editing of KotOR I/II's executable. Mistakes could cause it to stop working, requiring you to redownload the file if you do not know how to fix the problem yourself. With Steam, this is an easy thing to do; on a physical copy of the game, it would require a full reinstallation. Remember to back up any and all files that you will be altering in case something goes wrong. Things you'll need: The KotOR I/II no-CD patch -- If you've already patched your game to run in a custom resolution, then you've already gotten the no-CD patch, because the normal executable isn't editable. I can't link to the no-CD patches since they are technically illegal, but they are easily found via Google. This should not be required for the GOG versions of the games. In the case of KotOR II, you should also grab the KotOR II HQ movies patch -- this is included by default with the Steam and GOG versions, so most people shouldn't need to worry about this. If you are playing with a physical copy, then you'll need to find a mirror of the patch online somewhere. There are 6 parts in total. RAD Video Tools -- this program is used to output the HQ movies to your desired resolution. **** The latest update of RAD Video Tools no longer works with kotor movies. Users will need to download version RADTools_1200e located here HxD Hex Editor -- You will need a hex editor to edit the games' executables. Any will work, but HxD is the one I used, and it's free. Download here. Now, the instructions. ----------------------------------------------------------------------------------------------------- Step 1: First, make sure you've backed up everything that you'll be editing. I suggest creating a folder entitled "Backup" inside your KotOR I/II directory, in which you can put the game's executable and any other important files (such as the original movie files), although the executable is really the only one that is at risk of being screwed up by a mistake. If you have the Steam version, you can just use the "verify integrity of game cache" function to redownload the original version(s) of any broken file(s). Step 2: Create a folder entitled something like "Outputted Movies" and put it somewhere like your desktop. It doesn't really matter where; the desktop is probably the best place. You'll be deleting it once you're finished, as it will no longer be needed. Step 3: KotOR II users should install the official KotOR II HQ movies patch. This will overwrite many of the files in your \Movies directory with higher quality ones. Remember that this is not necessary on the Steam version. Step 4: Get the no-CD patch for your game (I can't link here as stated above, so use Google) and, if necessary, patch your game to run in whatever resolution you want. Instructions on how to do that can be found online and will not be given here so as to reduce the size of this post. I'm sure most people reading this have already done this step eons ago, anyways. Step 5: If you haven't already, download and install the RAD Video Tools linked above. Step 6a: Now, the fun stuff begins. You'll need to use RAD Video Tools to convert all of KotOR I/II's .bik movies to your desired resolution. Depending on the power of your computer, this can take a significant amount of time. It might be best to just do this step overnight, as the processing takes a while and is very resource-intensive, slowing your PC while in progress. If you are on an old/weak PC, this process could take too long to be worthwhile for you. I can't estimate how long it will take, as it will vary wildly based on the power of your PC. To convert the files, open RAD Video Tools and navigate to your KotOR I/II installation directory, and then open the Movies subfolder. Select all of the .bik movies. Step 6b: Now that you've selected all of the files, click "Bink it!" in the lower left corner of the RAD Video Tools window. A new window should open wherein you can select the output settings. Under "Browse," select the desktop folder we created earlier called "Outputted Movies." All of the converted movies will now be outputted there. Under "Input video settings," enter your desired resolutions. I, for example, put 1920 in the width boxes and 1080 in the height boxes. KotOR I users should make sure that the "Compress audio" option is checked and that lossiness is set to 0, otherwise the files will be rendered without sound (thanks milestails for noting this); KotOR II users can uncheck compress audio. Click "Bink" on the right-hand side. Step 7: Now you play the waiting game. Wait for the movies to be converted. Step 8: Once the movies have been outputted to your desktop folder (or wherever else), copy and paste them to your KotOR I/II's Movies folder (e.g. C:\Program Files (x86)\Steam\steamapps\common\Knights of the Old Republic II\Movies). Select yes when asked to overwrite. You can also backup the originals beforehand, if you want. Once all the files are in place, you can delete the "Outputted Movies" folder from your desktop; it has served its purpose. Step 9: Install HxD (or any hex editor, really) and open the game's executable (swkotor.exe or swkotor2.exe), located in your KotOR I/II installation directory. Here comes the only complex part of these instructions. You will need to find the following hex values (in HxD, make sure to change the search datatype from Text-string to Hex-values) and edit them to match your desired resolution. Change the bolded resolution pairs to your desired widescreen resolution. Remember to flip the order of the hexadecimal values. For example, 1920 is 0x780 in hexadecimal. I would flip the order (ignoring the x) and enter 1920 as "8007." 1080 is 0x438, and thus, it would be entered as "3804." For KotOR II: TSL, the hex values you must edit are: For KotOR I, the hex values you must edit are (thanks to Kainzorus Prime for finding these hex values online): Note: If the game minimizes during cinematics, this may be fixed by setting the game's executable to run in compatibility mode for Windows XP with Service Pack 3. If you are having trouble finding the coordinates, it may be because the UniWS patcher already edited the hex coordinates for you. You can verify this by searching for what you plan on changing the coordinates to (instead of the original pre-patch values); if you find a match, that means the editing has already been done by the patcher. Step 10: Most people have probably already done this, but if you haven't, it's vital: open the file swkotor.ini/swkotor2.ini with Notepad (or any text editor) in your KotOR I/II directory and change the width and height under [Graphics Options] (and [Display Options] for KotOR II) to whatever your custom resolution is. ----------------------------------------------------------------------------------------------------- That's it! Assuming everything worked correctly, your KotOR I/II movies should now play full-screen, with no ugly black bars on the top and bottom. Enjoy the fixed movies, and PM me if you have any questions or anything that could be added to this guide. I will update this thread in the future to correct any mistakes or to add any additional information.1 point
-
Version 1.0.0
1,053 downloads
KMRP - KOTOR MODERN RESTORATION PATCH Modern resolutions, properly scaled UI, engine fixes and restored interface behaviour for KOTOR 1 48 resolutions | 800x600 to 15360x8640 | 4:3 | 16:10 | 16:9 | 21:9 | 32:9 WHAT IS KMRP? Vanilla KOTOR was built around fixed pixel sizes and interface layouts originally designed for resolutions such as 640x480. On modern displays this causes tiny text, overlapping list entries, undersized icons, broken map scaling and other interface problems. KMRP fixes these problems in the game engine itself. It supports 48 resolutions from 800x600 up to 15360x8640 across 4:3, 16:10, 16:9, 21:9 and 32:9. Several of these fixes require changes to swkotor.exe because the affected values are hardcoded inside the engine and cannot be reached through GUI or 2DA files alone. WHAT IT FIXES Readable text with properly scaled list rows Inventory, Abilities and Store icons and rows scale correctly Item stack counts remain visible with larger fonts Long item description crash fixed Description text no longer runs under the scrollbar Area map fills its frame Fog of war covers the complete map Map marker clicks line up correctly 250 misplaced map notes can be corrected using Derslok's fixes HUD minimap is zoomed correctly again Dialogue letterboxing, tutorial popups and interface artwork follow the selected resolution INSTALLATION Install other content mods first, such as K1CP or K1R, then install KMRP. Download the standard KOTOR Editable Executable Run KMRP - KOTOR Modern Restoration Patch.exe. Select your resolution. Open Advanced Settings if you want to change optional components. Click Start Patching. Launch KOTOR. To change resolution later, use Restore Original first, then patch again. KMRP backs up the executable, INI and every Override file it modifies before patching. EXE PATCHING KMRP modifies swkotor.exe because several interface values and bugs are hardcoded inside the game engine. Before writing anything, KMRP verifies the executable by SHA-256 and file size. Unknown executables are rejected. KMRP modifies 893 bytes of the 4,042,752-byte executable, around 0.022%, and adds ten 4KB code sections where additional space is required. Every executable patch is documented in the GitHub repository. KMRP is not a launcher and nothing stays running in the background. The only exception is the optional Modern Driver Compatibility component, which places two files beside the executable. If you do not want your executable modified, do not install KMRP. INCLUDED COMPONENTS K1 Modern Driver Compatibility 1.2.0 by Synchro Optional. Restores lighting, reflections, fog, soft shadows and correct grass rendering on modern hardware. K1 Area Map Fixes by Derslok Optional. Corrects 250 misplaced map-note positions. Party Portraits by MadDerp Bundled with permission. KOTOR 1 HD Icon Pack 1.0 by JackInTheBox Bundled with permission. COMPATIBILITY Tested with: KOTOR 1 Community Patch 1.10.0 KOTOR 1 Restoration 1.2 K1CP replaces two icons also included in the HD Icon Pack. KMRP keeps the K1CP versions where applicable. DOWNLOADS GitHub Releases https://github.com/RayesDiyab/KMRP-KOTOR-Modern-Restoration-Patch/releases Nexus Mods https://www.nexusmods.com/kotor/mods/1879 Deadly Stream Available on this page SOURCE AND DOCUMENTATION Full source code, executable patch documentation and reverse-engineering notes: https://github.com/RayesDiyab/KMRP-KOTOR-Modern-Restoration-Patch CREDITS ndix UR KOTOR High Resolution Menus 1.5 Synchro K1 Modern Driver Compatibility and published area-map research Derslok K1 Area Map Fixes MadDerp Party Portraits JackInTheBox KOTOR 1 HD Icon Pack RaymanGT HD menu and UI asset set LICENSE KMRP is licensed under GPL-3.0. Star Wars: Knights of the Old Republic © 2003 BioWare Corp. / LucasArts. KMRP is an unofficial community patch and is not affiliated with or endorsed by BioWare, LucasArts, Lucasfilm or Disney. You must own the game.0 points -

Version 1.2.2
118 downloads
Expands supported resolutions and scales all Menus/HUD. Install - Use with Kotor Patch Manager: https://github.com/LaneDibello/Kotor-Patch-Manager - Editable K1 Executable or GOG version required - Download and copy HD UI Menu Pack textures to override directory - Copy Scaled Kotor textures to override directory, overwrite if asked - Apply all "Scaled" patches with patch manager and then click launch. - Alt Tab Patch and Movie Patch are recommended. - Change resolution in game - please report any bugs Recommended - K1 Modern Driver Compatibility Patch Source: https://github.com/J0-o/ScaledKotorWidescreenPatch Roadmap: - trace and upscale the font to a higher resolution to improve clarity at resolutions above 1080p - adjust margins in items lists - increase default feat icon size0 points -
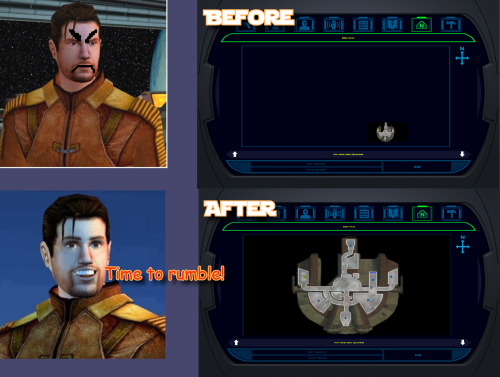 yo, are you still here? Can you please tell me what mod adds these restored maps? TSL Restored Content Mod? Any mod that does not modify game EXE file should work fine. I have updated the mod, it now will write a log fail even when it fails. Please do this: 1. Download the new version. 2. Unzip it in some folder, run 'Install.bat'. Let it get to an error message. 3. A last-run-log.txt should appear in the same folder where install.bat is. 4. Send this last-run-log.txt to me. You can send it to me in a private message. (The file contains the path to your game folder, so if that includes your Windows username, it'll be in there. Nothing else personal, just the name of user, else is data about exe file)0 points
 -
Hi! Do you have KOTOR Modern Restoration Patch installed? If yes, it already has map fixes this mod does and my map note fixes are part of that mod. If you don't use that mod, please tell me what mods you installed before this one.0 points
-
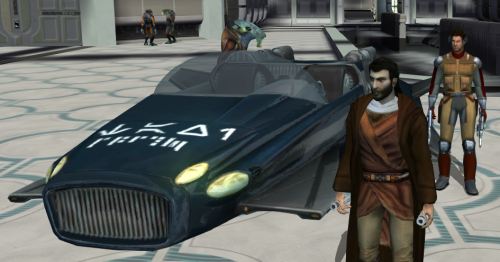 Worked great, no more running all over!0 points
 -
Hmm, the issue is still there, and I do have all set to high texture quality by default, maybe it's Windows 7 64bit issue along with AMD driver thing, since I can't turn on anti-aliasing in the game, I don't know to be sure, about second picture, yeah shading is the right word, the yellow is a bit bright than the rest of body, I think, yeah it's kind of hard to see, but the more I think about it, the more I think it's my old Windows 7 64bit along with AMD driver, if it doesn't show for on your PC specs, then it's issue on my side, anyhow it's not critical for me, I mean the mod itself is magnificent, I have seen Twi'leks mods for kotor, but this one takes the cake. Regardless thanks for your help.0 points
-

Version 1.0.1
3,717 downloads
Those of you familiar with Party Model Fixes by redrob41 know it is a cool mod that fixes up some of the game's models for your K1 party members. Cool enough that I figured it was time for a sequel -- we are going to do even more fixing up of our compatriots: Carth: His unique outfit has a holster which hung by some leather that was missing a texture on one side, rendering it invisible from certain angles. This fixes up that issue, alongside some bonus texture mapping fixes to his opposite pouch and jacket, including the collar fix that redrob41 worked on in their original mod. Zaalbar: Our wookiee friend had some hairs that went missing depending on the angle, again due to missing textures on the opposite sides of some geometry. This fixes that right up, alongside some other messy texture mapping for some of his fur. Jolee: Sometimes Jolee likes to just hang out in a swim suit, socks, and... some kind of bizarre ankle brace. I could not tell you what it does, but it is unlikely to be doing its job given that it disappears when viewed from the other side. This fixes up another classic case of one-sided texture syndrome, and makes some small improvements to texture mapping. Mission: Originally Mission was set to just use adult models when wearing various armors, likely due to time constraints. Therefore, I have made some alternate armor models more suitable for a kid to use. These are just edited versions of the vanilla models, with similar texture mapping, so it is all very vanilla-looking and compatible with any texture mods. This will add the new models to your game and set her appearance.2da row to use them. Her unique models in vanilla are fixed up less noticeably to reflect the changes, and include similar texture mapping fixes to the arms that redrob41 did. This mod is intended to be installed after redrob41's Party Model Fixes, but does not require it to work. All changes will be applied immediately, and do not require that you start a new game. Installation: Download the included .7z file and extract it anywhere of your choosing on your computer. You can unzip a .7z file with tools such as Archive Utility on MacOs, or by with free programs like PeaZip on Windows and Linux. Simply run this installer, directing it to the location of your main game folder with the executable. For Steam installations, this would be "Steam\steamapps\common\swkotor". The installer is an .exe file, which Windows can run natively. Mac and Linux users might consider checking out Cortisol's HoloPatcher -- a new tool that is meant as a cross-platform alternative to traditional KotOR mod installers. Alternatively, executable files can be run on Mac or Linux with programs using tools such as Wine. If you are having trouble with either of those options, I have included some instructions for manual installation in the download's "ReadMe" file. If you happened to have previously installed another mod which placed an appearance.2da file in your override folder, the installer will give you a warning reporting as much upon completion. This is of no concern -- so long as you get no other warnings or errors, the mod is installed correctly and ready-to-go. The mod will overwrite any conflicting model files (.mdl/.mdx) in your override folder, but not any appearance.2da file it finds there, merely edit the existing one. Be sure to back up anything you want to keep ahead of time. The Included Files list below contains all the files that will be installed to the override folder. Uninstallation: Delete all of the files listed below from your override folder. If you had an appearance.2da file in your override folder prior to installing, you can find a backup version in the mod's "backup" folder, which was automatically created during installation, and place that in your override. If you are unsure whether or not a previous mod had put that file there or not, it is better to make use of the backup. Included Files: Compatibility: This mod is fully compatible with any mod which does not replace any of the model files (.mdl/.mdx) listed above. Files that edit appearance.2da are compatible so long as they do not change Mission's armor model cells. If you intend to install Party Model Fixes by redrob41, I recommend doing so before installing this mod, or what you install here will be overwritten. Expect compatibility with most any texture/reskin mods -- so long as they do not replace models (.mdl/.mdx files) as well as textures, there should be no conflict. Acknowledgments: Thanks to seedhartha, NdixUR, Symmetric, and Purifier for making importing to Blender simple using KotORBlender, and Cortisol for making file extraction easy with the Holocron Toolset. I would also like to thank Stoffe and Fair Strides for making inter-mod compatibility infinitely more feasible with TSLPatcher. Shout-out to ConansHair for pointing out that weird bright spot on Zaalbar's rump. This modification is not supported by Obsidian Entertainment, Lucasarts, Disney or any licensers/sponsors thereof. Use of this modification is at your own risk and neither the aforementioned companies nor the author may be held responsible for any damages caused to your computer via this modification's usage.0 points










.thumb.png.d8b108d1620cfd7d697f7271e60714db.png)