Leaderboard


Popular Content
Showing content with the highest reputation since 04/05/2024 in Posts
-
4 pointsSpace for creativity) 1.mp4
-
4 pointsOf course. That's the entire reason I provided them. I have no intention of releasing them myself. Edit: @Dark Hope Not sure if this would be of interest to you, but I edited the tank glass UVs so that they no longer require a tiling texture. I've applied a TOR kolto tank glass texture here as an example. I also assigned the top and bottom tank lights a custom texture so that if you want to change it you don't need to replace LTS_light05. Taris Upper City Med Center Tank Glass TOR Texture.mp4
-
3 points
-
3 points
-
2 pointsHi everyone I'm posting this update in part to show you guys some images and the Intro Movie/ crawler mockup. I'm posting the mockup video in hopes to find someone who can do the real intro movie for the mod. The mockup is done in Blender. The person could take this file and make it look better. At the end of the video you see part of the space station break off,. There would be an explosion there. If anyone is interested in doing the actual intro video, please contact me by DS message. Link to video: RoR intro movie mockup
-
2 pointsHere is a preview of the next update to the RC-K1CP. This update shall not only impact the RC-K1CP, it shall also impact the Unofficial K1CP Tweak Pack and the K1 Pre-Release Pack! A number of Tweak Pack features will be removed from the Tweak Pack and will be added to the RC-K1CP: this includes the restored turret soundset, Davik's upgradeable armor, Eli's alternative clothing and the soundset fixes. The Lite NPC restoration shall also be added to the RC-K1CP, but the Lite NPCs shall be made an optional install! In addition, the Lite NPC restoration shall simultaneously remain in the Tweak Pack. Tweak Pack shall have a copy of the Lite NPCs restoration as it undoes the controversial Lite Upgrader feature in the K1CP, hence it fits the description of the "tweak pack". But for Lite NPC restoration in RC-K1CP, there is a unique reason it's being added here. In a future update, there shall be a 3rd install option called "Lite NPC restoration plus" which shall restore all of the Lite NPCs which were not used in the vanilla game. If you install the main RC-K1CP mod, the Lite NPC restoration mod and the Lite NPC restoration plus mod together you'll get to experience the full arsenal of Bioware's original Lite NPCs. Below are some screenshots of the unused Lite NPCs in question, courtesy of A Future Pilot and his Lite Upgrader mod. Now what about the K1 Pre-Release Pack? The K1P-RP mod is similar to the RC-K1CP mod, except this mod restores content shown in official Bioware Pre-Release screenshots. Below is an example: Now, in the game files for Anchorhead are dialogues for cut NPCs such as Chadra-Fans and Ithorians but the Pre-Release screenshots show quite a bit of cut content in Anchorhead. In this screenshot, we have the cut Ithorian Miner NPC. In this screenshot, we have a hover sled with engine in the background and a little drone floating about. In this screenshot, we have a Protocol Droid, a Quarren and two Dewbacks In this screenshot, we have a landspeeder in the background. This creates a problem, do I restore these features in the K1P-RP mod or do I restore them in the RC-K1CP mod? Well, I've made a decision. The NPCs shall be restored in RC-K1CP whilst the placeables will be restored in K1P-RP! RC-K1CP: K1P-RP And to finish this preview off, this update will also fix the syntax errors that have been plaguing the mod since release! So have fun installing it with no guaranteed error messages.
-
2 pointsOh, good eye! Yeah, I think that sounds like a really good solution to restore the sublevel and alternate way to disable the turrets while also keeping the Twi'lek coward. Completely forgot the line about the lieutenants, so moving a couple enemies around sounds like a great solution that wouldn't too drastically alter the difficulty/design of the Vulkar base. I'm 100% behind this!
-
2 pointsMaybe I wasn't too specific in my post, but the idea is that you'd get a different card from the Coward. This new card would unlock the elevator that leads to the sublevel, from there you can obtain a passcard without having to fight a crowd of enemies at once. So I had a similar idea which I'm sure you'd really like. The idea was to add a second Vulkar coward in the sublevel which would be the Twi'lek coward from the vanilla game whilst the Vulkar coward on the ground floor is the human one. The Twi'lek coward in the sublevel would be guarding the heating system generator room whilst the human coward is guarding the Vulkar control room. I say control room as dialogue from the TLK seems to suggest the computer terminal which is found in the main open area near the armory was supposed to be inside the room with the coward NPC: "I don't know. Maybe you could use the main terminal in this room to override the security system, if you're good with computers. Otherwise you'll need to get your hands on a pass card."- Vulkar Coward This would suggest that the coward was guarding a control room akin to the one found in the Hidden Bek Base (the one that's famously locked forever in the vanilla game) instead of just some random room as we got in vanilla. My plan had the Vulkar Lieutenants from the barracks moved to the sublevel so that the barracks would have the passcard in a footlocker guarded by 10 enemies whereas the Lieutenants would have energy shields but would have fewer guards protecting them. By having the Twi'lek coward in the sublevel as an NPC, his dialogue on the Lieutenants still works as there are Lieutenants on the sublevel with him. I also know there's an option to disable the turrets by disabling them via the computer terminal, but that option is way more expensive then just overriding the power conduit in the barracks (10 spikes VS 3 spikes). I think I might change it so that both disabling the turrets and overriding the power conduit would cost the same, this means you either disable the turrets or override the power conduit to avoid fighting the Vulkars for a Spike fee or you simply attack the Vulkar swarm head on and risk getting killed if you're playing on Impossible difficulty.
-
2 pointsSo in regards to the Vulkar Base thing, two main thoughts on that First is that I really like the idea you have! Kotor already has plenty of dungeon design where you can explore and use cunning to figure out how to progress, or just brute force your way through, so I think a choice between "find the Vulkar coward in the sublevel to get the card" or "take out a room of like ten enemies to get the card" would fit pretty seamlessly in the game design. I'm all for this idea. Just might require a tiny bit of custom content to make the puzzle about the blaster turrets guarding the garage clearer to the player that some kind of pass is needed Second thought is about the Twi'lek Vulkar coward in the vanilla game. Honestly, I really like that character. Gameplay-wise, it's just a basic light/dark alignment choice, but I think it adds a nice bit of flavour to the setting and Brejik as a character. A few characters go on about how Brejik's new leadership of the Vulkars has fundamentally changed them as a swoop gang, and I just think it's really neat to encounter an enemy who goes "You know what, I don't agree with the new ways, and I'm not gonna die for a cause I don't care for." It might feel a bit clunky having two enemies who stop combat and offer a "spare me or kill me" choice, but ideally, I'd love some way to retain the vanilla Twi'lek coward while also restoring the human coward who gives you the garage pass card (I suppose one possible solution to that could be to place the human coward in a room with some enemies, have him do the cowering/fear animation, and then start his whole speech after combat ends so it isn't the exact same situation as the other one? But that's just one idea, if you even would want to use both characters. Up to you, obviously!)
-
2 pointsI'd say the most expedient route would be to use my Scoundrel jacket with Scout legs hybrid mod and then pair it with Dark Hope's Scoundrel retexture that makes it a leather jacket, coupled with her Scout retexture for the legs. However, snce my mod sandwiches both textures together into one, side-by-side, you'd need to manually do that yourself with DH's textures. Alternatively, I can provide a batch file for use with the commandline tool ImageMagick to do it for you. Edit: Here's what it would look like, pouches and no pouches versions: Also if you want it for the Scout then the model will need to be edited, since it's currently set up to replace the Scoundrel.
-
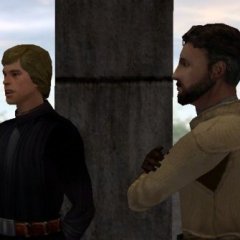
2 pointsTwo disguises wasn't necessarily the original intention. The party was originally the method to acquire the sith passcard to get into the military base (all the VO for this is in the game). You could also pay the same gender party goer to let you come (originally to get the passcard, later the disguise).
-
1 pointYes, replacing the exe with HoloPatcher will prevent the issue happening.
-
1 pointSpecifically, it nukes files that use certain characters in their filenames when it repacks the MOD for the Grove module, meaning that k_pdan_state1-.ncs and k_pdan_state1+.ncs get deleted. These scripts are the starting conditionals that check the value of the DAN_BOLOOK_STATE global, without which the DLG won't function correctly.
-
1 pointIncredible work! The garden changes, especially the removal of overgrown grass, was really well done!
-
1 pointI pointed your mod out to brents742 last night. Nice job btw!
-
1 pointI'm not sure what the current status is for this project on restoring the parts of the module that are still damaged-looking from TSL, but I just made some cleaned-up versions for Thor110's Expanded Galaxy Project which I figured I would post independently here as a modders' resource. If it would help your project out at all, feel free to make use of it.
-
1 pointView File Restored Enclave Sublevel This is a modders' resource -- not intended for general use. It includes alternate versions of the four submodules in the enclave sublevel from TSL that had damage baked into their room models, now restored to their pre-bombing condition. That includes removing rubble, replacing flickering/dead lights, and cutting back on vegetative overgrowth. Lightmapping looks good too. I've exported the models in both K1 and TSL formats, default is TSL because I made this for Thor110's Expanded Galaxy Project, but K1 versions are in a subfolder. I've also included a VIS file for the module which is a merge of Thor110's additions for Visibility File Fixes with new edits of my own, particularly to compensate for the removal of some rubble in the rotunda with the glass dome which at least partially obscured submodules getting unloaded. I would use the exact same VIS even for the vanilla module, though. Usage: Just add the included models to your mod project. I did include versions for K1 ports, which you can find in the "K1" subfolder. Don't forget the VIS. You don't need to ask for permission to use these, just give credit in the description/readme. Included Files: Acknowledgments: Thanks to seedhartha for making modeling for these games simple using KotORBlender, and Cortisol for making file extraction easy with the Holocron Toolset. I would also like to thank Thor110 for buffing up the module's vis for his Visibility File Fixes mod, and allowing me to include those edits in this version. I also want to shout-out his Expanded Galaxy Project, the reason I made these in the first place. This modification is not supported by Obsidian Entertainment, Lucasarts, Disney or any licensers/sponsors thereof. Use of this modification is at your own risk and neither the aforementioned companies nor the author may be held responsible for any damages caused to your computer via this modification's usage. Submitter PapaZinos Submitted 05/02/2024 Category Modder's Resources
-
1 pointView File KotorBlender (for Blender 3.3+) This add-on is a fork of KotorBlender, upgraded to support newer versions of Blender. KotorBlender is in turn based on NeverBlender, forked from version 1.23a. ## Features - Import & export MDL models, including walkmeshes - Import & export LYT files - Import & export PTH files ## Installation 1. Clone this repository or download the latest release of KotorBlender from Deadly Stream 2. If you have cloned the repository, create a ZIP archive containing the **io_scene_kotor** directory 3. From Edit → Preferences → Add-ons in Blender, install the add-on from the ZIP archive and enable it by ticking a box next to "Import-Export: KotorBlender" 4. Alternatively, if you want to contribute to KotorBlender, you may want to create a symbolic link to the local repository in the Blender add-ons directory, typically located at `C:/Users/{user}/AppData/Roaming/Blender Foundation/Blender/{version}/scripts/addons`. 1. `mklink /D io_scene_kotor {repo}/io_scene_kotor` ## Usage ### Data Preparation Extract models, textures, walkmeshes, LYT and PTH files into a working directory, using a tool of your choice, e.g. reone toolkit. Recommended directory structure: - *data* — extract all BIF archives here without subdirectories - *texturepacks* - *swpc_tex_tpa* — extract swpc_tex_tpa ERF archive here If you plan to edit textures, batch-convert TPC to TGA / TXI files using **reone toolkit**, although TPC textures are also supported by KotorBlender. ### Model Import and Export 1. Import via File → Import → KotOR Model (.mdl) 2. Select top-level MDL root object to be exported 3. Export via File → Export → KotOR Model (.mdl) ### Editing Animations To edit list of model animations and corresponding events, select MDL root object and navigate to Object → KotOR Animations. KotorBlender supports both object and armature-based edits. To create an armature from objects, navigate to KotOR Animations → Armature and press Rebuild Armature and Apply Object Keyframes. Before exporting a model, make sure to copy armature keyframes back to objects by pressing Unapply Object Keyframes. ### Lightmapping 1. Select objects for which you want lightmaps to be recreated, or unselect all objects to recreate all lightmaps 2. Press KotOR → Lightmaps → Bake (auto) UV mapping: 1. Select objects having the same lightmap texture and enter Edit mode 2. For every object, ensure that `UVMap_lm` UV layer is active 3. Select all faces and unwrap UVs via UV → Lightmap Pack, increase Margin to avoid face overlapping Fine-tuning: 1. Increase lightmap image size via UV Editing → Image → Resize 2. Tweak ambient color via Scene → World → Surface → Color 3. Manually toggle rendering of objects in Outliner and press KotOR → Lightmaps → Bake (manual) 4. In Scene → Render, set Device to GPU Compute to improve performance, set Render Engine to Cycles if not already 5. In Scene → Render → Sampling → Render increase Max Samples to improve quality ### Minimap Rendering 1. Press KotOR → Minimap → Render (auto) 2. Open "Render Result" image in Image Editor and save it as "lbl_map{modulename}.tga" 3. Open "MinimapCoords" text in Text Editor and copy-paste generated properties into module .ARE file using any GFF editor Fine-tuning: 1. Tweak background color via Scene → World → Surface → Color 2. Manually toggle rendering of objects in Outliner and press KotOR → Minimap → Render (manual) ### Connecting Rooms 1. Select a room walkmesh 2. Enter Edit mode and select two vertices adjacent to another room 3. Determine 0-based index of the other room into the LYT file 4. Enter Vertex Paint mode and set brush color to (0.0, G, 0.0), where G = (200 + room index) / 255 5. Ensure that brush blending mode is set to Mix, and brush strength is set to 1.0 6. Paint over the selected vertices ### Editing Paths 1. Extract PTH file from the module's RIM file, e.g. "modules/danm13_s.rim" (Kotor Tool, reone toolkit, etc.) 2. Import PTH into Blender via File → Import → KotOR Path (.pth) 3. Create/move path points, or modify path connections via Object Properties 4. Export PTH via File → Export → KotOR Path (.pth) ## Compatibility Known to work with Blender versions ranging from 3.3 to 4.0. ## License GPL 3.0 or later Submitter seedhartha Submitted 03/18/2021 Category Modding Tools
-
1 pointI'm sure many of us play the Kotor 1 Community Patch (K1CP), it's the 4th most downloaded mod on Deadlystream after all! And I'm sure many of us might also know that the K1CP isn't compatible with the Kotor 1 Restoration (K1R mod)... you might be wondering, why is that? K1R is similar to it's K2 cousin, TSLRCM, in that it restores cut content, fixes bugs in the vanilla game and it expects you to install it first and any other mods installed afterwards need to be made compatible with it. But K2 was rushed, Obsidian was forced to leave content unfinished and cut the rest to make way to make way for a release before the 2004 Christmas sales... this not only gutted much of the plot but it also left a plethora of bugs upon release. TSLRCM undoes all of this by restoring much of Obsidian's intended content for early 2005 and fixing many of the game breaking bugs. K1, on the other hand, wasn't like this. What was cut by Bioware was stuff that most players agree was *actually* cut for a good reason, and the bugs in the vanilla game weren't nearly as bad as they were in vanilla K2. In K1R's "prime" from its full release in 2015 until K1CP's first release in 2018, K1R competed with many mods that were incompatible with it such as Kainzorus Prime's NPC Overhaul Mod... and since all K1R had to offer was minor and controversial restored content and minor bug fixes many players, including myself, opted for the much better incompatible mods. With the release of K1R's 1.2 update, there have been a handful of critical bugs in the mod with some capable of breaking the game. This would normally be fixed by the Dev Team behind the mod, but one by one the original K1R Devs left the Kotor Community with only 2 K1R Devs remaining in the community. The mod's leader, ZM90, also vanished... without him, it's impossible to update K1R as he's the one who hosts it, more importantly, we can't obtain permission to update K1R or use assets from K1R. With K1R being seen as undesirable by many and with no hope of it ever being fixed, the developers of the newly emerging K1CP mod abandoned K1R compatibility... just over 5 years later and K1R has become a obsolete relic of the past whilst the K1CP has become the ultimate bug fix mod for K1 standing alongside TSLRCM in importance (Not anywhere near as close, TSLRCM is still King... but its far superior to K1R). Some modders might still make their mods K1R compatible, but I don't bother since K1R has those before mentioned game breaking bugs... why on earth would I put in the effort to make my mods K1R compatible if your game is guaranteed to break because you installed K1R? I'd much rather focus on K1CP compatibility as their dev team is active, are willing to fix bugs with their mod and are still working to this day to fix more vanilla bugs. So this creates a problem... many of us play K1CP, but we can't have Restored Content due to K1CP being incompatible with K1R, and no one can update K1R as the original K1R Devs have abandoned the community... so how do we update K1R? How do we get K1CP compatible with K1R if K1CP Devs refuse to do it? My answer: forget K1R... The K1 Community Patch has already taken the mantle of the "main Kotor mod" from K1R and we can't change that, but we can work with this! This thread is a WIP thread for an upcoming mod, one that you will install after the K1CP mod, one that will restore Kotor 1's cut content whilst having K1CP and it's many, many bug fixes installed! I present to you: Restored Content for the K1 Community Patch or RC-K1CP for short! Now we have to keep our expectations in check... this is currently a one man project, and I alone cannot recreate K1R in its entirety from scratch... though I can, however, restore much of the lesser restored content like impossible difficulty before working my way up to the big leagues like the Vulkar Sublevel. Much of what can be restored is limited to my own modding abilities, so if I can't restore the Vulkar Sublevel constantly requesting it won't make me restore it... it'll be restored when I'm able to restore it, and if that time is not now it'll be some time in the future. You might be wondering; won't this impact the development of my NPC Overhaul mod development? The answer is no... that is because the first release of the RC-K1CP Demo is ready for release! In the coming week or two, I'm planning on releasing some screenshots from the mod to demonstrate what the mod has thus far alongside a YouTube video of an ambitious restoration. Once these are posted here, I shall release the RC-K1CP Demo here on Deadlystream for you to try out! Updates for the RC-K1CP shall be done in two ways; they shall be done in either content updates which adds restorations and bug fix updates which fixes bugs with the mods. As with any other mods, I'd like for players to be ever vigilant for possible bugs and to report any if bugs do arise! RC-K1CP does not follow the same "rules" as K1R and TSLRCM did, so you might see some restored content K1R avoided or never knew existed... so keep that in mind! With release version 0.1.0, you shall enjoy the following restorations from the RC-K1CP. And lastly, there are some things you might consider 'cut content' which might be added to the RC-K1CP. If this cut content was found in pre-release screenshots between 2001-early 2003 before the games release it could be added to the K1 Pre-Release Pack instead and if it's from the XBOX version but was cut from the PC version it might be added to the Knights of the Old XBOX mod (which is due for an update anyway). What do we think? Do you have any suggestions or recommendations? Anything you dislike in K1R you don't want to see in RC-K1CP?
-
1 pointIt would be useful to know which site, specifically. Is that the only version of the texture available? It's only 128x128 which would be pitiful even when KOTOR was new. Edit: Just had a look at the model and it isn't going to work. It uses blendshapes (AKA morph targets), not skeletal animation.
-
1 pointSo it's already rigged then. That makes things a lot easier. I gather this is something you downloaded somewhere?
-
1 pointCreating tools is my specialty. Let me know if you're finding some task in this project incredibly tedious, that a specialized tool could address. Would love to help out.
-
1 point@Mesmitos, reach out on Discord to troubleshoot. It's not an issue with the mod builds, your install is either broken in some way or you're just noticing the few imperfections which are still present.
-
1 pointAds are now disabled for active site members so that should go away.
-
1 pointVersion 1.3 is out, new and improved! Here's what's new: -- All included models are now slightly higher-poly to make some of the blockier-looking parts look more consistent with the rest of the model. You can see this in the newer pictures around the boots, knees, and shoulders -- The base game female robes had their own unique idle animations so as to reduce clipping, but a bug caused some weird arm twitching. I've fixed the animation to get rid of the twitching while still keeping the clipping adjustment -- Fixed some issues with clipping while running for thick female robes and while dual-wielding for thin male robes -- I have added a compatibility patch for any mods using svösh's Robe Collar version of the robe models. Because the UV changes were pretty minor, I have merged all edits by me to the models with theirs, including the higher-poly parts, animation and clipping fixes I can't confirm whether or not the models are the same, but there is now a compatibility patch for svösh's Robe Collar. You could try and see if it works for Achilles' mod. I haven't heard back from them yet, so if there are any differences I can't make a patch for Achilles' mod as of yet.
-
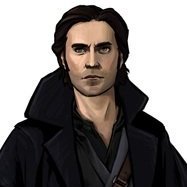
1 pointDoes anyone know where I can find this head mod? I really like the look of it but so far had no luck finding it. According to a reddit user it was uploaded onto an old modding site called "PCGameMods" however, that site has been long gone. Any chance it may have been recovered? Any help would be greatly appreciated. Cheers.
-
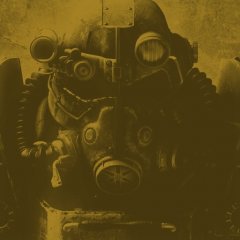
1 pointThe Circlet of Saresh already drops on the PC version, this mod is unfortunately not for the Xbox version as it's intended to be used with the K1 Community Patch.
-
1 pointDownload the attached 7-zip archive. It contains the freeware ImageMagick program needed to combine the textures, and a batch file to feed it the commands. Extract the archive somewhere (preferably not in Program Files). Download both sets of DH's textures linked above. Extract DH's textures and put them into the INPUT folder. Alternatively, if you want to use the vanilla Scout leg textures or ones from a different mod, put TGA versions of those in the OUTPUT folder. Double-click on Create_Combined_Texture.bat and it will merge the two sets of textures together in the OUTPUT folder. In that folder you'll find the two newly merged TGAs, two TXIs, and a sub-folder with the models. There are two versions of the model, one with the vanilla pouches, one without. Pick whichever version you prefer. Copy and paste the models and textures into your Override folder. However, since the textures are pretty big, I would suggest an additional step to convert the textures from TGAs to TPCs. Download TGA2TPC and extract it somewhere. Double-click tga2tpc.exe to run it. In the row of buttons up the top, click the first one, the folder icon, to set the export folder where the TPCs will be saved. Next click the +TGA button and browse to find both merged textures to load them. On the far right, click the Settings button and select "DXT5 (Alpha)". Now click the Run button. You can copy and paste the two TPCs into your Override. You don't need the TGAs or TXIs. The TPC step is entirely optional though, so I leave the choice up to you. The UVs for the jacket of the pouchless version, especially the female, were pretty wonky, so I fiddled with them to improve them a little. It's still not perfect however, as DH created the Scoundrel texture to fit the vanilla UVs. My pouchless model was a bit of a hack job that resulted in lots of distortion/stretching. I've (hopefully) gotten rid of the worst of it though, and as a bonus the back is no longer mirrored now as well. Scout_Scoundrel_Hybrid_Combine_Textures.7z
-
1 pointI'd like this, but I think you should prioritize other content restorations such as: -Having to get two disguises on Taris, requiring the player to both attend the party and stop the interrogation -Outcast Children in the Outcast Village on Taris. -The Echani Mercanary on Manaan that you can speak to about their ways. This Echani merc will also not speak to you if Canderous is in the party.
-
1 pointLet's talk about the cut Vulkar Sublevel! I got some ideas floating about how the Vulkar Sublevel shall be restored in RC-K1CP, and I'd like to share with you all some of my ideas. The Vulkar Sublevel in K1R was hated for the most part because, in earlier versions, the flow of the Sublevel used to be so convoluted with side quests and custom content. To make things worse, the players HAD to complete this content in order to access the Garage, and since this setup was so confusing players would often get stuck in the Vulkar Sublevel thus preventing them from progressing the game. This alone caused many players to uninstall K1R and vow never to touch the mod due to the Sublevel changes alone. In K1R 1.2, most of that convoluted content was removed and the current flow is much more streamlined allowing for a quick playthrough of the Sublevel without getting stuck over stupid mod design. But the legacy of the old Sublevel lives on as the Vulkar Sublevel content in K1R is now an optional install separate from the main K1R mod. As with K1R, my own Sublevel will be an optional installation though my rendition of the Sublevel will be different from K1R's. For example, the Sublevel will be 100% optional. If you guys have played K1R, you'll know the Twi'lek Vulkar Coward NPC used to be a human with human VO speaking of the cut Sublevel. You would speak to this Coward and he'll give you the pass card to access the Sublevel. However, his dialogue in the dialog.tlk file does not much the spoken VO... here are some examples: VO: "Yeah, sure. Whatever you want to know. Just don't hurt me, okay? Remember, I can make things very profitable for you by unlocking the central elevator." TLK: "Yeah, sure. Whatever you want to know. Just don't hurt me, okay?" VO: "The accelerator? It's down in the garage. You have to take the security elevator in the back to get there, but the elevator is protected by thermal-guided laser cannons." TLK: "The accelerator? It's down in the garage. You have to take the security elevator in the back to get there, but the elevator is protected by a nest of blaster turrets." VO: "The garage is off-limits to most of us, maybe one of the mechanics from the second level can help you out. They all got access cards to get past the security cannons." TLK: "Brejik's lieutenants carry them, and there might be an extra one in the barracks. But there's a small army in that room. Even you might have a tough time taking them all on at once." VO: "I can unlock the central elevator for you, but it only goes up... not down. An access card is the only way to get past those cannons protecting the security elevator to the basement." TLK: "You'll need a pass card to get by those cannons protecting the security elevator to the basement." As you can see, some lines of dialogue are extended in the VO version whilst others have been completely rewritten. I suspect the VO was recorded first, before the Sublevel was cut, and later, after the Sublevel was cut, Bioware went back and edited the human Vulkar Coward dialogue to remove references to the Sublevel. The final version we got in-game, however, was a complete rewrite of the old dialogue with alien Twi'lek VO to prevent the original voice actor from doing more takes. With the power of modern day AI VO cloning, I plan to bring some of those TLK lines to life and merge the Sublevel dialogue with the unused dialogue. For players who wish to avoid the Sublevel, the players can go to the Vulkar Barracks and either fight (or override the power conductor) through the Vulkars and obtain the pass card from a Footlocker. This will allow you to enter the Garage without ever going to the Sublevel. For players who do go to the Sublevel, you'll have 3 ways of getting to the Garage. Either you get the Spice for the junkie mechanic and get his Mechanic ID, you use the Magnetic Power Cell to crank up the heat & blind the turrets or you fight or you can kill the Vulkar Lieutenants who'll drop their own cards (they'll be moved from the main level barracks to the Sublevel with the Barracks instead containing a Footlocker with a pass card instead). So... what do you guys think of this setup? Is this something you'd like to see in RC-K1CP?
-
1 pointI tried replacing the existing bubble chunk model and that didn't really change much. So I went with DH's suggestion of using the underwater suit's bubble VFX. Here's an in-game test after playing around with some of the values for a bit. Taris_Kolto_Tank_Bubble_VFX_Test.mp4
-
1 pointWhether or not you'd consider it a "tutorial", I think it would be useful for people to demonstrate certain things explicitly (meaning in a video most likely).
-
1 pointI do see the value of good documentation / tutorials. I'm sceptical though if it will actually bring more people to use KotorBlender. So to anyone following this thread, do you think a tutorial is necessary here or just a nice-to-have? What topics would you like to have covered? In which format?
-
1 pointMore updates: Version 3.9.0 has added support for Bezier-type controllers, compressing quaternions on export and armature-based animations, i.e. it is now possible to animate a character using a Blender armature and then copy keyframes onto regular "bone" objects before exporting the model. More importantly, version 3.10.0 has implemented semi-automated minimap rendering. It works like this: Import a module layout via File → Import → KotOR Layout (*.lyt) Press KotOR → Minimap → Render (auto) Open "Render Result" image in Image Editor area and save it as "lbl_map{modulename}.tga" file Open "MinimapCoords" text in Text Editor area and copy-paste generated properties into module .ARE file using any GFF editor
-
1 pointNow do it in Aurebesh. By the way, I wouldn't say that level of detail doesn't have a place, as long as you are willing to go the extra mile to facilitate it. In other words, create a cutscene where you actually get a chance to show it off. I am doing a vaguely similar sort of thing with comm messages (which hopefully I'll get around to finishing next year some time).
-
1 pointIt enables a procedural dirt effect over the selected mesh when rendered in-game. You should be careful when enabling it. It's not compatible with envmaps if I recall correctly. To enable it, simply tick the checkbox.
-
1 pointReleased 3.4.0 with this and a couple of other fixes, but most importantly I have reworked the UI. It now fits Blender 2.8 style alot better. Here are some screenshots:
-
1 pointIn 3.3.0 now you can. You can even add supermodel animations on top of head models and they will look ok. I have also finally fixed precision issues with export of custom normals. Exported models now look exactly as they were imported, and MDLedit no longer raises a warning. Overall, I did some testing and this version seems to be pretty robust. I'm tempted to say it's final for now.
-
1 pointReworked armature support in version 3.2.1. Tried exporting armature keyframes directly, but this solution ended up being too complex and slow. So this is how editing animations currently works (and is very likely to stay that way, since I'm satisfied with the result): Import model with "Import Animations" ticked Select animation under Object Properties -> Odyssey Animations and press Play button to focus on it Position bone objects, insert/remove keyframes, etc. Set current frame to frame 0 or exactly 5 frames left from any animation. That is the Rest Pose Press Rebuild Armature. This step is entirely optional, but useful if you want to test your animation with the skinmesh Export model with "Export Animations" ticked
-
1 pointPublished version 3.2.0. Thank you guys for asking and making me look at things more thoroughly. I've fixed some custom meshes related issues, particularly modifiers not being applied on export. More importantly, I've added an option to merge duplicate vertices and mark sharp edges, which is a similar feature to smoothing groups in Max. This is important because KotOR models have a LOT of duplicate vertices, which is exactly how smoothing groups work - they create additional geometry where surface needs not to be smooth. Same result can be achieved with sharp edges and Edge Split modifier in Blender. Some example screenshots: New Import Options Normals Algorithm = None (normals are ignored) Notice sharp edges on the head, despite normals not being imported. That is because of duplicate vertices. Normals Algorithm = Custom (MDL normals are used as is) Notice how smooth edges on the left arm are. There are duplicate vertices there, but custom normals make them look smooth. Normals Algorithm = Sharp Edges, Sharp Edge Angle = 10 degrees (duplicate vertices are merged and sharp edges are marked) Notice how edges on the head are still sharp, despite duplicate vertices being merged. That is the result of these edges being marked as sharp. Unfortunately, edges on the left arm were not marked as sharp, because we could not merge duplicate vertices there - they have different UV coordinates. This happens on more than one model - maybe I'd need to improve the algorithm in the future.
-
1 pointDon't see the diff in the first two pictures. This is what I think is going on: Sharp Edges and Auto Smooth are a display-only thing in Blender. These affect how split normals (vertex normal per polygon) are calculated, but do not result in new geometry. Because split normals are not supported by MDL, what current approach does is it calculates vertex normal as an average of its split normals, effectively cancelling them out, unless all split normals are pointing in a single (imported) direction. What you need to do instead, with custom meshes, is to add Edge Split modifier to your mesh and apply that prior to export (KB doesn't automatically apply modifiers on export, regression on my part). Edge Split generates new geometry based on sharp edges and angles between edges, which is exactly what we need. With Edge Split you no longer need Auto Smooth, Custom Split Normals or Export Custom Normals. P.S. Since you're also using quads, make sure to download KB 3.1.1 (or later) - it fixes export of quads UV.
-
1 pointMy problem may arise from the fact that I am using a completely custom model. To illustrate the problem: No Custom Split Normals and Export Custom Normals is unchecked: Custom Split Normals and Export Custom Normals is checked: same model in blender with Custom Split Normals: Same model with sharp edges shown:
-
1 pointPublished version 3.1 of the add-on with import & export of original normals, support for saber meshes and optimized export.
-
1 pointThere's a rollout for the OdysseyBase where you can edit the supermodel, the same as in KMax. Blender's way of doing things is just a lot more clunky and obtuse.
-
1 pointNumber of things, including swapping some function pointers and appending additional data to mesh headers. This has everything to do with model format and almost nothing to do with its contents. i.e. you cannot target K1 supermodels from K2 models without some modification of the bone structure. This is by design, and I have no intention to automate these modifications at the moment. Smoothing groups is a 3ds Max concept to influence vertex normal calculation. MDL knows nothing of smoothing groups and so does Odyssey engine. What I meant by lack of smoothing groups is that in version 3.0 of KotorBlender, original normals are not preserved, and shading might get screwed. However, I have since implemented import & export of original normals and will soon release an update.
-
1 pointJust tested this and yeah - we can import and export original normals, no problem.
-
1 pointSo does this mean that KBlender will be able to import/export the model's original normals directly rather than dealing with MDLEdit/KMax's hacky conversion to/from Max smoothing groups (which is a legacy of MDLOps/NWMax's ASCII format)? Because that is the single biggest problem with the current Max/GMax workflow, causing all sorts of broken shading issues, especially on head models.
-
1 pointFor those interested, version 3.0 of KotorBlender is out. ASCII MDL / PTH workflow has been dropped in favor of binary importer & exporter. Binary MDL support is mostly on par with MDLops/MDLedit, except it lacks smoothing groups and cannot export saber meshes. I will fix these as I go. Other plans include streamlining the editing process, e.g. one-click lightmap baking and working with multi-material objects, armature animation export, advanced shader node setups, etc. Also, an interesting discovery I made about the MDL format - both MDLops and MDLedit expect per-vertex "tangent space" data to have the following layout: Bx By Bz Tx Ty Tz Nx Ny Nz, where B is a bitangent, T is a tangent and N is a normal. However, my experiments show that "tangent space" is actually a transposed TBN matrix, which makes a lot more sense from the engine standpoint: Tx Bx Nx Ty By Ny Tz Bz Nz.
-
1 pointStatus update: I've done a couple of beta releases (now at beta 4), where I've improved compatibility with MDLedit and added support for editing PTH files. For those interested in baking lightmaps or editing PTH files in KotorBlender, I've listed the necessary steps in the description.
-
1 pointView File Movie Mandalorians - Retextured Movie Mandalorians - Retextured by Mcfly -------------------- My intention in making these textures was to fuse the concept of the Movie Mandalorians mod, with the original in-game Mandalorian designs. I initially made these just for my own use, but I decided to release them once I finally completed the set. -------------------- Install: -------------------- - These textures require the Movie Mandalorians mod by Deadman. - Copy all .tga files into your KOTOR2/override folder. -------------------- Uninstall: -------------------- - Delete the .tga files from your override folder. - Reinstall Movie Mandalorians mod to restore the original textures -------------------- Special Thanks: -------------------- - Deadman, for creating the original mod. Thank you Deadman! -------------------- Permission: -------------------- - Anyone is welcome to do whatever they like with these. -------------------- Contact: -------------------- If for any reason you want to contact me, you can find me on DeadlyStream and NexusMods. - Mcfly696 @ NexusMods - Mcfly @ DeadlyStream Submitter Mcfly Submitted 10/18/2019 Category Skins TSLRCM Compatible Yes


.thumb.gif.be45d23c8c9f820b70fe0c360e3ea920.gif)