Stormie97
-
Posts
149 -
Joined
-
Last visited
-
Days Won
22
Content Type
Profiles
Forums
Blogs
Forum & Tracker Requests
Downloads
Gallery
Store
Events
Everything posted by Stormie97
-
The engine can handle many more polys than the vanilla model do have. @DarthParametric knows the actual facts and figures better than I do. No idea about textures sizes, but generally you can get very good results using 2K textures, or even by downsampling to 1K. Depends on the size of the model I'd say. Recently Koru has shown some progress they've made on improving head models, it's looks really good. Personally I've been looking into remaking high-quality some body models but I'm not yet ready to show what I've come up with. Regarding taking models available online: well it depends. If you're looking at a particular model, you have to figure out: where does it come from? Has it been ripped from another game without specific consent of the game's studio? Or did an artist make it and publish it onlline? Is it available for sale or do you plan to rip from a platform like, let's say, Sketchfab? If it's available for sale, what's the user agreement that comes with it? Would the author agree to have it ported to KoTOR as a mod? If none of those apply, was the model published as a free resource?
-
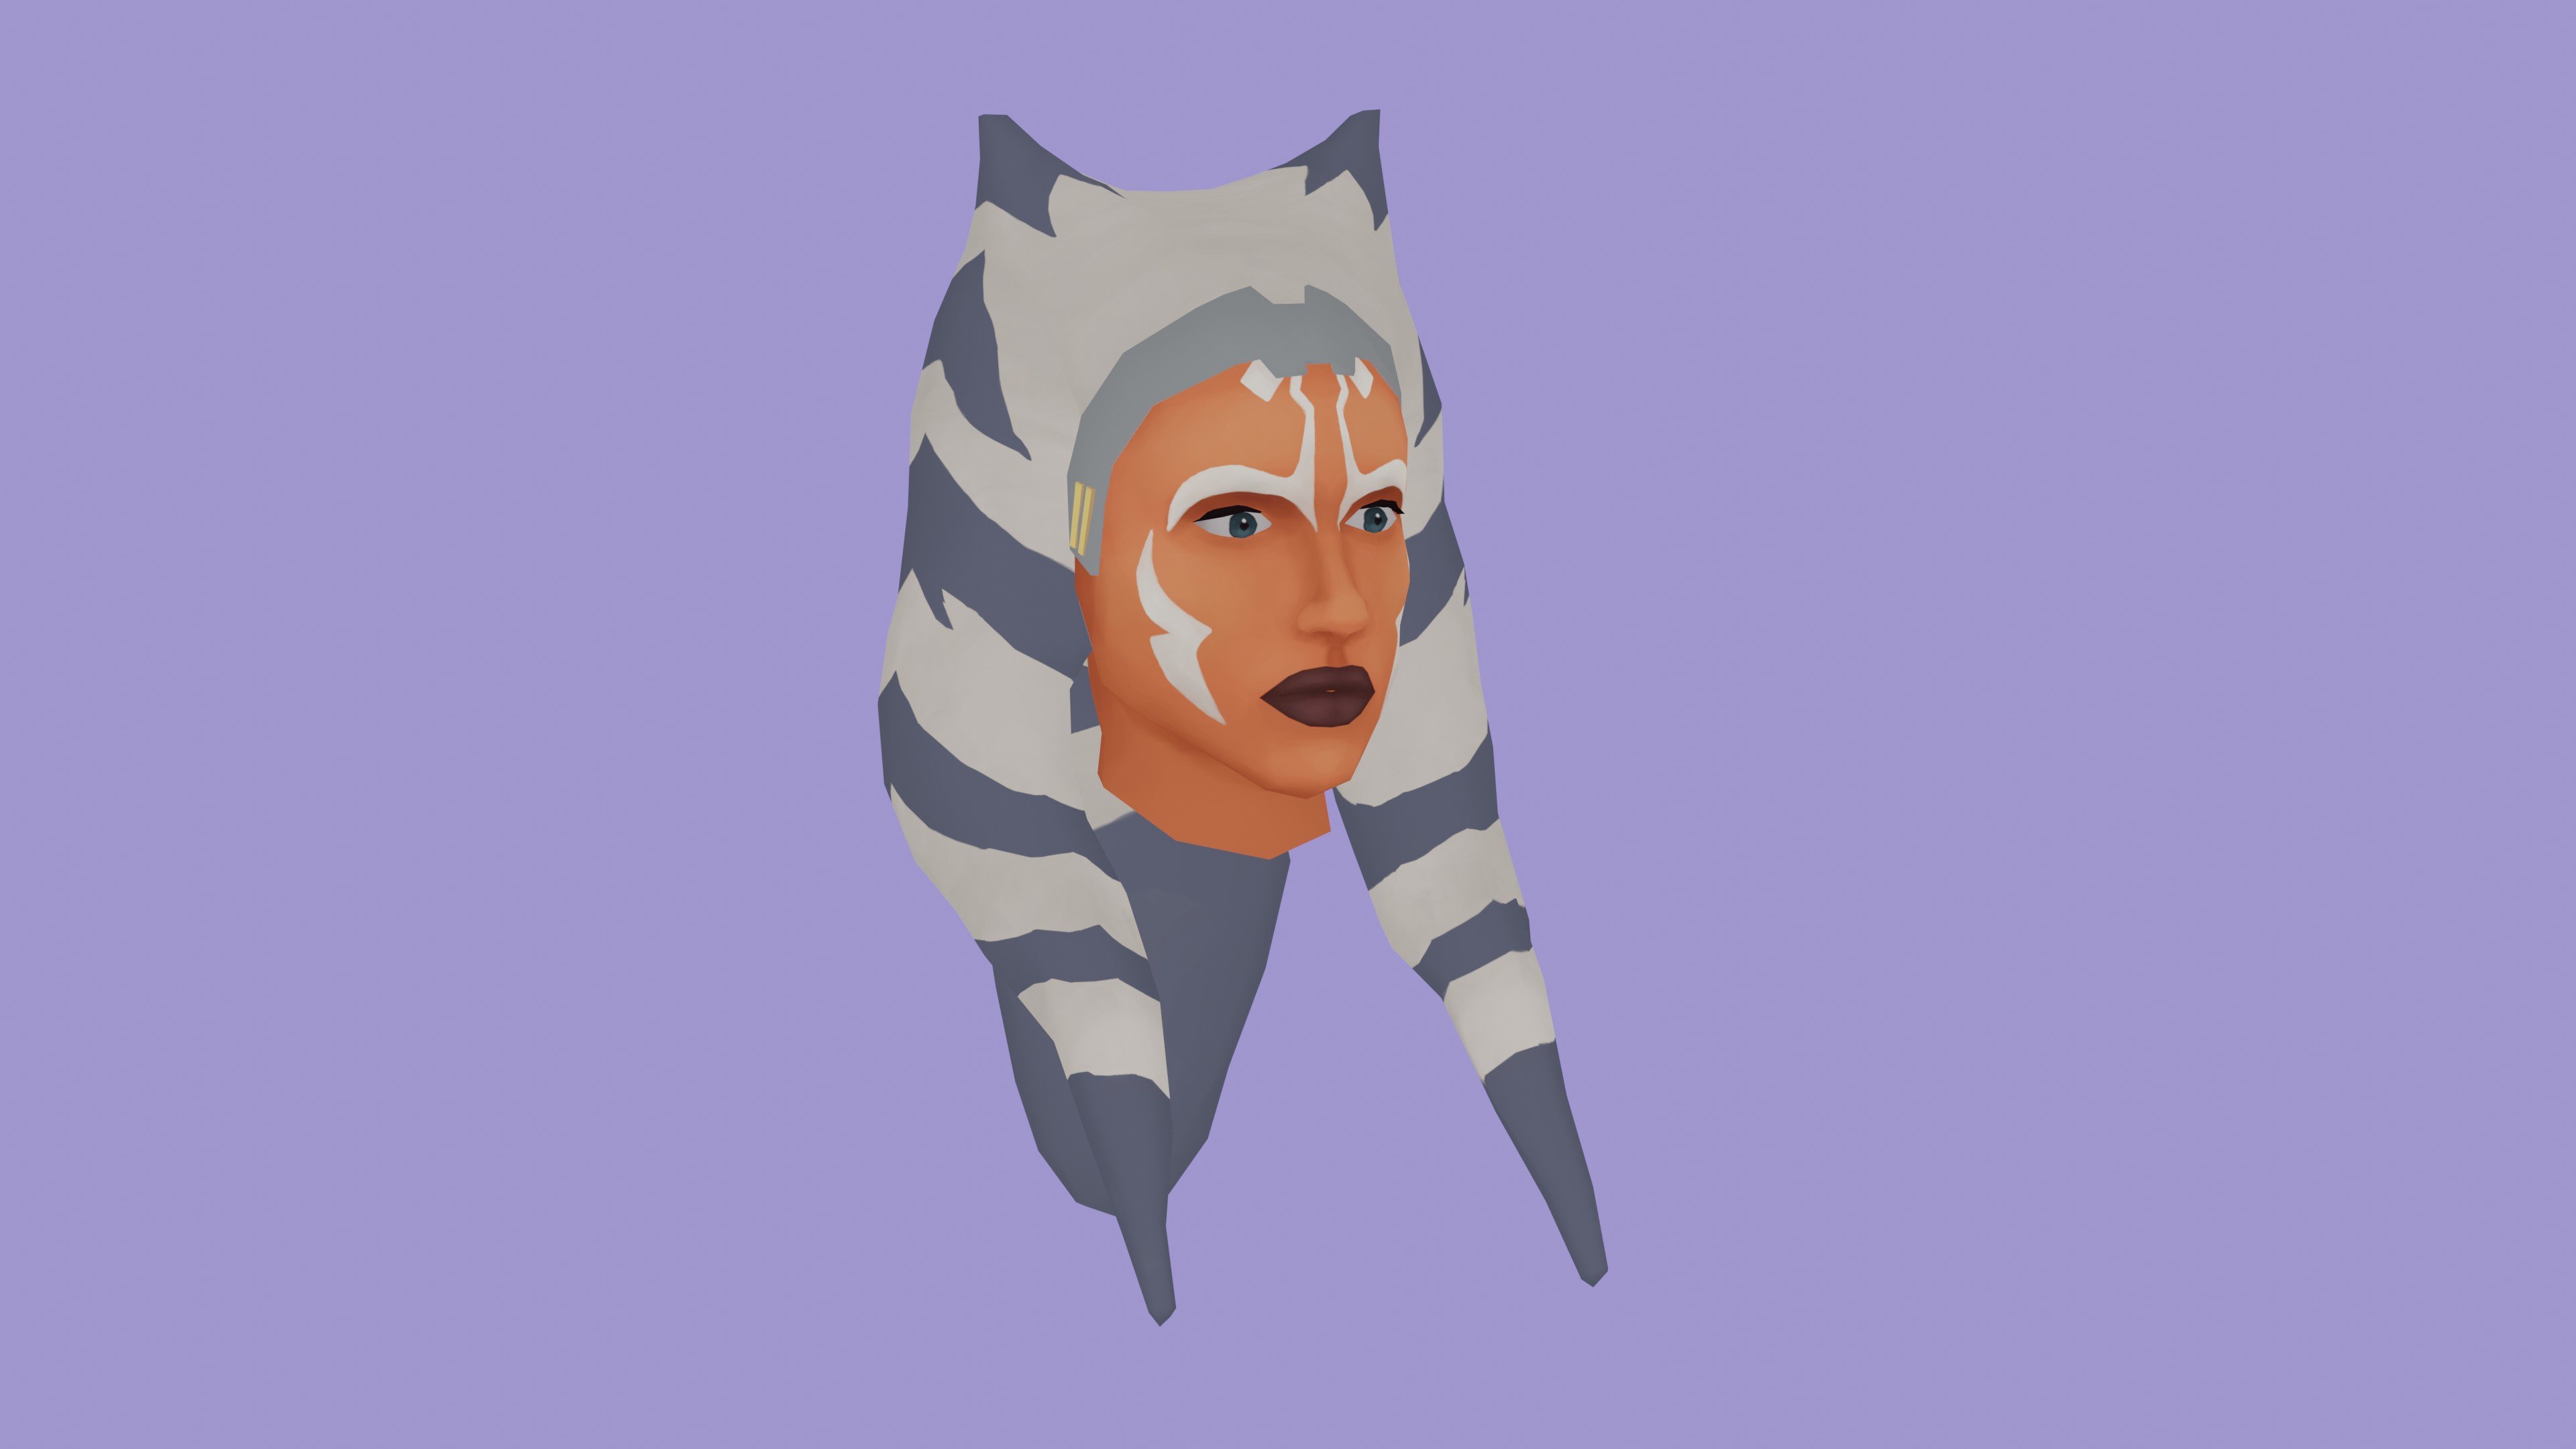
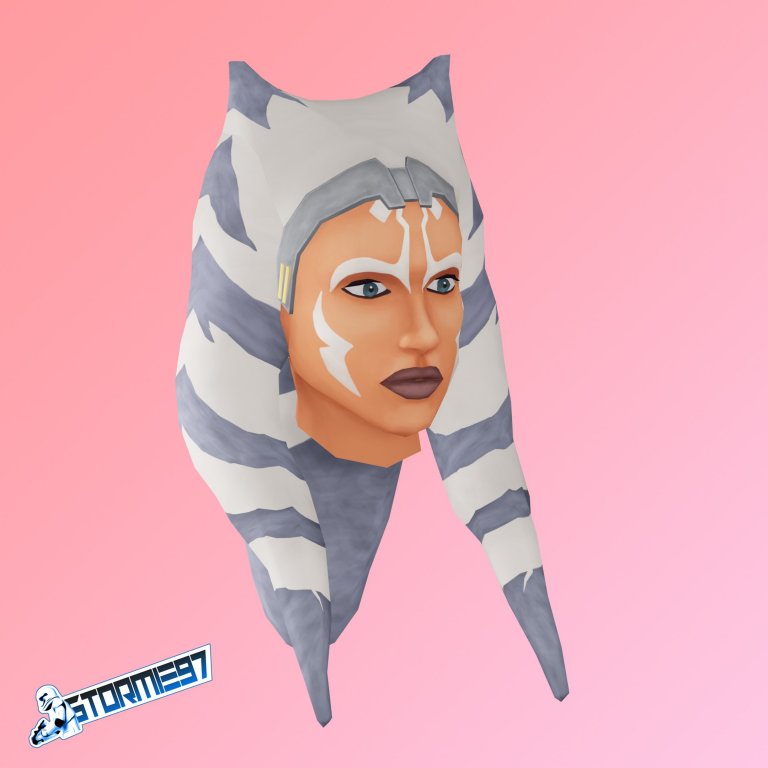
Well my work on the Leia head model hasn't seen much progress tbh. As for Ahsoka, I don't see her replace a particular NPC as it stands, however I might release the head model as a modder's resource if others are interested in replacing some NPCs with Togrutas. Good eye. I did use those as reference while I was crafting that thing.
-
I think her likeness is pretty spot on. Her eyes have a lighter hue in the vanilla textures. Also her eyebrows normally have that stern, authoritarian and arrogant look to them. Other than that she looks fantastic!
-
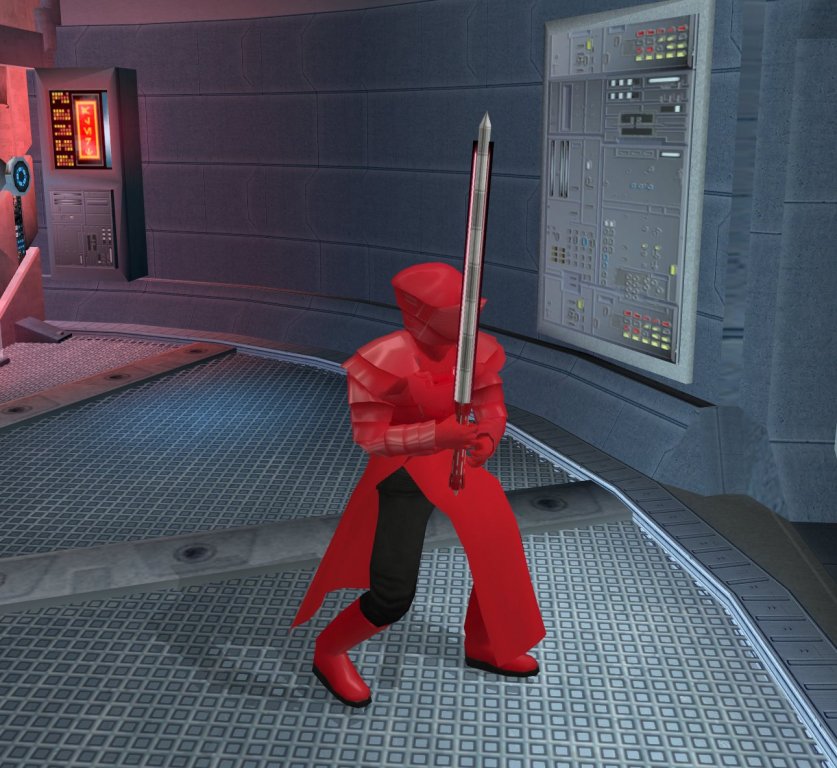
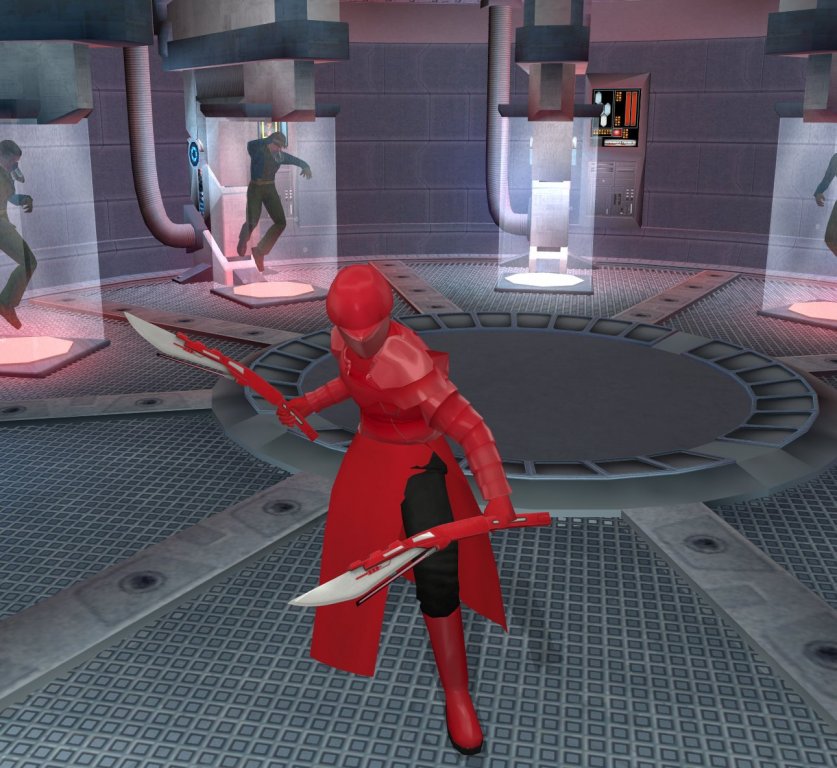
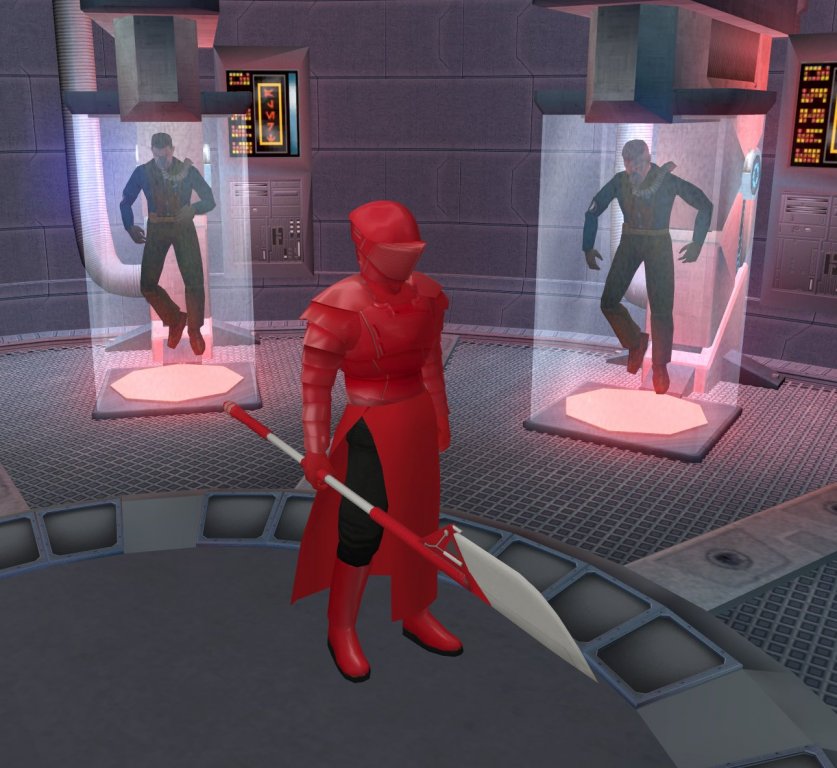
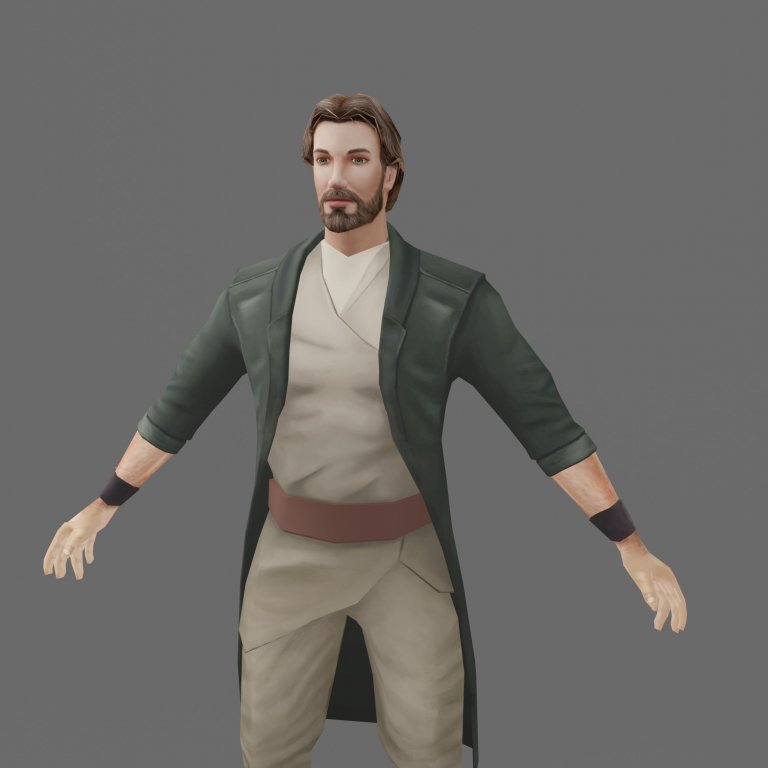
This one I've personally already done a while ago. These pieces are from artist Ryunaa on Tumblr, whom I already contacted a while ago to ask if it's okay that I create a new robes model based on her sketches. The model is finished, I just need to finish the textures. But I just keep getting carried away with new stuff, so I've got a bunch on my plate already at the moment. A few months ago I've also contacted Plasma et PreFXDesign on JKHub to port their Lobster Soldier models (armor + weapons) from The Last Jedi. I've pretty much ported everything already, I just need to figure out a few things, including how to create new enemies that'd wear that stuff and place them around in K2.

-
Thank you. Yes I'm aware of it. It's not really a bug since everything is working as intended, it's just that the robes weren't designed with Togrutas in mind so the main lekku in the back ends up clipping with the hood. Anyway, I think I'll just have to include modified robe models in the final mod that would have flattened out hoods. They'll just replace the ones used by this head's appearance line, so other playable heads and NPCs will still have the regular robes. Seems like the simplest way to get rid of the problem. Well, doesn't that remind you of a certain companion? 😉
-
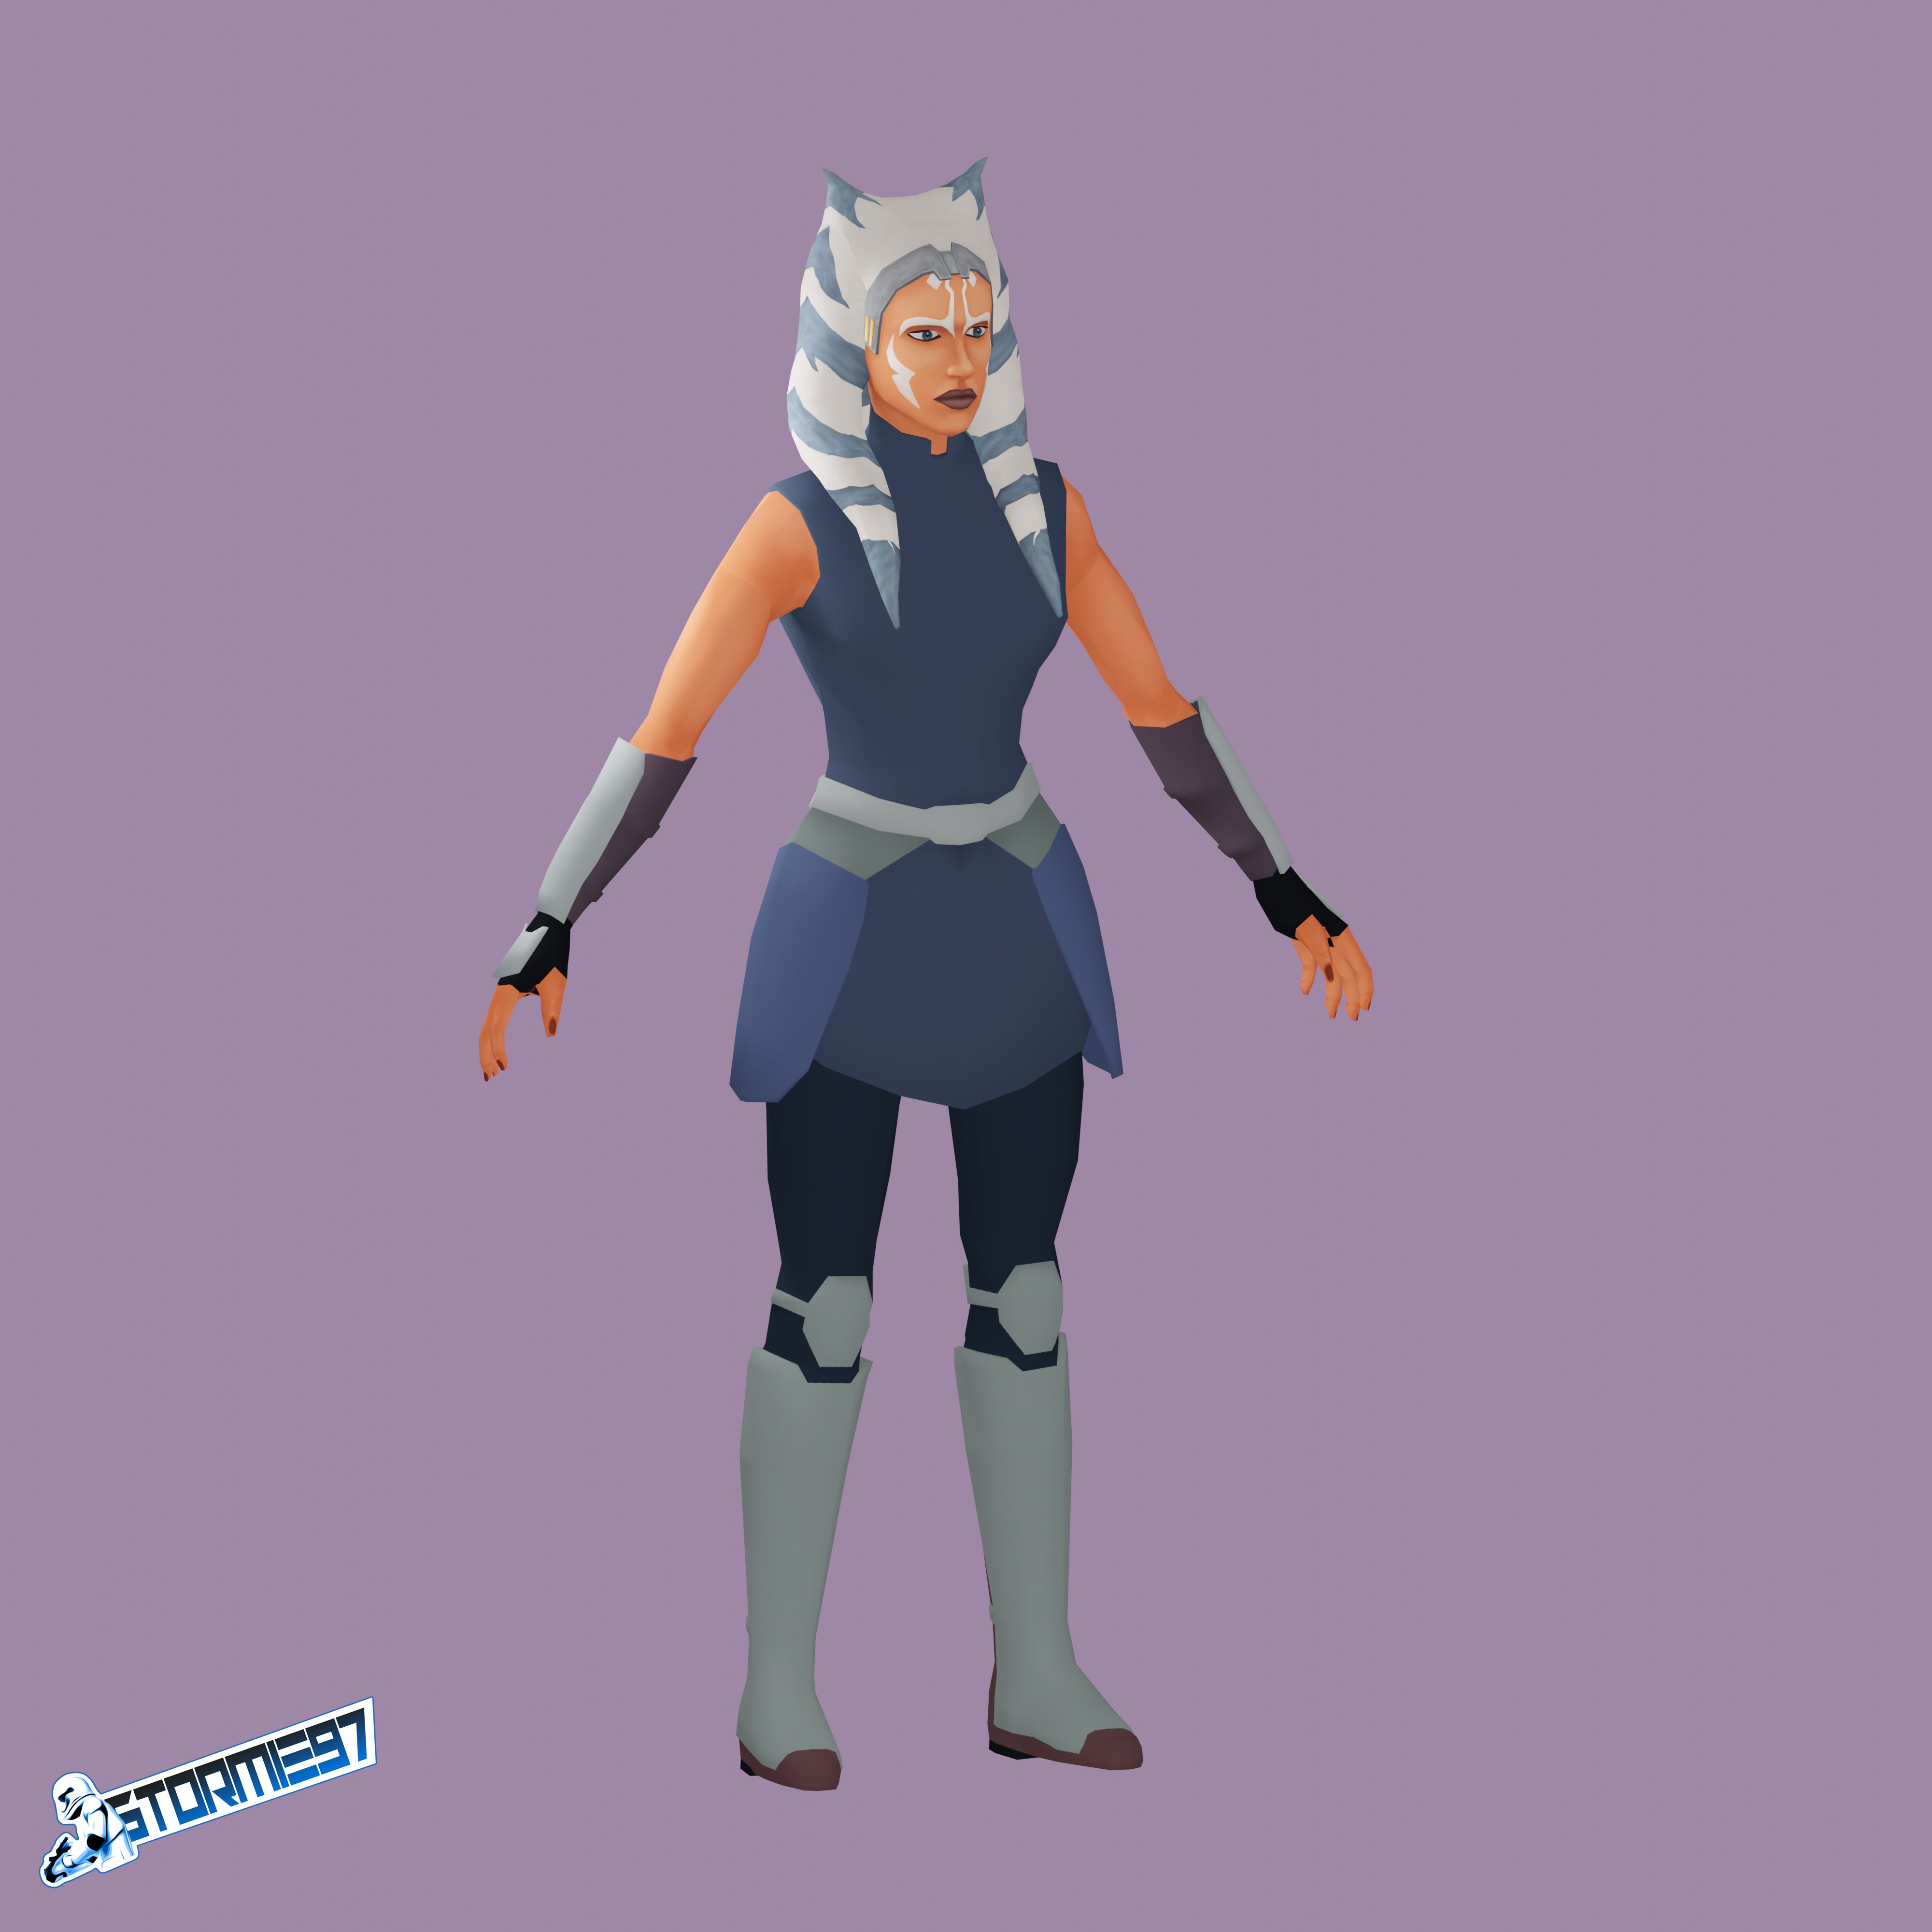
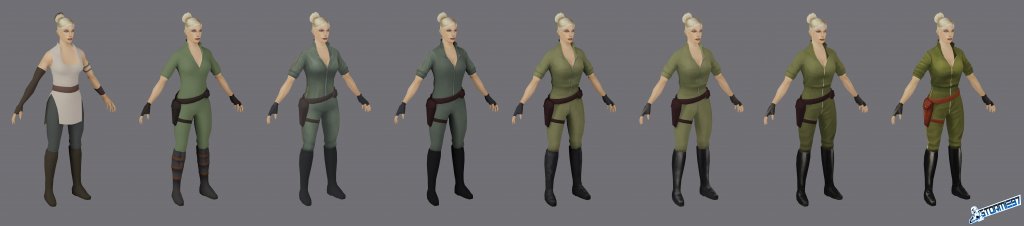
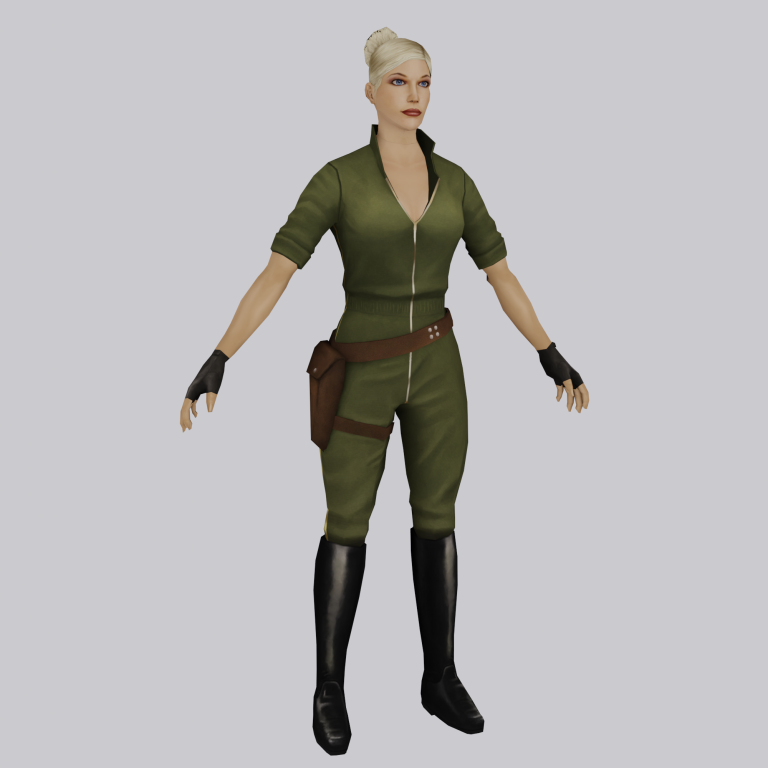
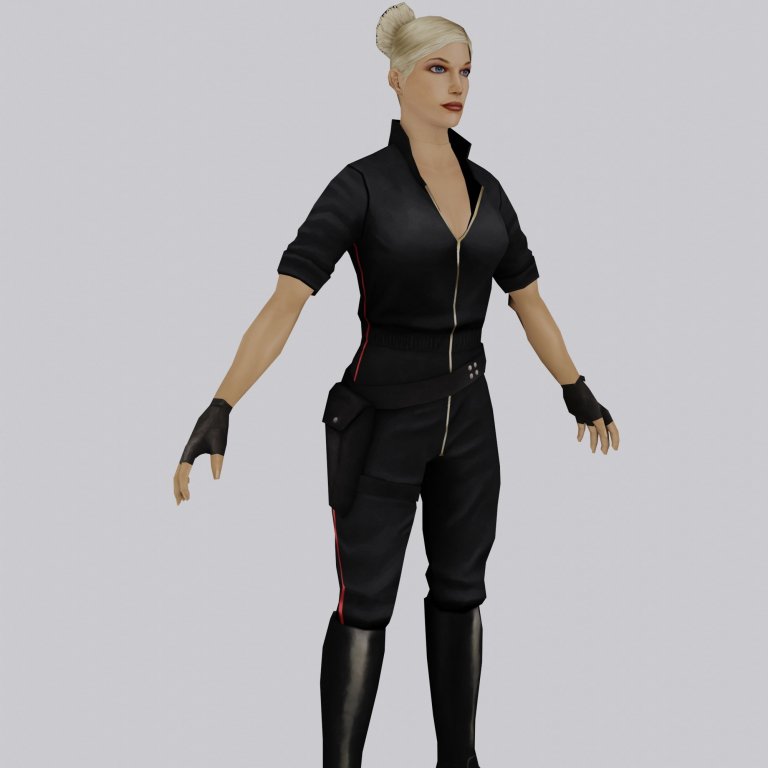
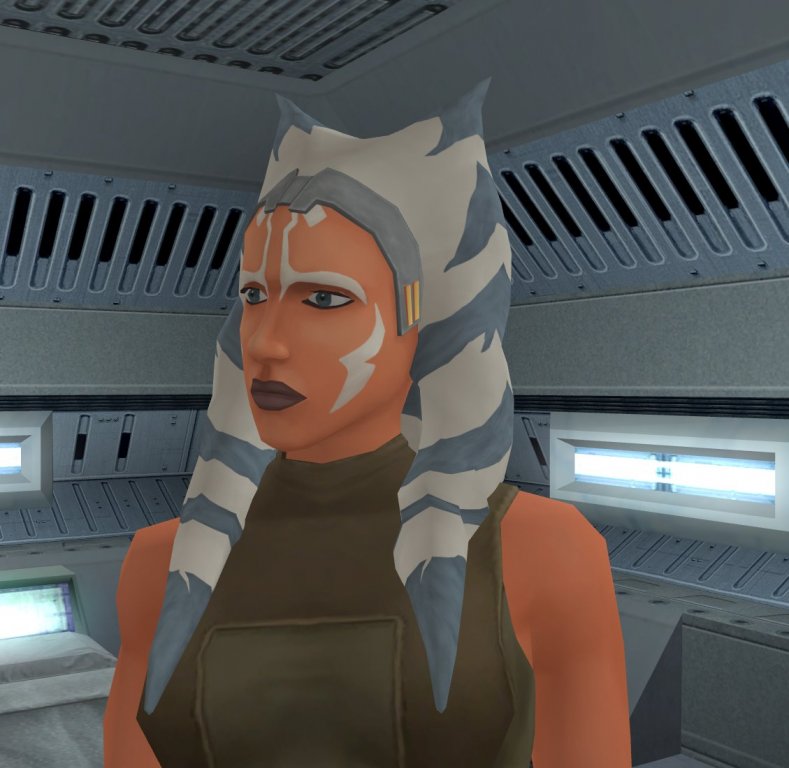
Haven't posted here for a while, time for an update. Regarding my Ahsoka Tano mod I've posted about a few months ago, progress is good. The head is complete and working well in-game. I've also worked on her outfit of the S7 finale. While it is well under way, I need to finish painting the textures before moving on to skinning the model. Since the oufit seems to bear Mandalorian patterns, I think I'll make the outfit available in-game (probably technically working as a disguise) as a reward for completing the hand-to-hand combat challenge in the Mandalorian camp on Dxun or something like that. I don't want to release the head separately and then go back to update the file to include the outfit, but I'll drop a "beta" version of the mod containing just the head here. Feel free to report any bugs on this thread or by DM. Moving on, the other day I've posted a pic of a WIP model I'm working on. The idea behind it is to create all new models that'd replace the boring default commoner clothing for the PC. I'll create upgradable items with interesting stats to give the user an incentive to actually use the new clothing other than just the new aesthetic. While I've teased the male model the other day, the female version is actually pretty much done. I've literally spent dozens of hours working, scrapping and recreating the damn thing, but I've now come to something I'm very happy with. And here it is. But wait, you might be wondering.. ..and yes it do! Next step, finishing the male model! Ahsoka_beta.zip

- 66 replies
-
- 11
-

-

-
I'm back! A lil' sneak peak of what I'm working on at the moment (and will be releasing soon-ish)
-
Pretty much. Using mods from the workshop alongside manually downloaded mods tends to create all sorts of issues. Here it looks like the model is the right one from my mod but the engine is using the wrong textures.
-
 You need to rename a few files: Navigate to your Override folder Find the texture file named "twilek_f50.tga" ; that's the head texture of the Yuthura Ban PC mod Select the file and hit CTRL+X. Paste it somewhere on your computer where you'll easily find it if need be. Do the same for the files named "twilek_f50d1.tga", "twilek_f50d2.tga", "twilek_f50d3.tga" and "twilek_f50d4.tga" ; those are the dark side texture variations of the Yuthura PC mod. Find the texture file named "twiled_f02.tga" ; that's the head texture of the Ritual tattoo girl mod Create a copy of the file ; rename the copy into "twilek_f50.tga" (which is the name that the Yuthura PC mod expects for the head texture) The Girl with ritual tattoos doesn't include any dark side variation textures, so you need to create 4 copies of the "twilek_f50.tga" file you have just renamed. Then, rename those 4 copied files into "twilek_f50d1.tga", "twilek_f50d2.tga", "twilek_f50d3.tga" and "twilek_f50d4.tga". Be mindful that your character's head won't go through any changes if you go DS during your playthrough. And that's it.
 -
TSL Patcher comes with a fantastic user guide and the software is quite user friendly. Take the time to sit down and read through the guide thoroughly. Besides, for head ports you'll basically just need to use the simplest features of the patcher, i.e. adding a few rows in appearance.2da, heads.2da and portraits.2da, as well as copying the necessary .mdl, .mdx and .tga files over to the user's override folder.
-
Yes but I'm off to bed now so it'll have to wait until tomorrow. I'll send you a DM.
-
No it won't affect the bake, just pointed it out in case that'd be something noticeable in the game you want to put this in (it probably will be). Generally to make characters pose, you want to use a skeleton rig so that you can move the bones around to make the pose you want. I'm attaching the blender file here, feel free to use it (or anyone else reading this). It was made for a character ported from another game but it should work fine for the Sith trooper model with a few adjustments. This way, your models won't need to have holes everywhere. I use Blender 2.8+ which I definitely recommend, unless you really need 2.79 for some reason (such as plugins that don't exist for 2.8). The general process goes like this: In Object Data Properties, under UV Maps, create a new UV map. Name it however you want. Do this for each of the meshes and make sure they all have the same name name for that second UV set. For each of these objects, click on their new UV set and proceed to unwrap your model however you want. There a different possible approaches here. You can make sure you don't hit Unwrap and just rearrange the UVs as they exist in the first, original UV map so that all of them fit into one image. Or you can select everything, hit U, 'Smart Unwrap' and call it a day. Once your second UV set is ready, duplicate your objects. Rename the duplicates into something like "[NAME].orig". Name the others something like "[NAME].new" (this is just to make these instructions clearer). On the .orig meshes, delete the second UV map you've created. On the other meshes, delete the first UV map so as to only retain the UV unwrap you've created. Now for each mesh: Select a .orig mesh. In the material node editor, add an Image Texture node. Create a new image and name it "MyTexture" or whatever, with the resolution you'd like. Whether no alpha channel is need depends on your target game engine and the results you want to achieve. Make sure the new image texture node is active. Now, CTRL + select the corresponding .new mesh. Create a new material, set it up as a simple Image Texture -> Diffuse BSDF -> Material Output, with the "MyTexture" image selected in the Image Texture node. Make sure the Image Texture node is selected here as well. Now go to the render tab and select Cycles. Scroll down to Bake and select "Diffuse" in Bake Type. Uncheck "Direct" and "Indirect" under Influence as to only retain "Color". Click on the "Selected to Active" checkbox. Hit the "Bake" button, and after a few moments your MyTexture image should contain the texture information of the mesh you've baked. Repeat the process for the other two meshes, just make sure that "Clear Image" is unchecked under Output or Blender will just keep erasing whatever you had baked before. There's probably a shorter way to do it but this works every time. Unfortunately I can't help for the Unity part. AFAIK, Blender Render is longer worked on and has been replaced with Eevee in 2.8+, but you'll want to use Cycles to bake your new texture. basic armature.fbx
-
This is quite tricky. The reason the Qel-Droma robes in-game look like any other Jedi robes is because they all share the same 3D body model. There is only a small number of body models that can be used in KOTOR, ranging from Model A (being the underwear model) to Model J (the Star Forge robes model), which are determined in appearance.2da as columns. While it's possible to add appearance rows in appearance.2da, the number of model columns is hardcoded. In practical terms, this implies that if one were to replace the Qel-Droma robe model, they'd end up replacing the entire batch of Jedi robes in the game. Now typically there are two workaround for this: either replacing the Star Forge robes model or introduce a new model as a disguise. The latter is ideal for stuff that also covers the head of the wearer, but when the character's head is meant to be visible, then it gets tricky because you'd have to create a new row in appearance.2da for each of the playable heads. Yikes. Besides, a mere retexture, however well-made it may be, won't cut it if you want to achieve the look on those pictures, simply because the robes models don't quite look like on the pictures. Depending on the direction you'll want to take for this I'd gladly create a new model quite close to the one in your pics. However, as I'm already working on several projects at the time and because of IRL stuff, I won't create the texture for it. Someone else would have to join in and do that.
-
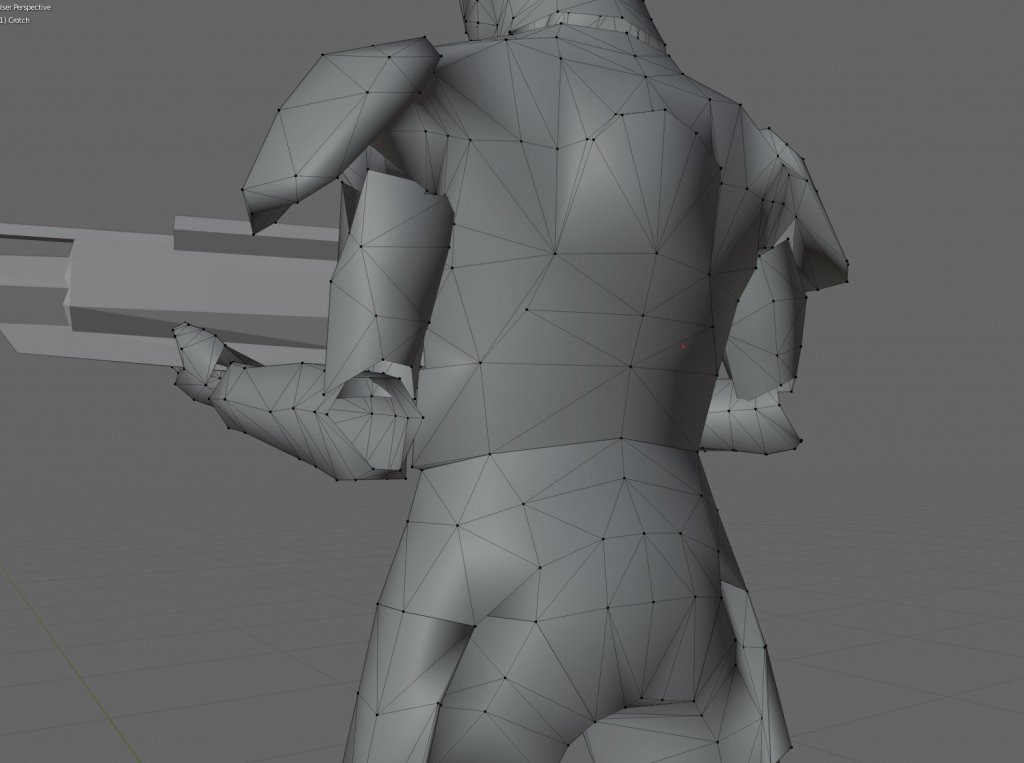
I'm seeing quite a few issues here. You seem to have deleted some geometry around the shoulders and elbows. I'm assuming this is either by mistake or perhaps you've tried to pose the character's arms by moving the vertices around and this happened as collateral damage. The Sith Trooper texture is set up fine, but what's up with material nodes spaghetti fest for the weapon and base? From what I can see, you were trying to add some specularity (shininess) to the weapon and base, am I correct? If I understand correctly the problem you've described, it's that you want to combine all textures into one single image file, isn't it? If so, just unwrapping the UVs is not quite enough, you have to bake a new combined texture. I can walk you through it if that's what you're going for, but you'll want to correct the issues I've stated above first. I don't own TableTop Simulator so I'm not able to take a look at the files. When you say "sway back and forth", do you mean the characters follow the same animations as in the kotor games? If that's the case, it means the author ported kotor's animations into his mod. Not sure how the community would feel about that though.

-
It's a compass pointing to Bastila's location. It's part of the whole "You need to gather your party" mechanic, nothing to worry about.
-
Not really. Basically, by removing those polygons you'd end up with holes in the model. That would mean you'd have to remodel and retexture most of the model to achieve the result you've described. In that case, editing any of the existing armors would require much less work to obtain the desired effect.
- 1 reply
-
- 2
-

-
-
Question on Appearance.2da editing
Stormie97 replied to Elwood288's topic in General Kotor/TSL Modding
You'll find a lot of info on that subject on Kexikus' thread here -
I was having a good day until you reminded me of those. Haven't seen the movie (which I hear is pretty bad) but yeah, Rebels ranged from mediocre to atrocious and I hope they never dare to bring that Space Aladdin idiot back. Doesn't change my opinion on CW's finale though.
-
Thanks, I made a number of small tweaks including darker blue bits on the lekku and pointier tips. I'm satisfied with the result and moved on to the skinning part. Here's a preview of her in-game. I've also started working on her outfit from the show finale (WIP untextured): The final mod will also include her two lightsabers. I'm not sure about the locations to put the items in in-game though, suggestions are welcome. Well the last four episodes are some of the best prequel material that has come out so far, and it's also some of the best stuff Disney has ever done with the franchise. I heavily recommend and I don't think it's necessary to watch the whole show (nor the first 8 episodes of the final season) to appreciate the finale.

-
She is no Jedi.
-
The Clone Wars ending is so good I might start doing a proper Ahsoka mod
EDIT: Welp.

- Show previous comments 3 more
-
Thanks. I used Yuthura's head as a base and worked my way from there in order to get a sort of mix between KOTOR's style and the cartoon. I'll touch up the face a bit, too but I don't want to go overboard into the cartoonish look. This mod shows that the twilek face is actually a good base for Ahsoka, the texture job alone manages to convey her likeness.
-
-
-
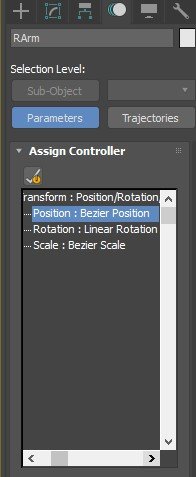
When you click on the Odysseybase "C_Rakghoul", in the Modify tab on the right there's a field labelled "Supermodel". Indeed, rakghouls don't seem to use any supermodels. So here's how I recommend you to proceed: First, let's import the vanilla model. In the KOTORMAX panel, navigate to the converted .ascii of the vanilla Rakghoul model, then select "Import Geom+Anims" and hit import ; it should come loaded with its own set of animations. From there, replace the vanilla meshes ("ghoul" being the torso + legs, "head", "LArm" and "RArm") with your the model you want to port. Your model should also be split up in a similar manner, as well as having similar size and proportions. Make sure those parts are editable meshes, give each a "OdysseyTrimesh" and "Skin" modifiers in the "Create" tab of the KOTORMAX panel. Add the corresponding bones to each split part in the Skin modifier, but before doing so, scroll down to "Advanced Parameters" and change the "Bone affect limit" to 4 (limition of the Odyssey engine apparently, very important). Also make sure all parts have the following controllers assigned: Click on the Odysseybase, in the Modify panel choose an export directory and hit "Export Model+Anim" since the Rakghoul model doesn't use any supermodel. If you don't get any warning popup, it should have gone smoothly. Convert the exported .ascii file back into binary using MDLedit and give a quick test in-game before bothering with weighing the individual vertices.

-
I wouldn't mind making a new 3d model, but I'd need a good piece of concept art to use as reference.
-
MOD:Qui-Don Jorn's Sabers 4.0 KotOR Conversion
Stormie97 replied to Kainzorus Prime's topic in Mod Releases
Switching those should do the trick: Blue w_lghtsbr_001.mdl w_lghtsbr_001.mdl w_lghtsbr_001.tga iw_lghtsbr_001.tga Green: w_lghtsbr_003.mdl w_lghtsbr_003.mdl w_lghtsbr_003.tga iw_lghtsbr_003.tga- 19 replies
-
- 1
-
-
- Qui-Don Jorn
- Saber
- (and 4 more)
-
[Help!] KOTORBlender Can't Select .mdl File
Stormie97 replied to uwadmin12's topic in General Kotor/TSL Modding
NWMax is a thing of the past, bead-v's KOTORMAX (along with MDLEdit) is the way to go.