Leaderboard


Popular Content
Showing content with the highest reputation on 04/27/2020 in all areas
-

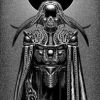
Version 2.1
3,246 downloads
The Jedi Masters is a story conversion mod for Kotor2, a fan made Kotor3 with it's own storyline spanning up to 14 hours. For installation instructions, visit : http://www.the-jedi-masters.com/download.html Trailer :1 point -
Your screenshot of Steamcmd looks good. However, I don't see your mod on Steam. On Steam you go to the workshop tab then next to your avatar you have "Your Files" -> "Files you've posted". The Steam website is just a mirror of the program, you can ignore it.1 point
-
@JediArchivist Well, whatever it is, it's not the contents of the script. I just made a VDF and saved in the directory structure you created. It gives me a workshop item ID and everything. Steam>login hodgel Logging in user 'hodgel' to Steam Public ... Logged in OK Waiting for user info...OK Steam>workshop_build_item C:\Mods\VDF\MiraRomance.vdf Create new workshop item ( PublishFileID 2075413754). Preparing update... Preparing content...ERROR! Failed to update workshop item (Failure). The error is because I never created any of the mod's files. But, I was able to replicate your error: Steam>workshop_build_item C:\Mods\VDF\MiraRomancw.vdf ERROR! Failed to load build config file "C:\Mods\VDF\MiraRomancw.vdf". So... you have a problem with the path. Check the file name properties. Since you created it in Notepad, you may have saved it as a text file due to the way Notepad works. The filename may be "MiraRomance.vdf.txt"1 point
-
Yeah, it's on my list of things to fix. I ran into trouble with it the last time, so it didn't make it to release. It is indeed caused by animation frames being missing but apparently they are needed even on an animation in which the object is not animated or things will get scrunched up. I have a script that, thanks to some help from @bead-v, can copy/paste animation frames to fix the problem en masse... but something else went wrong when I did that. I'll have to try it again at some point.1 point
-
Yes, exclude that line entirely. Steamcmd adds it (will add the line to your vfd file), like last mod number+1. You can reuse your vfd and the publishedfileid will tell Steam which mod to update.1 point
-
@Effix According to Steam's documentation, "publishedfileid" "0" tells Steam to create a new Workshop mod. After creation, "publishedfileid" in the VFD is modified with whatever value Steam gives your mod. Updates to the mod then use the modified "publishedfileid" value in order to find the mod to update. The documentation does say that "publishedfileid" can be left "unset" to create the mod, but I'm unclear as to what that means. For example, leave out "publishedfileid" entirely, or just write "publishedfileid" without a corresponding value? It can't hurt to try the full syntax, especially since everything else looks ok. @JediArchivist I would ensure this is being run with administrator rights since it modifies the VDF file. I would also check stderr.txt to see if it gives more information on the error.1 point
-
There is some documentation here. Light Priority: Only 3 light objects can affect a given mesh at any time. This number determines the priority for rendering lights. Lower number = higher priority. Ambient Only: If this is set to 1, the light will only affect static objects such as areas and not dynamic objects such as creatures. Dynamic Type: 1 for animated lights. 0 for non-animated lights. Shadow: Determines whether the light will cast shadows when occluded by dynamic objects. Flare: Determines whether the light has a lens flare, which is a texture that's rendered in front of the light whenever you look at it. Fading Light: 1 if the light should fade in and out as an object approaches/moves away from the light. If 0, the light will just blink on or off like it was hit by a switch. I would say your best bet is to copy the settings from a similar light source such as blaster bolts or T3's welding arm. Apart from that, I would try setting the priority and fading light values to 1, and flare to 0 as I don't see a use for it here.1 point
-
publishedfileid only gets added after your initial publishing, it's to identify a mod that you try to apply an update to. I've never included "changenote" (you can manage it in Steam), try leaving that out. I don't know about the contents of those folders but I don't see anything obviously incorrect. Edit: btw I'd love to help, feel free to zip your files and I'll take a look. PS: Yeah, Steam... just know its limitations. The TSL Patcher is obviously a superiour approach, which is not an option on Steam.1 point
-
@JediArchivist I think you're missing a field. Try adding "publishedfileid" "0", e.g. "workshopitem" { "appid" "208580" "publishedfileid" "0" "contentfolder" "C:\\Mods\\Mira Romance 2.0" "previewfile" "C:\\Mods\\Previews\\1.jpg" "visibility" "0" "title" "Mira Romance Mod 2.0" "description" "This Mod enables the Male Exile to romance Mira! It adds new conversation lines, a new movie, and a new outfit for Mira" "changenote" "Version 2.0.0" }1 point
-
Didn't know that the forum had/support this feature -- I got a notification for that, which is cool!1 point
-
I played this great mod back in 2014, when it was still in a beta state. It is an awesome mod, i truly felt like playing a genuine KOTOR III! I highly reccomend it to anyone who played KOTOR I and II and wishes that a KOTOR III existed!1 point
-
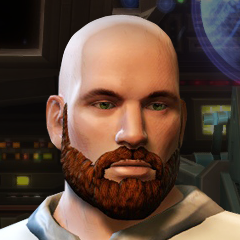
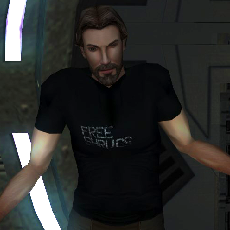
It's the character seam line on the model. I believe it is a problem with mipmapping in the game. In your case, it may be the modded texture. Hopefully this will help.1 point
-
I haven't played Kotor for a while , so I only just saw this now. I tried it and it completely removed the line from Mission's face.1 point
-
I also regularly experience this issue. It seems to be an issue with the algorithm in the game for getting data to make mipmaps from. Mipmaps are smaller versions of your texture which the game uses for rendering at different distances. This is why close up you (almost) never see this issue, and it is generally very affected by camera angle/distance. You can reduce the issue by making sure that all your UV islands have nice big like-colored dead zones/borders around them. I didn't know this early on and have paid the price. The game's mipmaps are 1/2 size at each 'level'. So, at the first level, your UV island border pixels are blended with 1 pixel (from the original sized image) from across the border. At the 2nd level, 2 pixels, 3rd level 4 pixels, 4th level 8 pixels, 5th level 16 pixels. It's a bit more complicated than that, but that is kind of the general idea. You have to balance the size of your border areas with the level at which the mipmap has so little detail it doesn't really matter. Like, a 2K texture will have 11 mipmap levels, which would need UV island borders of 1024px to be "perfect" at the last level ... but that last level is only 1 pixel, so what detail would you really be trying to preserve with that? For me, personally, I find 16px for 2K textures to be a good balance. A reason why you see this less in default textures is that they use the TPC format, which includes precomputed mipmap images (for which, presumably, they took care to make sure the mipmaps came out with good visual characteristics). TGA images don't have mipmaps, so they are generated by your video card (there is an OpenGL function that does this), which is also why there is some variance w/ different cards/drivers/etc. Seems like driver-level AA settings would help too, but in-game AA settings don't seem to affect the issue. In an ideal world, the mipmap generation would use UV mapping to refrain from using pixels from outside the UV islands, but that is not 2003 tech My understanding for why this issue never really goes away is that the game seems to maybe use black pixels when a mipmap is blending with pixels outside the border of the image. That is just a theory though.1 point
-
Well I did the retexture, so I can't rule that out, but it doesn't show when the texture is in model viewer, or in close up scenes. If it was a fault in the retexture wouldn't it always be there? EDIT: I switched back to the default texture but the line is still there.1 point
-
 god i love pedantic people1 point