


J
-
Posts
133 -
Joined
-
Last visited
-
Days Won
25
9 Followers


.thumb.jpg.85b65824e79abedb2a1401eb0edbb33b.jpg)

Recent Profile Visitors
5,826 profile views


J's Achievements
")


-
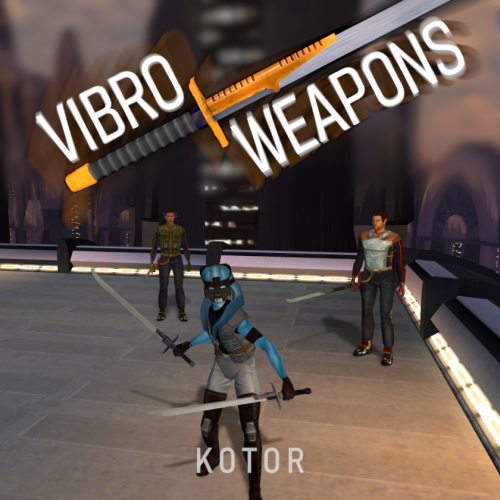
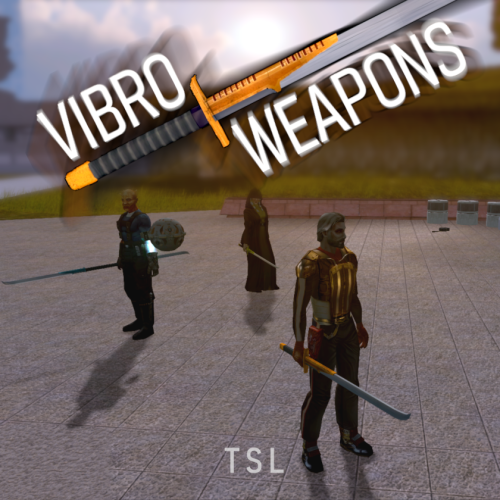
View File HQ Vibro Weapons + Effects - K1 Vibro Weapons with vibration effects. All vanilla vibroswords, vibroblades, and vibro double-blades updated. Toasty Fresh vibro models were used as a base and each texture was color matched to the vanilla style. Vibration and motion blur effects were added to the blades. 6 Vibroblades Vibroblade - g_w_vbroshort01 Krath Blood Blade - g_w_vbroshort02 Echani Vibroblade - g_w_vbroshort03 Sanasiki's Blade - g_w_vbroshort04 g_w_vbroshort05 g_w_vbroshort06 g_w_vbroshort07 Mission's Vibroblade - g_w_vbroshort08 Prototype Vibroblade - g_w_vbroshort09 7 Vibroswords VibroSword - g_w_vbroswrd01 Krath Dire Sword - g_w_vbroswrd02 Sith Tremor Sword - g_w_vbroswrd03 Echani Foil - g_w_vbroswrd04 Bacca's Ceremonial Blade - g_w_vbroswrd05 g_w_vbroswrd06 g_w_vbroswrd07 g_w_vbroswrd08 Baragwin Assault Blade - g1_w_vbroswrd01 GenoHaradan Poison Blade - geno_blade 4 Vibro Double- Blades Vibro Double-Blade - g_w_vbrdblswd01 Sith War Sword - g_w_vbrdblswd02 (not used)Echani Double-Brand - g_w_vbrdblswd03 Yusanis' Brand - g_w_vbrdblswd04 g_w_vbrdblswd05 g_w_vbrdblswd06 g_w_vbrdblswd07 Credit: KoTOR Weapon Model Overhaul by Toasty Fresh - 3 models/textures were used as base KOTOR Blender Submitter J Submitted 07/18/2026 Category Mods K1R Compatible No
-
Version 1.0.0
47 downloads
Vibro Weapons with vibration effects. All vanilla vibroswords, vibroblades, and vibro double-blades updated. Toasty Fresh vibro models were used as a base and each texture was color matched to the vanilla style. Vibration and motion blur effects were added to the blades. 6 Vibroblades Vibroblade - g_w_vbroshort01 Krath Blood Blade - g_w_vbroshort02 Echani Vibroblade - g_w_vbroshort03 Sanasiki's Blade - g_w_vbroshort04 g_w_vbroshort05 g_w_vbroshort06 g_w_vbroshort07 Mission's Vibroblade - g_w_vbroshort08 Prototype Vibroblade - g_w_vbroshort09 7 Vibroswords VibroSword - g_w_vbroswrd01 Krath Dire Sword - g_w_vbroswrd02 Sith Tremor Sword - g_w_vbroswrd03 Echani Foil - g_w_vbroswrd04 Bacca's Ceremonial Blade - g_w_vbroswrd05 g_w_vbroswrd06 g_w_vbroswrd07 g_w_vbroswrd08 Baragwin Assault Blade - g1_w_vbroswrd01 GenoHaradan Poison Blade - geno_blade 4 Vibro Double- Blades Vibro Double-Blade - g_w_vbrdblswd01 Sith War Sword - g_w_vbrdblswd02 (not used)Echani Double-Brand - g_w_vbrdblswd03 Yusanis' Brand - g_w_vbrdblswd04 g_w_vbrdblswd05 g_w_vbrdblswd06 g_w_vbrdblswd07 Credit: KoTOR Weapon Model Overhaul by Toasty Fresh - 3 models/textures were used as base KOTOR Blender-
- 5
-

-

-
- vibrosword
- weapons
- (and 2 more)
-
If you wanted to keep the Star Map in it's current location, you could borrow the dark energy from K2 and have it blocking the star map until you explore the new area.
-
 I would recommend using the light saber hilt fix in Kotor Patch Manager. Otherwise, you would need to use KotorBlender and to modify the model.
 -
No JCs Lightsaber effects mod does not work with crazy's. This one does support it tho: https://deadlystream.com/files/file/2794-lightsaber-hilt-variety-tsl/
-
 yes everything goes to override
- 5 comments
-
- 1
-

-
- vibrocutter
- vibroblade
- (and 1 more)
-
You may not need to. There's a lot of exciting game patching in the works, including a lightsaber hilt fix.
-
All good suggestions. I do plan to add a skip function when downloading/syncing. I think there's 2 camps here. One that wants a no fuss single-click installer, to quickly play the game. Another that wants to customize advanced mod builds. I'm trying to build it for both. If you add [NO DELETE] to the beginning of a custom mod title, it should not delete them when syncing. A warning popup should be added when clicking sync. Root builder is very useful but I dislike how much time it adds to the game launch. I'm looking into ways to improve this. It will be needed for the upcoming patching framework by @Lane. Tslpatcher mods do show as disabled. I don't like it either but when I started this project there was no way to have a plugin change ignore list settings. This may have changed in the past year and I'll be looking into it. I also need some way to flag or mark tslpatcher mods.
-
The author just updated the mod. You can get around this by downloading the previous version on the same page. On the mod page, click "see changeling" and then you can download v1.1.1. I uploaded the hashes for the new mod update. Pressing refresh will download the latest instruction set/hashes. Thank you for testing this. I'll fix it to make it more seamless in the next update.
-
When downloading singles files like this one, it will create a .zip. That might have failed the first time and then when you refresh, it created a new tar02_duelorg021.dlg.zip.
-
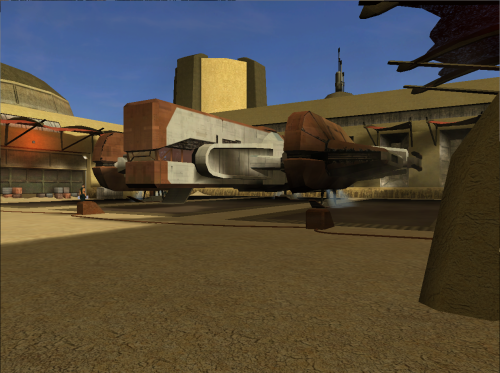
View File HD Ebon Hawk - K1 Ported clean version of HD Ebon Hawk -TSL to KOTOR. The original texture was upscaled then a lot of manual cleanup and detail was added. The original leviathan hangar ebon hawk texture was missing reflections and it has been fixed. Compatible with Yavin Station Hangar by WildKarrde Submitter J Submitted 05/03/2026 Category Skins K1R Compatible No
-
Version 1.0.0
43 downloads
Ported clean version of HD Ebon Hawk -TSL to KOTOR. The original texture was upscaled then a lot of manual cleanup and detail was added. The original leviathan hangar ebon hawk texture was missing reflections and it has been fixed. Compatible with Yavin Station Hangar by WildKarrde -
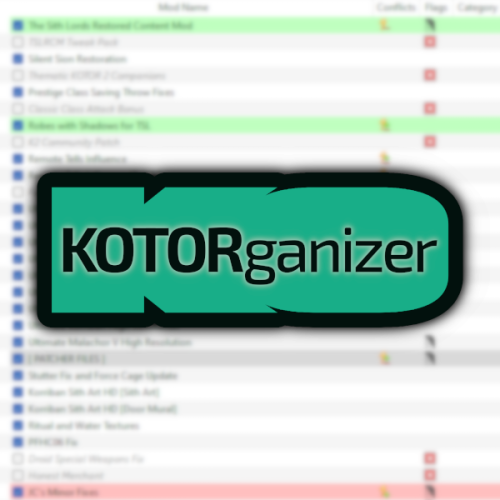
View File KOTORganizer MO2 Plugin ## Quick Setup 1. Download the Latest Archive version of **Mod Organizer 2 Beta 2.5.3** from the MO2 Discord and extract it somewhere with plenty of free space. 2. Download the **KOTORganizer plugin** and extract it into your MO2 folder. 3. Launch MO2 and complete the first-time setup: * Choose **KOTOR** or **KOTOR 2** as the game. * Choose **portable instance**. * Login to your nexus account, in the settings. 4. Open the **Sync** tab on the right side of MO2. 5. Click **Refresh** to pull the latest mod build instructions. 6. Click **Download All** and wait for the downloads to finish. * Some downloads will open in your browser and require you to click the download button manually. 7. Once all downloads are finished, click **Refresh** again to validate the files. * If any files are missing or mismatched, download them again. 8. When all files are validated, click **Sync** to install the mod list. * This may take some time. * The process is complete when the patcher window shows the final error and warning count. 9. Click **Run** to start the game. NOTE: The following are not included and will need to be patched/installed manually: - Widescreen Patches for KOTOR - 4GB patches for both games - 3C-FD Patcher for KOTOR2 - Upscaled Movies for KOTOR and KOTOR2 KOTORganizer MO2 Plugin KOTORganizer extends Mod Organizer 2 for both STAR WARS Knights of the Old Republic and STAR WARS Knights of the Old Republic II: The Sith Lords. Why Mod Organizer 2? Mod Organizer 2 already provides a stable foundation for mod management across many games. Extending it for Star Wars: Knights of the Old Republic and Star Wars: Knights of the Old Republic II: The Sith Lords gives KOTOR modding access to MO2’s biggest strength: the virtual file system. With MO2, the game sees modded files as if they are in the game directory, while the real game folder stays untouched. This keeps the base install closer to vanilla, makes mods easier to enable or disable, and gives better visibility into how files overlap or conflict. MO2 does have a learning curve, but for advanced KOTOR/KOTOR2 builds, the extra structure is worth it. Who Is This For? This plugin is mainly intended for larger KOTOR/KOTOR2 mod builds, repeatable installs, and users who want better insight into file conflicts. An auto downloader and installer is included to easily deply the Mod Builds from https://kotor.neocities.org/ If you only install a few simple loose-file mods, this may be more tool than you need. If you are building a large mod list with many TSLPatcher mods, texture overrides, and compatibility concerns, MO2 provides a much cleaner workflow. Installing Mod Organizer 2.5.3 Beta is required. The current unreleased beta builds include features that KOTOR support depends on. A beta build can be acquired from the Mod Organizer 2 Discord in the dev-build channel. Development has been more active recently, so an official release should be available soon. Once you download and extract MO2, download and extract KOTORganizer to the MO2 directory. Launch ModOrganizer.exe and you can verify the plugin is loaded by opening the Info tab on the right. The sync tab can download and install the mod builds from https://kotor.neocities.org/ Texture Management KOTOR uses several texture-related file types, including .tpc, .tga, .dds, and .txi. MO2 normally only detects exact filename conflicts, but KOTOR has additional texture priority rules that can cause problems even when the extensions differ. The texture management tab helps bridge that gap. It detects conflicts across supported texture formats and highlights them by severity. The highest-severity conflicts are cases that may cause hard crashes in-game. Lower-severity warnings include cases where a .tpc takes priority over a .tga or .dds unexpectedly. An Auto Fix button is included to resolve supported texture conflicts based on the current MO2 mod priority order. TSLPatcher Management Many KOTOR mods use TSLPatcher-style installers instead of simple loose-file installs. The patcher tab lists enabled mods that contain a tslpatchdata folder and can consolidate their patched output into a single MO2-managed mod. Double-clicking a patcher mod shows more detail, including: the changes.ini parsed human-readable install actions detected conflicting patch actions the latest install log A test tab is also available for simulating or testing a single mod install before running the full patcher process. When the patcher process is run, enabled patcher-style mods are processed in priority order and consolidated into a [PATCHER FILES] mod in MO2’s left panel. Automatic Mod Deployment The sync tab is designed to help download, validate, and install mod builds that follow the instructions from the KOTOR Mod Builds site. The Refresh button pulls the latest instruction set and checks for missing files. Download All starts downloading missing mods in sequence. Nexus Mods downloads require logging in with a Nexus account inside MO2. Deadly Stream mods can be downloaded automatically when supported. Mods from other sources open in an Edge browser window, where the user only needs to click the download button. The browser window closes automatically after the download completes. Downloads can still fail. Servers can be slow, unavailable, or inconsistent, and some files may need to be retried manually. Once all files are validated through Refresh, the Sync button becomes available. Sync extracts the downloaded files, runs the multi-patcher, and applies supported texture conflict fixes. When the patcher summary appears with the number of errors and warnings, the process is complete. Manual Mod Installing KOTOR mods are often packed inconsistently. The plugin includes a KOTOR-specific mod data checker that recognizes common archive layouts and can fix many of them automatically. This is especially useful for loose-file mods and patcher-style archives that would otherwise require manual cleanup before MO2 can install them correctly. Steam Workshop Warning If the game is installed through Steam and Workshop content is detected, the plugin warns the user. The intended workflow is MO2-managed content, not a mixed MO2 plus Steam Workshop setup. Mixing both can make conflicts harder to understand and can lead to unexpected file priority issues. Save Support The plugin integrates the game’s saves folder into MO2. Save entries can show timestamps, basic metadata, and screenshot previews. Profile-specific saves can also be enabled through MO2 settings. Limitations This plugin is meant to reduce repetitive setup work, improve conflict visibility, and make large KOTOR/KOTOR2 builds easier to manage. It does not remove the need to read mod instructions. Mods with unusual installers, custom compatibility patches, manual edit requirements, or unsupported archive layouts may still require manual review. Submitter J Submitted 05/03/2026 Category Modding Tools
-
Version 2.2.7
174 downloads
## Quick Setup 1. Download the Latest Archive version of **Mod Organizer 2 Beta 2.5.3** from the MO2 Discord and extract it somewhere with plenty of free space. 2. Download the **KOTORganizer plugin** and extract it into your MO2 folder. 3. Launch MO2 and complete the first-time setup: * Choose **KOTOR** or **KOTOR 2** as the game. * Choose **portable instance**. * Login to your nexus account, in the settings. 4. Open the **Sync** tab on the right side of MO2. 5. Click **Refresh** to pull the latest mod build instructions. 6. Click **Download All** and wait for the downloads to finish. * Some downloads will open in your browser and require you to click the download button manually. 7. Once all downloads are finished, click **Refresh** again to validate the files. * If any files are missing or mismatched, download them again. 8. When all files are validated, click **Sync** to install the mod list. * This may take some time. * The process is complete when the patcher window shows the final error and warning count. 9. Click **Run** to start the game. NOTE: The following are not included and will need to be patched/installed manually: - Widescreen Patches for KOTOR - 4GB patches for both games - 3C-FD Patcher for KOTOR2 - Upscaled Movies for KOTOR and KOTOR2 KOTORganizer MO2 Plugin KOTORganizer extends Mod Organizer 2 for both STAR WARS Knights of the Old Republic and STAR WARS Knights of the Old Republic II: The Sith Lords. Why Mod Organizer 2? Mod Organizer 2 already provides a stable foundation for mod management across many games. Extending it for Star Wars: Knights of the Old Republic and Star Wars: Knights of the Old Republic II: The Sith Lords gives KOTOR modding access to MO2’s biggest strength: the virtual file system. With MO2, the game sees modded files as if they are in the game directory, while the real game folder stays untouched. This keeps the base install closer to vanilla, makes mods easier to enable or disable, and gives better visibility into how files overlap or conflict. MO2 does have a learning curve, but for advanced KOTOR/KOTOR2 builds, the extra structure is worth it. Who Is This For? This plugin is mainly intended for larger KOTOR/KOTOR2 mod builds, repeatable installs, and users who want better insight into file conflicts. An auto downloader and installer is included to easily deply the Mod Builds from https://kotor.neocities.org/ If you only install a few simple loose-file mods, this may be more tool than you need. If you are building a large mod list with many TSLPatcher mods, texture overrides, and compatibility concerns, MO2 provides a much cleaner workflow. Installing Mod Organizer 2.5.3 Beta is required. The current unreleased beta builds include features that KOTOR support depends on. A beta build can be acquired from the Mod Organizer 2 Discord in the dev-build channel. Development has been more active recently, so an official release should be available soon. Once you download and extract MO2, download and extract KOTORganizer to the MO2 directory. Launch ModOrganizer.exe and you can verify the plugin is loaded by opening the Info tab on the right. The sync tab can download and install the mod builds from https://kotor.neocities.org/ Texture Management KOTOR uses several texture-related file types, including .tpc, .tga, .dds, and .txi. MO2 normally only detects exact filename conflicts, but KOTOR has additional texture priority rules that can cause problems even when the extensions differ. The texture management tab helps bridge that gap. It detects conflicts across supported texture formats and highlights them by severity. The highest-severity conflicts are cases that may cause hard crashes in-game. Lower-severity warnings include cases where a .tpc takes priority over a .tga or .dds unexpectedly. An Auto Fix button is included to resolve supported texture conflicts based on the current MO2 mod priority order. TSLPatcher Management Many KOTOR mods use TSLPatcher-style installers instead of simple loose-file installs. The patcher tab lists enabled mods that contain a tslpatchdata folder and can consolidate their patched output into a single MO2-managed mod. Double-clicking a patcher mod shows more detail, including: the changes.ini parsed human-readable install actions detected conflicting patch actions the latest install log A test tab is also available for simulating or testing a single mod install before running the full patcher process. When the patcher process is run, enabled patcher-style mods are processed in priority order and consolidated into a [PATCHER FILES] mod in MO2’s left panel. Automatic Mod Deployment The sync tab is designed to help download, validate, and install mod builds that follow the instructions from the KOTOR Mod Builds site. The Refresh button pulls the latest instruction set and checks for missing files. Download All starts downloading missing mods in sequence. Nexus Mods downloads require logging in with a Nexus account inside MO2. Deadly Stream mods can be downloaded automatically when supported. Mods from other sources open in an Edge browser window, where the user only needs to click the download button. The browser window closes automatically after the download completes. Downloads can still fail. Servers can be slow, unavailable, or inconsistent, and some files may need to be retried manually. Once all files are validated through Refresh, the Sync button becomes available. Sync extracts the downloaded files, runs the multi-patcher, and applies supported texture conflict fixes. When the patcher summary appears with the number of errors and warnings, the process is complete. Manual Mod Installing KOTOR mods are often packed inconsistently. The plugin includes a KOTOR-specific mod data checker that recognizes common archive layouts and can fix many of them automatically. This is especially useful for loose-file mods and patcher-style archives that would otherwise require manual cleanup before MO2 can install them correctly. Steam Workshop Warning If the game is installed through Steam and Workshop content is detected, the plugin warns the user. The intended workflow is MO2-managed content, not a mixed MO2 plus Steam Workshop setup. Mixing both can make conflicts harder to understand and can lead to unexpected file priority issues. Save Support The plugin integrates the game’s saves folder into MO2. Save entries can show timestamps, basic metadata, and screenshot previews. Profile-specific saves can also be enabled through MO2 settings. Limitations This plugin is meant to reduce repetitive setup work, improve conflict visibility, and make large KOTOR/KOTOR2 builds easier to manage. It does not remove the need to read mod instructions. Mods with unusual installers, custom compatibility patches, manual edit requirements, or unsupported archive layouts may still require manual review.- 1 review
-
- 8
-
-
-
- modorganizer
- mo2
- (and 1 more)
-
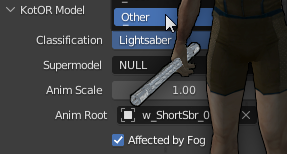
I found a different solution. Blade and hilt are separate models now. The original models contain the blade and a reference to a new model. The new model is the hilt. If you want multiple hilts then you'll have to edit the reference to point to different hilt models. Ive never use GMAX so I dont know.
