Leaderboard
Popular Content
Showing content with the highest reputation on 05/10/2019 in Posts
-
I discovered this a while ago when modding my swkotor.exe file for widescreen resolution. There is an easy way to make more modes for your monitor to appear, particularly to get around the 75Hz frame rate limit, and without setting the frequency manually. These options will appear to you from the in-game menus. As far as I know it does not give you widescreen resolutions, just the option to change frequency. All you have to do is edit your swkotor.ini file and add the line "AllowHighMonitorFrequency=1" under [Graphics Options] and you will then be able to use other frequencies like 120Hz or 144Hz if your panel supports it. [Graphics Options] RefreshRate=75 Height=1080 Width=1920 AllowHighMonitorFrequency=1 Then start the game and go your graphics options to change your refresh rate. My reason for posting this is I'm not aware of this being mentioned anywhere before and it's not on pcgamingwiki. Hopefully this will help others who have monitors with frequencies higher than 75Hz. This might also be somewhat helpful combined with V-Sync in some cases if you need that option.1 point
-
Yes. That's on the texture's alpha channel (e.g. TorKirals.tga). The RGBA color space has four channels: Red, Green, Blue, and Alpha. The first three channels determine the color. The color isn't stored as a single value (because math and computer science and stuff) but instead is split into three primary colors, with a channel for each color. Each channel is a black and white image (that's a better metaphor anyway) that just says how much of that color there is, with a range of values from 0 (black) to 255 (white) for 8-bit channels. These channels are interpolated from black and white to red, green, or blue, and then the three colors are combined to produce the final image. Like so: The alpha channel is an extra channel. Rather than adding to the color, it's used for other things, usually transparency. In this case, the alpha channel determines the intensity of the shader. In Photoshop, you can access the channels with the Channels panel: The game textures generally have alpha channels, but if there isn't one already, you can add a new one in that panel. You can click on any channel to edit it individually, and click on the RGB channel group at the top to return to RGB space.1 point
-
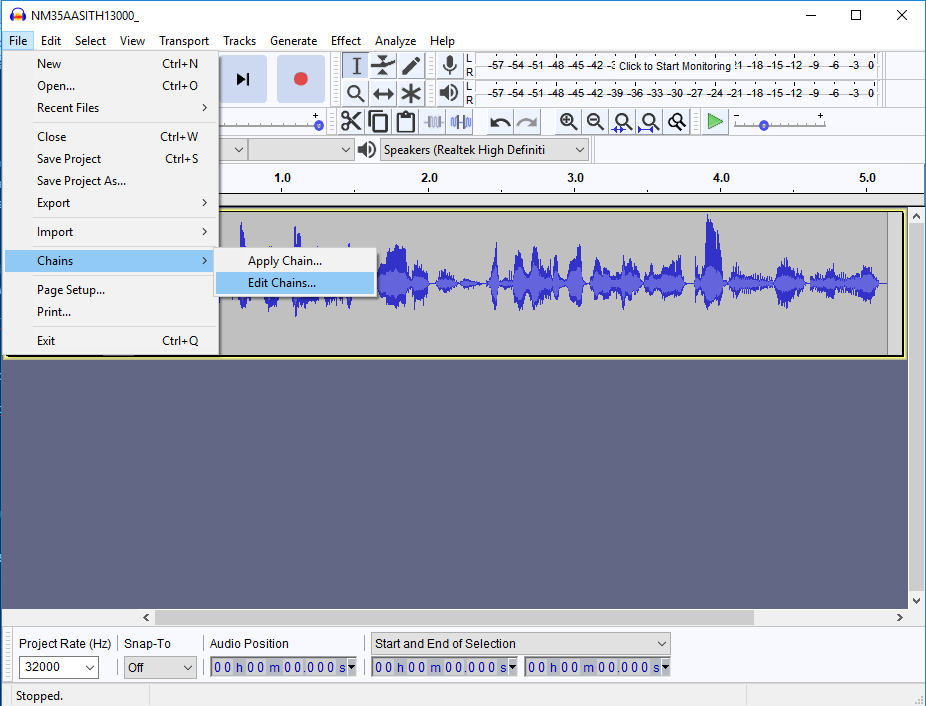
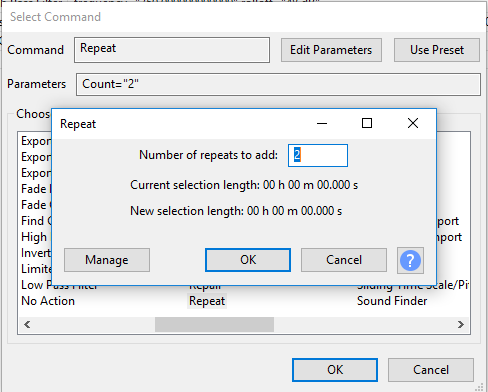
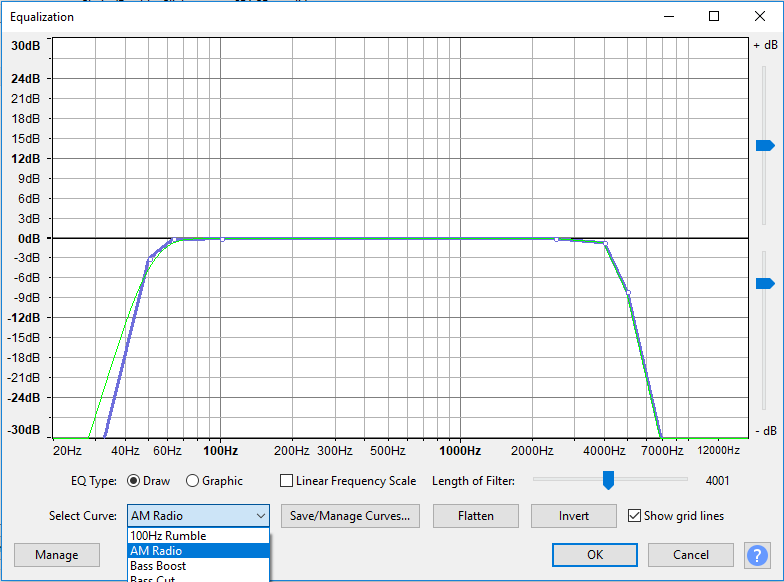
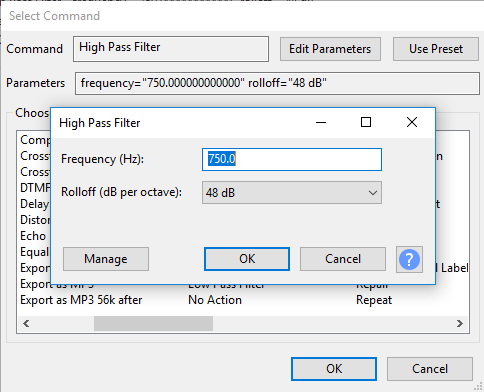
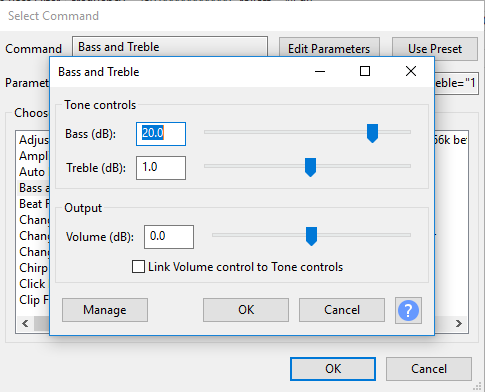
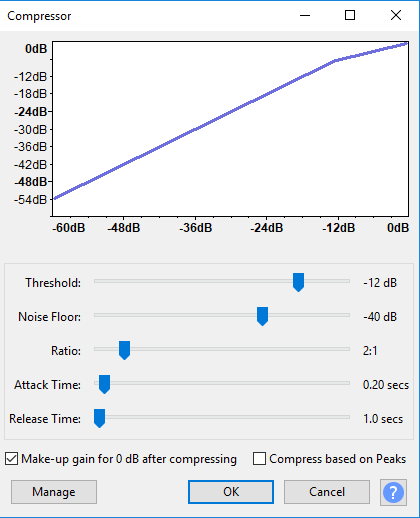
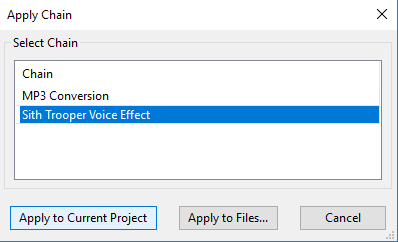
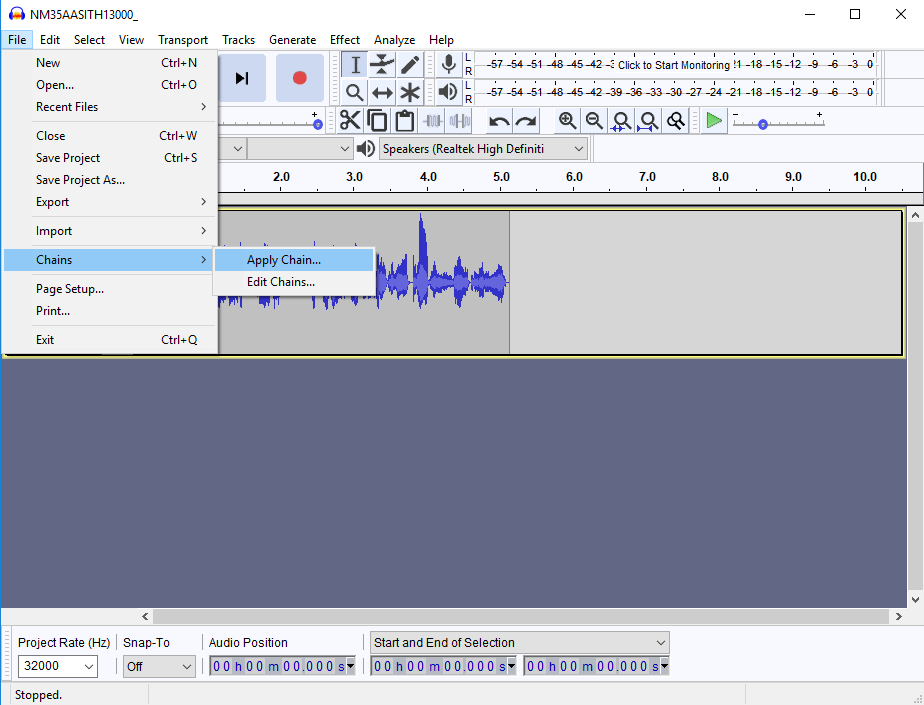
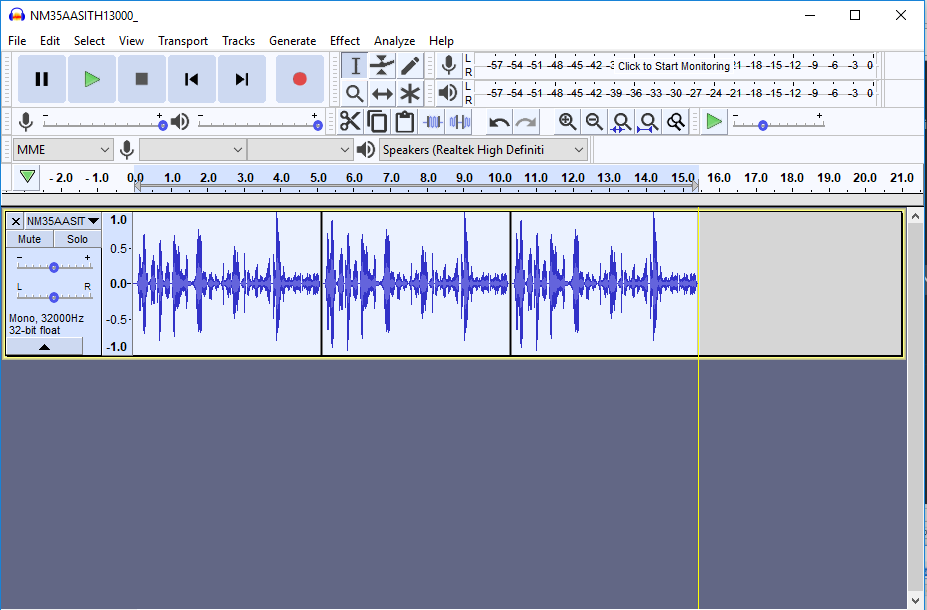
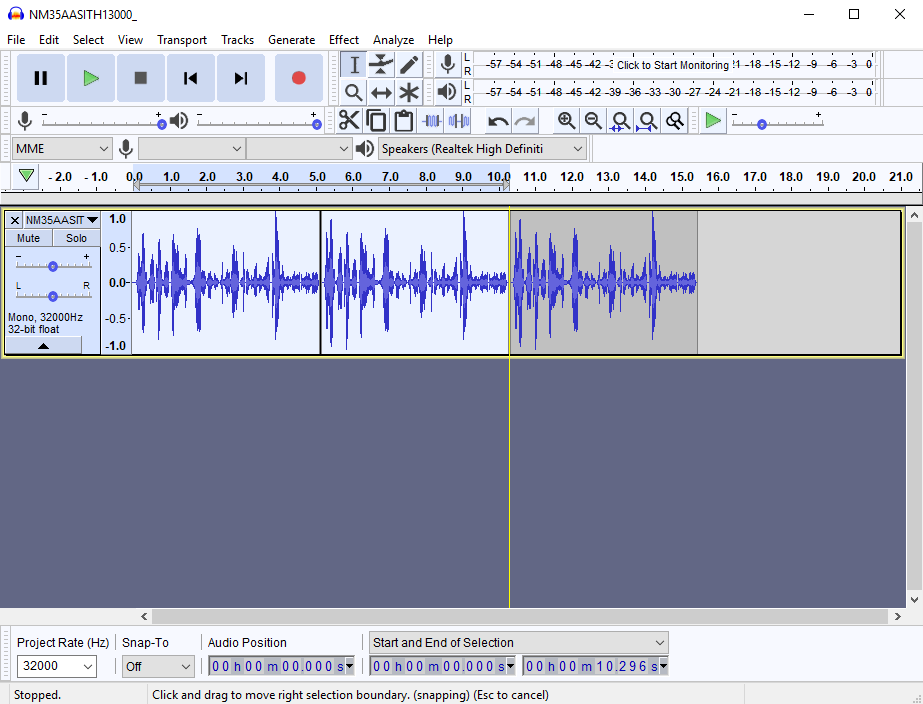
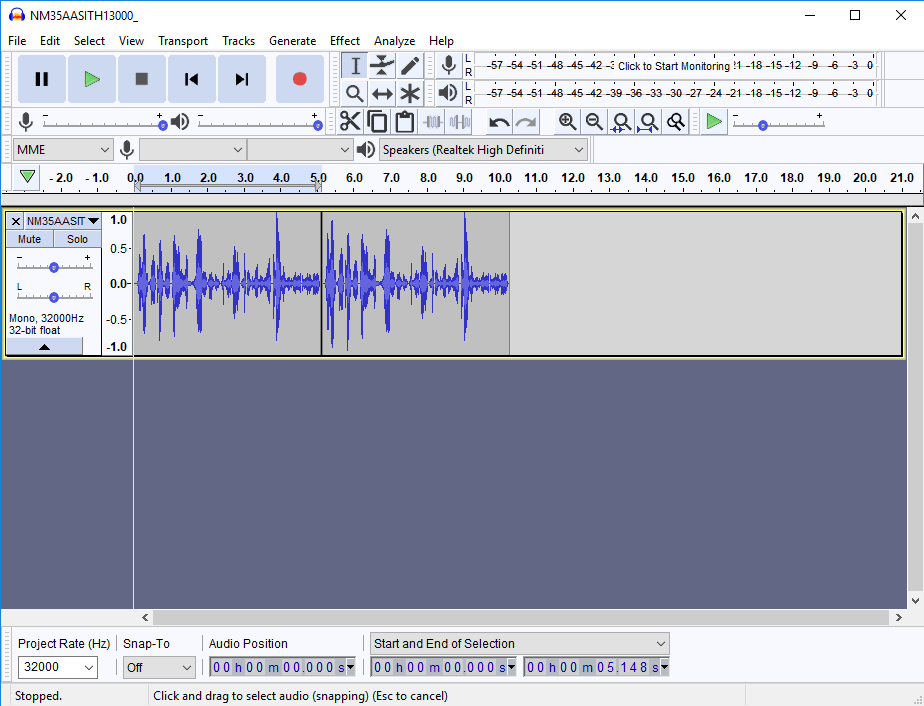
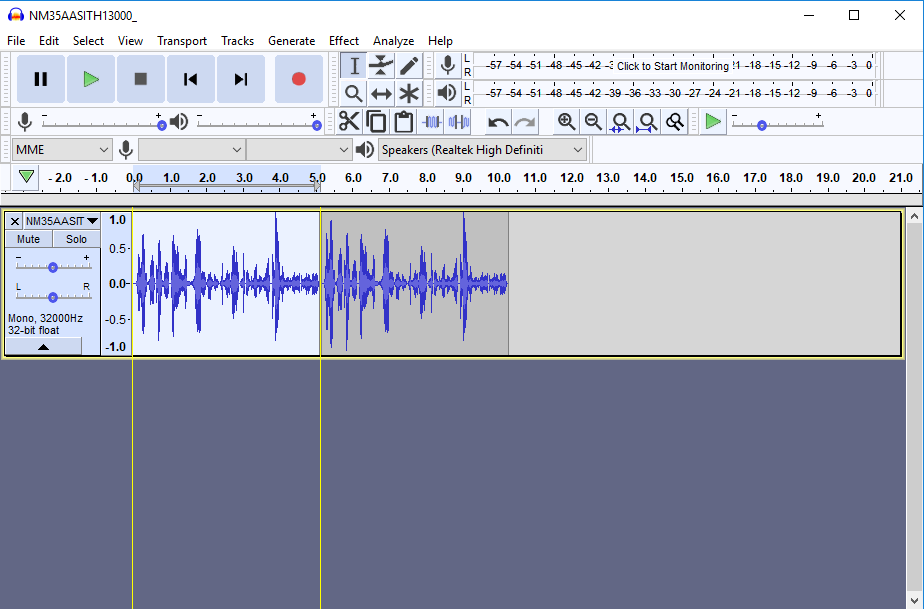
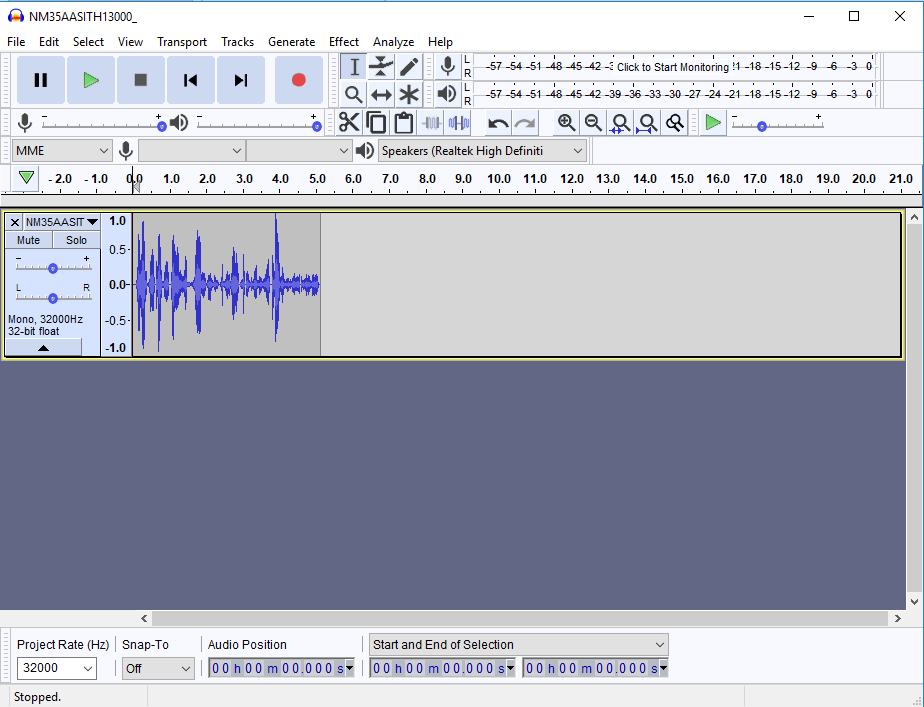
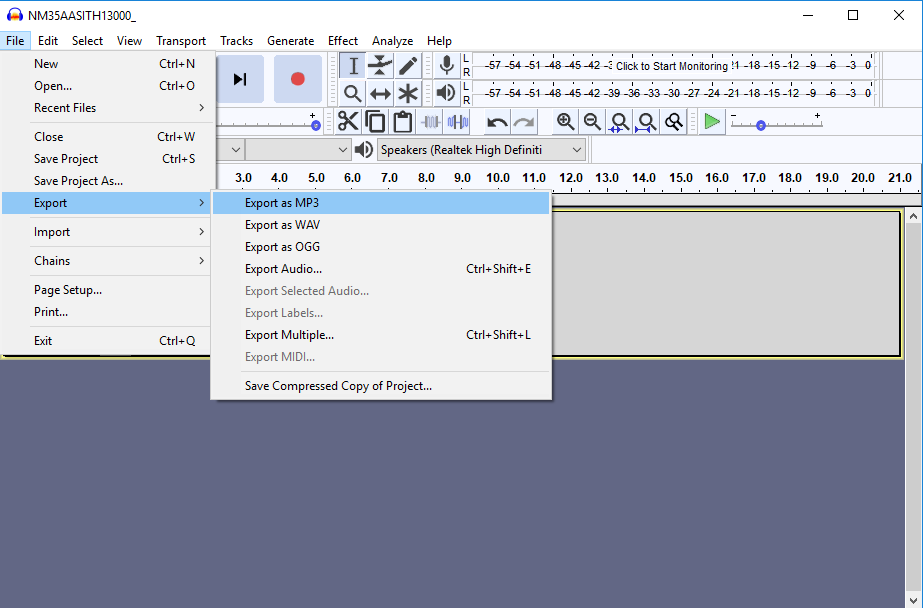
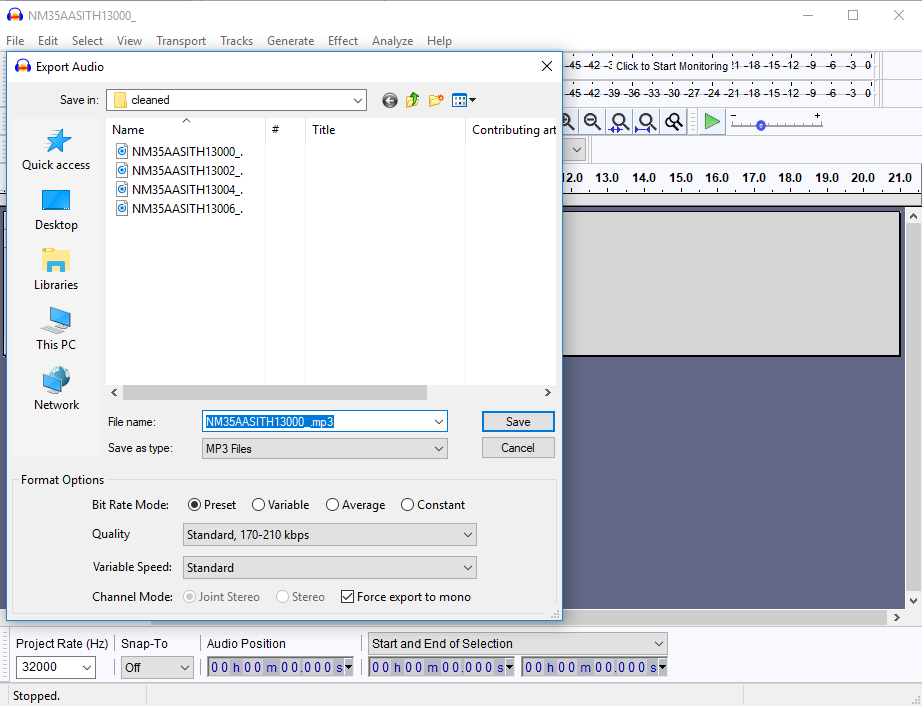
In order to make my recent addition to my Sith Trooper Texture Restoration mod, I had to convert a standard Sith voice to a Sith Trooper voice. After a lot of trial and error, I've managed to make it sound pretty spot on. (If any of you audiophiles out there have any suggestions for improvements, let me know!) Also thanks to DarthParametric for a couple of batch scripts that we'll be using in this tutorial. Tools you'll need: Audacity (The audio editing software we'll be using) dd (This is a direct download link. dd is a Unix tool for reading/writing files/disks) The batch files attached to this post Setup: Create two folders, one for the input (original) files, and one for the output (new) files Save dd from the link above, and the convert.bat file attached to this post in the input folder Save the addheader.bat, and header.bin files attached to this post to the output folder First, you need the audio file(s) you want to apply the effect to. In this tutorial we're going to be using a Sith voice file from the Korriban Acadamy, but this should work with any voice file (even ones you record yourself). Drag the .wav files from the streamwaves folder of KOTOR into the input folder (The files I'm using are in streamwaves/m35aa/sith13). The audio files that KOTOR uses are mp3 files with a wav header, so before we can do anything with them, we need to convert them to plain mp3 files. To do this, just double-click on convert.bat and let it run. When it finishes, you'll have .mp3 versions of each sound file. Now we're going to apply the Sith Trooper effect. We're going to automate some of it to make it easier, but sadly, we can't automate all of it. To automate it we will create a chain of effects which we can then easily apply to each file. Steps 1-6 creates the chain, and only need to be done once. Steps 7-12 need to be done for every audio file you wish to apply the effect to. 1. Open up one of the .mp3 files in Audacity, then go to File -> Chains -> Edit Chains: A new window will appear. In the bottom left click "add" then give the chain a title like "Sith Trooper Voice Effect". 2. Next click on Insert, and select "Repeat". Click "Edit Parameters" and change the number of repeats to 2: 3. Hit OK on both windows, and you should see it added to the chain. Next we're going to add Equalization. Select Insert again, then select Equalization, end edit Parameters. In the Select Curve dropdown, select AM Radio: Make sure the other settings are as in the screenshot, then hit OK. 4. Select Insert again, and select High Pass Filter. Edit Parameters and set frequency to 750Hz and rolloff to 48db: 5. Hit OK, hit Insert again, select Bass and Treble, and hit Edit Parameters. Set bass to 20, treble to 1, Volume to 0, and make sure "Link volume and tone" is unchecked: 6. Now, (this is the last effect!) hit OK, select Insert, select Compressor, and hit Edit Parameters. We'll use the defaults, but make sure they match the screenshot: Now, we've finished creating the chain, we need to apply it to the audio file. 7. Select File -> Chains -> Apply Chains, select the chain you just made, and select "Apply to Current Project": This will apply the effect, and cause the audio to be repeated three times. We do this because the Compressor effect can cause issues at the start and end of the audio, so we're just going to use the one in the middle that hasn't been affected. You may want to zoom out for the following steps. To do so, hold down Ctrl and scroll the mouse wheel. By default the entire audio file is selected, so click in the blank space to deselect, before selecting sections to delete. 8. Mouse over the end of the audio, and you will see a yellow line to indicate that you're at the very tip: Now click and drag to the left until you see another yellow line, then let go (You will now have the third repeat selected): 9. Hit the delete key on your keyboard to remove the third repeat. Now we're going to do the same with the first repeat. Mouse over the beginning till you see the yellow line: Click and drag till you see the other yellow line: Let go of the mouse button and hit delete. You'll now have your finished audio file: Now we're going to export the file. We'll export it as MP3, and then add a WAV header just like the original files (I've seen reports that plain uncompressed WAV files will work, but I wasn't able to get it working, so I had to do it this way). 10. Select File -> Export -> Export as MP3: 11. Now set Bitrate to Preset, Quality to standard, variable speed to standard, and check "Force export to mono": 12. Save the file to the output folder. Then repeat steps 7-12 for every file you want to apply the effect to. 13. Once you have all of the files you want to add the effect to in the output folder, run the addheader.bat file. This will output .wav files that can be put into the game! You can either put them in the Override folder, or back into the streamwave folder you got them from! Let me know if you have any questions or comments! convert.bat addheader.bat header.bin0 points

